
If you’re craving a cozy, nostalgic dessert that perfectly captures the essence of comfort food, look no further than this Traditional Mini Sweet Potato Pies Recipe. These delicate, individual-sized pies boast a silky, warmly spiced sweet potato filling nestled inside a crisp, buttery crust. They’re just the right size for sharing—or sneaking seconds without anyone noticing! Whether you’re baking for a holiday feast or a simple family gathering, these mini pies bring a delightful touch of Southern charm that’s guaranteed to impress and satisfy.
Ingredients You’ll Need
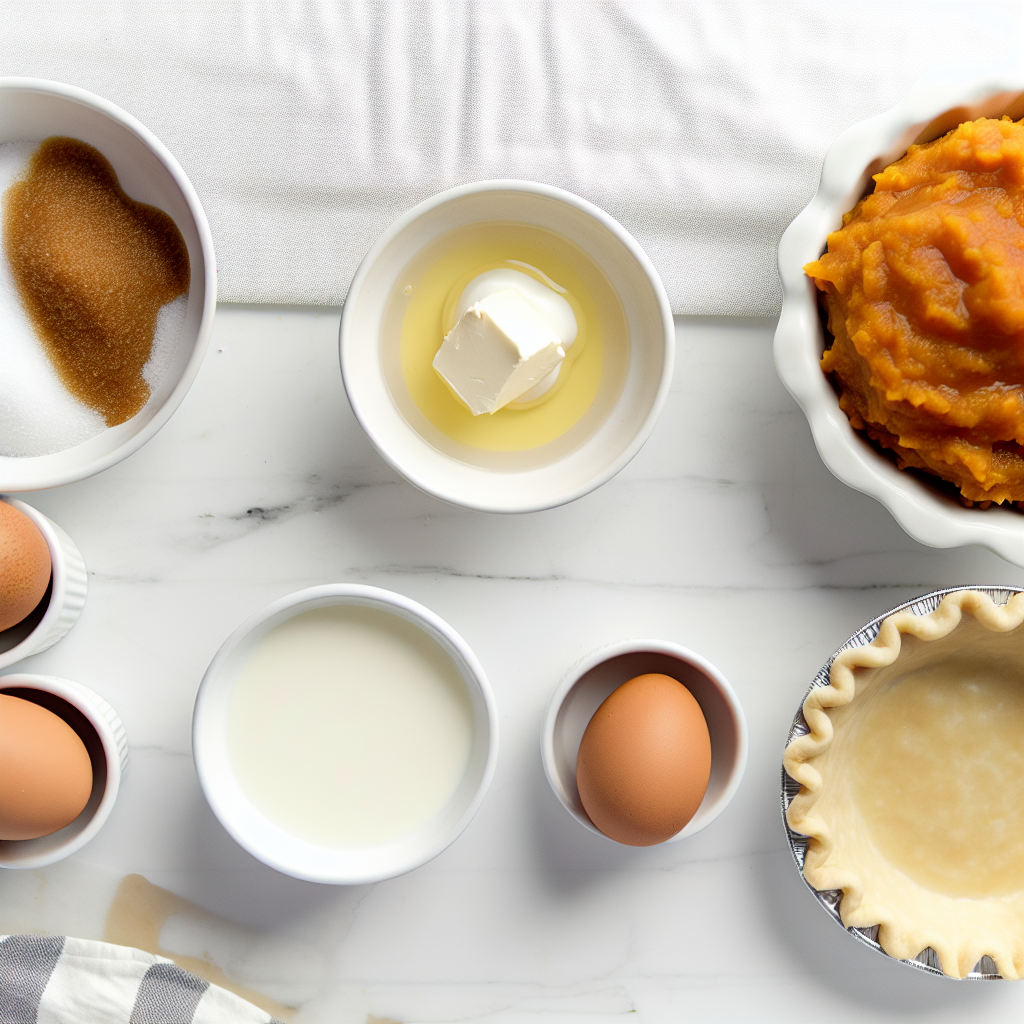
The beauty of this Traditional Mini Sweet Potato Pies Recipe lies in its simplicity. Each ingredient plays a crucial role, from the velvety sweetness of the mashed potatoes to the aromatic spices that elevate every bite. These essentials come together harmoniously to create a rich, luscious filling and a flaky crust that holds it all perfectly.
- 1 cup mashed sweet potatoes: The star of the show, providing natural sweetness and creamy texture.
- 1/2 cup brown sugar: Adds deep, caramel-like sweetness that enhances the sweet potatoes perfectly.
- 2 large eggs: Bind the filling while contributing to a smooth, custard-like consistency.
- 1/2 cup evaporated milk: Gives creaminess and a subtle richness without heaviness.
- 3 tablespoons unsalted butter, melted: Introduces a luscious, buttery undertone that enriches the flavor.
- 1 teaspoon vanilla extract: Infuses a warm, fragrant sweetness that complements the spices.
- 1 teaspoon ground cinnamon: Adds a classic, cozy spice that wakes up the palate.
- 1/4 teaspoon ground nutmeg: A pinch of aromatic spice that lends depth and warmth.
- 1/4 teaspoon salt: Balances sweetness and intensifies the overall flavor.
- 1 pie crust (homemade or store-bought): The flaky shell that holds all the delicious filling together beautifully.
How to Make Traditional Mini Sweet Potato Pies Recipe
Step 1: Prepare Your Oven and Pans
Start by preheating your oven to 350°F (175°C). This ensures your pies bake evenly from the moment they go in. Grease your mini muffin or tart pan thoroughly to prevent sticking and to help your crusts come out flawlessly golden and crisp.
Step 2: Cook and Mash Sweet Potatoes
Peel, dice, and either boil or roast your sweet potatoes until they are fork-tender. Roasting can add a subtle caramelized note, but boiling works just as well for a smooth, creamy result. Once cooked, mash them thoroughly and let cool to room temperature to avoid scrambling the eggs in the filling later.
Step 3: Mix the Filling
In a large mixing bowl, whisk together the mashed sweet potatoes with brown sugar, eggs, evaporated milk, melted butter, vanilla extract, cinnamon, nutmeg, and salt. The goal here is a silky, smooth filling that’s well blended and fragrant with warm spices—this is the heart of your pies.
Step 4: Prepare Pie Crust
Roll out your pie crust and cut circles sized to fit snugly into your mini tart or muffin tin cavities. Press the dough gently but firmly into each one, making sure to dock the bottoms with a fork. This small step prevents the crust from puffing up while baking.
Step 5: Fill the Crusts
Spoon the sweet potato filling into each crust shell, filling them just below the rim. This prevents overflow and allows for a perfect bake, leaving room for a slight rise in the custard-like filling.
Step 6: Bake Until Set
Place your mini pies in the oven and bake for 18 to 22 minutes. Keep an eye out for a set filling that springs back lightly when touched and a crust that has turned a beautiful golden brown.
Step 7: Cool and Serve
Once baked, let your pies cool in the pan for about 10 minutes before transferring them to a wire rack. These Traditional Mini Sweet Potato Pies Recipe treats can be enjoyed warm, which highlights their creamy texture, or chilled for a firmer slice of autumn flavors.
How to Serve Traditional Mini Sweet Potato Pies Recipe
Garnishes
A sprinkle of powdered sugar, a dollop of freshly whipped cream, or a light dusting of cinnamon makes these mini pies feel extra special. For a festive touch, consider adding chopped pecans or a drizzle of caramel sauce to enhance texture and flavor.
Side Dishes
These mini pies shine as a dessert alongside a scoop of vanilla ice cream or a cup of warm spiced cider. At holiday dinners, they pair beautifully with savory favorites like roasted turkey or glazed ham, offering a sweet contrast that balances the meal.
Creative Ways to Present
Serve these pies on a rustic wooden board with a scattering of autumn leaves or atop a delicate lace doily for a charming presentation. You can also plate them individually with a swirl of coulis or a festive sprig of mint to impress your guests effortlessly.
Make Ahead and Storage
Storing Leftovers
Keep any leftover Traditional Mini Sweet Potato Pies Recipe stored in an airtight container in the refrigerator for up to 4 days. This helps maintain their freshness and flavor, making them perfect for quick treats between celebrations.
Freezing
You can freeze these mini pies before baking by placing them on a baking sheet until solid, then transferring them to a freezer-safe container or bag. Bake from frozen by adding a few extra minutes to your baking time, giving you convenient, ready-to-go desserts whenever the craving hits.
Reheating
To reheat, warm your pies gently in a preheated oven at 300°F (150°C) for about 10 minutes. This method preserves the custard’s creaminess and refreshes the crust’s crispness without turning the filling rubbery or drying it out.
FAQs
Can I make these pies gluten-free?
Absolutely! Use a gluten-free pie crust in place of traditional crust to enjoy your Traditional Mini Sweet Potato Pies Recipe without gluten. The filling itself is naturally gluten-free, so it’s an easy swap.
What’s the best way to cook sweet potatoes for this recipe?
Both boiling and roasting work well. Roasting enhances sweetness and adds depth, but boiling is quicker and yields a very creamy mash. Choose based on your schedule and flavor preference.
Can I use regular milk instead of evaporated milk?
While regular milk can be used, evaporated milk adds a richer, creamy texture that elevates the custard. If you substitute, consider using slightly less milk for the best consistency.
How do I know when the pies are done baking?
The filling should be set but still slightly jiggly in the center. The crust will be golden brown and firm. A slight spring back to touching indicates they are perfectly baked.
Can I add other spices or flavors?
Definitely! Feel free to experiment with ginger, cloves, or even a splash of bourbon for a unique twist. Just be careful not to overpower the natural sweet potato flavor these pies are known for.
Final Thoughts
If you want to bring a warm, inviting Southern classic to your kitchen, this Traditional Mini Sweet Potato Pies Recipe is a must-try. The mix of creamy sweet potato filling and crisp crust is comforting and simply irresistible. Don’t hesitate to whip up a batch soon—trust me, these little pies will become one of your favorite go-to desserts, guaranteed to draw smiles from everyone lucky enough to taste them.
Print
Traditional Mini Sweet Potato Pies Recipe
- Prep Time: 20 minutes
- Cook Time: 22 minutes
- Total Time: 42 minutes
- Yield: 12 mini pies
- Category: Dessert
- Method: Baking
- Cuisine: American
- Diet: Vegetarian
Description
These Traditional Mini Sweet Potato Pies offer a delightful twist on classic sweet potato pie, baked in adorable mini tart pans perfect for parties or family gatherings. With a rich, silky filling flavored with cinnamon and nutmeg nestled in buttery pie crusts, these bite-sized pies are warm, comforting, and irresistibly delicious.
Ingredients
Filling
- 1 cup mashed sweet potatoes
- 1/2 cup brown sugar
- 2 large eggs
- 1/2 cup evaporated milk
- 3 tablespoons unsalted butter, melted
- 1 teaspoon vanilla extract
- 1 teaspoon ground cinnamon
- 1/4 teaspoon ground nutmeg
- 1/4 teaspoon salt
Crust
- 1 pie crust (homemade or store-bought)
Instructions
- Preheat and Prepare Pan: Preheat the oven to 350°F (175°C). Grease a mini muffin or tart pan thoroughly to prevent sticking.
- Prepare Sweet Potatoes: Peel and dice sweet potatoes into even pieces. Boil or roast them until fork-tender. Once cooked, mash the sweet potatoes until smooth and allow them to cool before mixing.
- Mix Filling: In a mixing bowl, whisk together the mashed sweet potatoes, brown sugar, eggs, evaporated milk, melted butter, vanilla extract, ground cinnamon, ground nutmeg, and salt. Mix until the mixture is silky smooth and fully combined.
- Prepare Crust: Roll out the pie crust on a floured surface. Cut out circles sized to fit the mini tart tins. Gently press each circle into the cavities of the pan and dock the bottoms with a fork to prevent bubbling.
- Fill Crusts: Spoon the sweet potato filling into each crust-lined cavity, filling just below the rim to allow for slight expansion while baking.
- Bake: Place the filled tart pan in the preheated oven and bake for 18 to 22 minutes, or until the filling is set and the crust turns a golden brown color.
- Cool and Serve: Let the mini pies cool in the pan for about 10 minutes. Then transfer them to a wire rack to cool completely. Serve warm or chilled as desired.
Notes
- You can roast sweet potatoes for a deeper flavor instead of boiling.
- Use store-bought pie crusts for convenience without sacrificing taste.
- Ensure sweet potato filling is cooled before mixing with eggs to avoid curdling.
- Mini pies can be stored in an airtight container in the refrigerator for up to 3 days.
- For an extra touch, top with whipped cream or a sprinkle of cinnamon before serving.


