
If you are searching for a festive and delightful treat to brighten your holiday gatherings, you have to try Soft Christmas Peppermints: The Perfect Holiday Treat! Recipe. These melt-in-your-mouth mints are wonderfully soft, bursting with refreshing peppermint flavor, and are adorned in cheerful holiday colors. Whether you’re gifting them or enjoying them yourself, these charming little bites bring that magical Christmas spirit straight to your taste buds. Incredibly simple to make yet irresistibly tasty, this recipe is sure to become a cherished holiday tradition in your home.
Ingredients You’ll Need
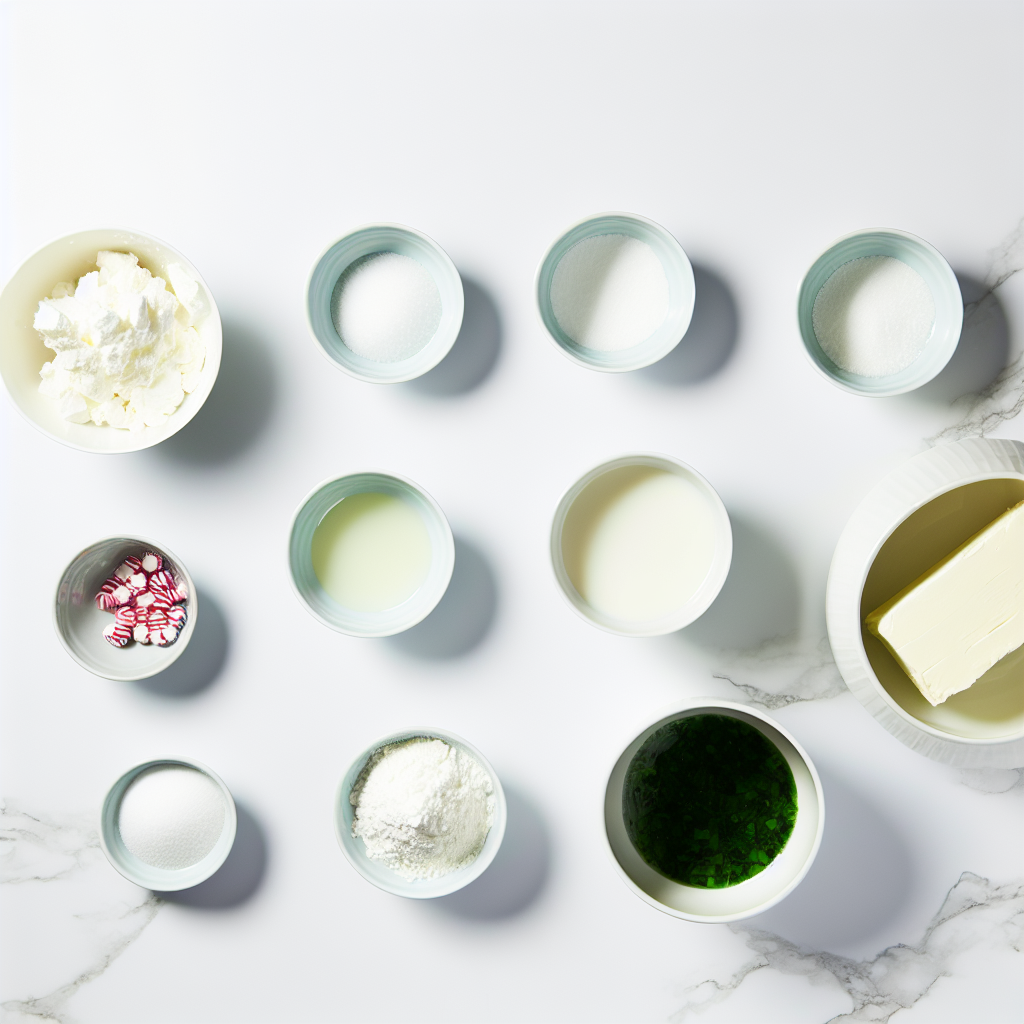
Getting the perfect texture and flavor for Soft Christmas Peppermints: The Perfect Holiday Treat! Recipe depends on a handful of very basic but purposeful ingredients. Each one plays a vital role, creating that soft, creamy, peppermint magic that is impossible to resist.
- 1/2 cup unsalted butter, softened: Adds richness and creates the smooth base of the mints.
- 1/4 cup sweetened condensed milk: Contributes sweetness and tenderness, helping the mints stay soft.
- 1 teaspoon peppermint extract: Provides that classic cooling peppermint flavor that defines the treat.
- 3 cups powdered sugar: Gives structure and sweetness while keeping the mints silky smooth.
- 1/4 teaspoon salt: Balances sweetness and enhances all the flavors.
- Red and green food coloring (optional): For that festive pop of Christmas colors that make the mints visually joyful.
How to Make Soft Christmas Peppermints: The Perfect Holiday Treat! Recipe
Step 1: Cream the Butter and Condensed Milk
Start by combining your softened butter and sweetened condensed milk in a large mixing bowl. Use a mixer or sturdy spoon to cream them together until the mixture is smooth and luscious. This creamy base will ensure your mints remain delightfully soft rather than hard or chalky.
Step 2: Add Peppermint Extract and Salt
Next, stir in the peppermint extract and salt. The peppermint extract is the heart of the recipe, delivering that unmistakable holiday freshness, while the hint of salt enhances all the sweet flavors, ensuring every bite is perfectly balanced and satisfying.
Step 3: Incorporate Powdered Sugar
Gradually add the powdered sugar to the bowl, mixing continuously until a soft dough forms. This part requires some patience because adding the sugar slowly allows it to blend evenly, preventing lumps and achieving a smooth, pliable dough that’s easy to shape.
Step 4: Divide and Color the Dough
If you want to step up the festive factor, divide the dough into two portions and knead red food coloring into one half and green into the other. Take your time kneading each portion until the hues are vivid and evenly distributed – this step makes your mints irresistibly merry and bright.
Step 5: Shape the Mints
Roll the dough into small, uniform balls. Then gently flatten each ball so they resemble little peppermint discs. This shaping gives them their classic mint look and ensures they’ll dry evenly without cracking.
Step 6: Let Mints Dry
Arrange your shaped mints on a parchment-lined baking sheet and allow them to dry for at least 24 hours. This slow drying stage is essential to develop their delicate crust on the outside while keeping the inside soft and creamy, making these mints so special compared to harder candy variations.
Step 7: Store and Enjoy
Once dry, transfer your Soft Christmas Peppermints: The Perfect Holiday Treat! Recipe creations into an airtight container. Store them in a cool, dry place and enjoy this festive delight throughout the holiday season, perfect for sharing with family, friends, or even as thoughtful gifts!
How to Serve Soft Christmas Peppermints: The Perfect Holiday Treat! Recipe
Garnishes
Sprinkle some finely crushed candy canes or a dusting of powdered sugar over the mints for an extra festive look. You could also pipe a tiny swirl of white chocolate on top for an elegant touch that will wow your guests visually and in flavor.
Side Dishes
Serve these soft mints alongside a hot cup of cocoa, coffee, or spiced tea. Their creamy peppermint notes perfectly complement warm beverages, making for an irresistible holiday snack pairing that invites coziness and conversation.
Creative Ways to Present
Arrange your mints in a clear jar adorned with a festive ribbon or place them delicately in mini paper cups to create adorable edible favors. You can even layer them in a gift box alternating colors for a beautiful holiday gift presentation that looks as good as they taste.
Make Ahead and Storage
Storing Leftovers
Keep any leftover Soft Christmas Peppermints: The Perfect Holiday Treat! Recipe stored in an airtight container at room temperature. Proper storage helps maintain their soft texture and prevents them from absorbing unwanted moisture or odors.
Freezing
If you want to prepare in advance, these mints freeze beautifully. Place them in a single layer on a baking sheet, freeze until solid, then transfer to a freezer-safe bag or container. When ready to enjoy, thaw at room temperature to retain their lovely softness.
Reheating
Unlike many holiday treats, these soft mints do not require reheating. They are best enjoyed as-is, fresh and soft right from storage. Warming them might cause them to lose their signature delicate texture, so it’s best to savor them straight.
FAQs
Can I use different extracts instead of peppermint?
Absolutely! While peppermint is traditional and iconic for this recipe, you can experiment with other extracts like vanilla, almond, or even lemon for a unique twist. Just remember to adjust the quantity based on the strength of the extract.
How long do these mints last once made?
Stored properly in an airtight container, these soft peppermint mints remain fresh and tasty for about 2 weeks. For optimal flavor and texture, try to enjoy them within this timeframe.
Can I make these without food coloring?
Yes, the coloring is purely optional. The mints will still taste amazing without any coloring, perfect if you prefer a more natural look or want to use them year-round instead of just for the holidays.
What if my mints are too sticky after drying?
If you find them a bit sticky, allow them more drying time in a cool, dry spot. Humidity greatly affects the drying process. Alternatively, a light dusting of powdered sugar can help reduce stickiness on the surface.
Is it possible to shape these mints differently?
Definitely! Besides rolling into balls and flattening, you can use small cookie cutters to make festive shapes or press them into silicone molds for creative presentations that add extra holiday cheer.
Final Thoughts
Making Soft Christmas Peppermints: The Perfect Holiday Treat! Recipe is truly a joyful experience that fills your kitchen with festive aromas and your heart with holiday warmth. Once you take that first soft, minty bite, you’ll understand why this recipe deserves a special place in your Christmas celebrations. So go ahead, dive in and share these delightful mints – they might just become the sweetest tradition you look forward to every year!
Print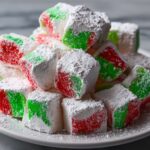
Soft Christmas Peppermints: The Perfect Holiday Treat! Recipe
- Prep Time: 15 minutes
- Cook Time: 0 minutes
- Total Time: 24 hours 15 minutes (including drying time)
- Yield: Approximately 30 mints
- Category: Confectionery
- Method: No-Cook
- Cuisine: American
- Diet: Vegetarian
Description
Soft Christmas Peppermints are a delightful holiday treat featuring a creamy, buttery texture infused with refreshing peppermint flavor. These no-bake mints are colorful, easy to make, and perfect for sharing during festive celebrations.
Ingredients
Main Ingredients
- 1/2 cup unsalted butter, softened
- 1/4 cup sweetened condensed milk
- 1 teaspoon peppermint extract
- 3 cups powdered sugar
- 1/4 teaspoon salt
- Red and green food coloring (optional)
Instructions
- Cream the Butter and Milk: In a large mixing bowl, cream together the softened butter and sweetened condensed milk until smooth, creating a creamy base for the mints.
- Add Flavor and Salt: Add the peppermint extract and salt to the butter mixture, then mix well to evenly distribute the flavors.
- Form the Dough: Gradually add the powdered sugar, mixing continuously until a soft dough forms that is easy to handle.
- Divide and Color: If desired, divide the dough into two portions. Add red food coloring to one portion and green food coloring to the other, kneading each until the color is uniformly distributed.
- Shape the Mints: Roll the dough into small balls and then flatten them slightly to form the traditional peppermint shape.
- Dry the Mints: Place the shaped mints on a parchment-lined baking sheet and let them dry undisturbed at room temperature for at least 24 hours to firm up.
- Store and Enjoy: Once dried, store the mints in an airtight container. Enjoy this festive treat throughout the holiday season!
Notes
- Allowing the mints to dry for at least 24 hours is crucial for firm texture.
- Use parchment paper to prevent sticking and ease removal.
- Food coloring is optional but adds festive holiday colors.
- Store mints in a cool, dry place to maintain freshness.
- Handles approximately 30 mints depending on size.


