
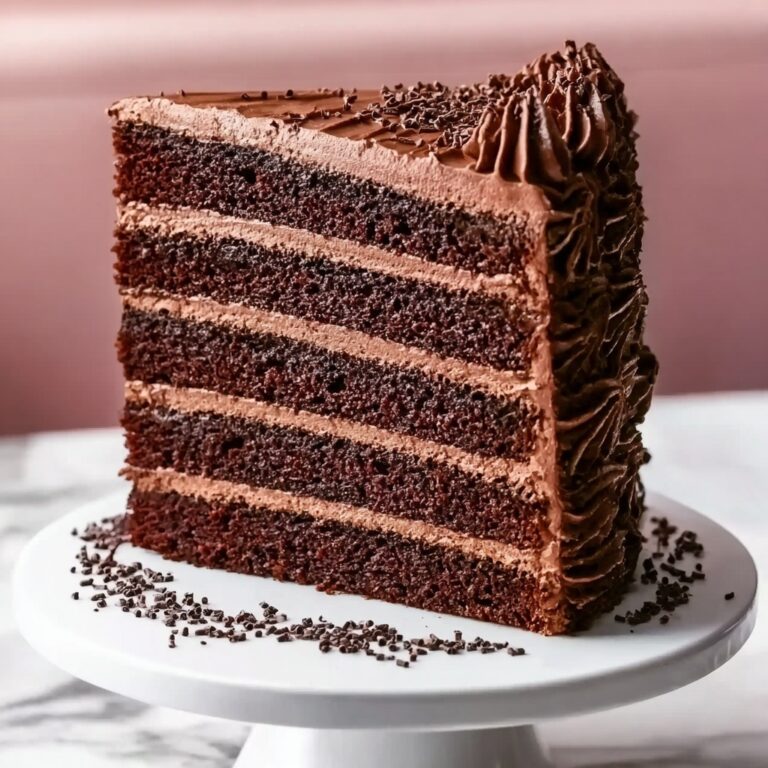
If you are searching for a show-stopping dessert that combines the rich, velvety texture of red velvet cake with the creamy indulgence of cheesecake, then this Red Velvet Cheesecake Layer Cake Recipe is your new best friend. From the deep red hues of the cake to the smooth, tangy cheesecake center, every bite is a celebration of flavors and textures that will surely become a cherished favorite. This cake isn’t just dessert—it’s an experience, perfect for birthdays, special occasions, or any time you want to impress and delight your loved ones.
Ingredients You’ll Need
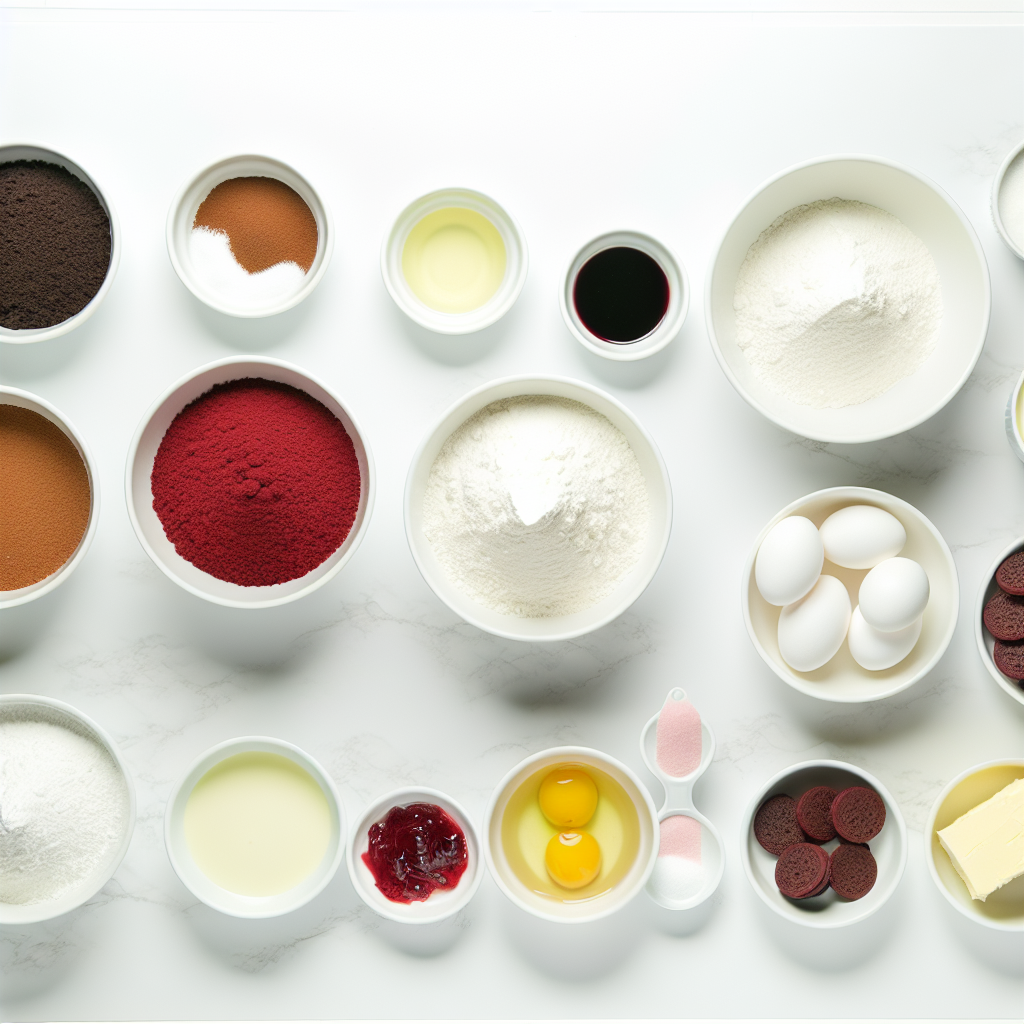
The magic behind this Red Velvet Cheesecake Layer Cake Recipe lies in its wonderfully simple ingredients that each play a crucial role. From the chocolate cookie crust that adds a crunchy base, to the vibrant red food coloring that gives the cake its signature look, every item helps create a harmonious balance of flavor and texture.
- Chocolate cookie crumbs (2 cups): Using Oreo or similar cookies without filling ensures a rich, crunchy foundation for the cheesecake layer.
- Unsalted butter (½ cup, melted): Adds moisture and richness to the crust and frosting, helping bind ingredients together.
- All-purpose flour (2 ½ cups): The backbone of your red velvet cake layers, providing structure.
- Sugar (1 ½ cups): Sweetens the cake perfectly without overpowering the tangy notes.
- Cocoa powder (2 tbsp): Gives a subtle chocolate flavor that is essential to red velvet’s unique taste.
- Baking soda (1 tsp): Helps your cake rise beautifully, creating tender, fluffy layers.
- Baking powder (1 tsp): Works alongside baking soda for perfect leavening.
- Salt (1 tsp): Balances sweetness and enhances all other flavors.
- Buttermilk (1 ½ cups): Offers a slight tang and keeps the cake moist and soft; milk with vinegar can work as a substitute.
- Vegetable oil (1 cup): Keeps the cake wonderfully moist and tender, ensuring it doesn’t dry out.
- Eggs (2 large for cake): Provide structure and help everything bind together.
- Vanilla extract (2 tsp): Adds warm, sweet notes that complement the rest of the ingredients.
- White vinegar (1 tsp): Reacts with baking soda to help the cake rise and maintain its signature red color.
- Red gel food coloring (1–2 tbsp): Key for achieving that vibrant, irresistible red velvet appearance.
- Cream cheese (16 oz, softened): Used in both the cheesecake layer and the frosting for luscious creaminess.
- Sugar (½ cup for cheesecake): Sweetens the cheesecake layer evenly.
- Eggs (2 large for cheesecake): Ensure the cheesecake sets with a smooth, silky texture.
- Sour cream or heavy cream (½ cup): Adds richness and a creamy finish to the cheesecake.
- Unsalted butter (1 cup, softened): Creates a silky, spreadable cream cheese frosting.
- Powdered sugar (4 cups): Sweetens and thickens the frosting for perfect spreadability.
- Strawberry or raspberry jam (½ cup): Warms up to become a glossy glaze that adds sweet, fruity brightness.
- Water (2 tbsp) and lemon juice (1 tsp): Lighten the jam glaze for an unctuous finish.
- Red velvet crumbs and dark chocolate chips: Perfect for decorating and adding texture to every slice.
- Extra frosting for piping: To add elegant finishing touches and extra indulgence.
How to Make Red Velvet Cheesecake Layer Cake Recipe
Step 1: Prepare the Chocolate Cookie Crust
Start by mixing the chocolate cookie crumbs with melted butter until the mixture resembles wet sand. This combination creates a sturdy yet crumbly crust that perfectly supports the rich cheesecake layer. Press this mixture evenly into the bottom of a 9-inch springform pan and bake at 350°F (175°C) for 10 minutes. Allow it to cool completely to set the base before adding the cheesecake filling.
Step 2: Bake the Red Velvet Cake Layers
Preheat your oven to 350°F (175°C) and prepare two 9-inch cake pans by greasing and lining them. In one bowl, whisk together the dry ingredients—flour, cocoa powder, baking soda, baking powder, and salt. In another, blend the sugar, vegetable oil, eggs, buttermilk, white vinegar, vanilla, and red gel food coloring until smooth. Slowly combine the wet and dry ingredients, mixing just until combined to avoid toughening the batter. Pour the batter evenly into the pans and bake for 25–30 minutes or until a toothpick comes out clean. Let the cakes cool fully before assembling.
Step 3: Create the Cheesecake Layer
In a separate bowl, beat the softened cream cheese with sugar until creamy. Add eggs one at a time, blending fully after each addition. Stir in vanilla and sour cream or heavy cream until the mixture is silky. Pour this cheesecake batter over the cooled cookie crust and bake at 325°F (160°C) for 40–45 minutes. The cheesecake should be set but still slightly jiggly at the center. Once done, let it cool completely, then refrigerate until chilled to enhance firmness and flavor.
Step 4: Assemble the Cake Layers
Place one red velvet cake layer on your serving plate and spread a thin layer of cream cheese frosting on top. Gently place the chilled cheesecake layer over this, spreading a light frosting layer on top to help the final cake layer adhere better. Add the second red velvet cake layer, then cover the entire cake with the remaining cream cheese frosting, smoothing out the sides and top for a flawless finish.
Step 5: Add the Glaze and Decorations
Warm the strawberry or raspberry jam with water and lemon juice until it becomes a pourable glaze. Let it cool slightly before drizzling over the cake, allowing it to drip gracefully down the sides. Finally, decorate with piped cream cheese frosting, sprinkle red velvet crumbs from the cake trimming, and scatter dark chocolate chips across the top, adding a perfect pop of color and texture.
How to Serve Red Velvet Cheesecake Layer Cake Recipe
Garnishes
To elevate the stunning look of this Red Velvet Cheesecake Layer Cake Recipe, fresh berries such as raspberries or strawberries make a wonderful natural garnish. Their brightness contrasts beautifully with the creamy frosting and enhances the jam glaze. Add some edible flowers or a sprinkle of finely chopped pistachios for an extra touch of elegance and a delightful hint of crunch.
Side Dishes
Pair this luscious cake with light, refreshing sides like a simple mixed green salad with a citrus vinaigrette to balance the cake’s richness. For beverages, a cup of freshly brewed coffee or a glass of sparkling rosé enhances the fruity and creamy notes of the dessert beautifully, making the entire experience feel like a celebration.
Creative Ways to Present
Instead of the traditional single-tier, try presenting slices of the Red Velvet Cheesecake Layer Cake Recipe in individual clear glasses layered with extra jam and whipped cream for an enchanting parfait-style dessert. You can also create mini versions using cupcake liners with cheesecake centers and a small drizzle of the berry glaze for elegant, bite-sized treats that are perfect for parties.
Make Ahead and Storage
Storing Leftovers
This cake keeps incredibly well in the refrigerator. Store leftovers tightly covered with plastic wrap or in an airtight container to maintain freshness and prevent the cake from drying out. It will stay beautifully creamy and moist for up to 4 days, giving you plenty of time to enjoy every delicious slice.
Freezing
If you want to prepare this cake in advance or save portions for later, it freezes wonderfully. Wrap the whole cake or individual slices tightly in plastic wrap and then in foil before freezing. When wrapped properly, the Red Velvet Cheesecake Layer Cake Recipe can be frozen for up to 3 months without losing its flavor or texture.
Reheating
When you’re ready to enjoy frozen cake slices, thaw them overnight in the refrigerator. Since this cake is best served chilled or at room temperature, there is no need to heat it. If you prefer it slightly softer, letting slices sit at room temperature for 20–30 minutes before serving works beautifully.
FAQs
Can I make the cheesecake layer without the cookie crust?
Absolutely. The cookie crust adds a delightful crunch but the cheesecake layer can be baked on its own in a greased pan if you prefer a classic cheesecake texture. Just be sure to adjust baking time slightly to ensure it sets properly.
What if I don’t have buttermilk on hand?
No worries. You can easily substitute by adding 1 tablespoon of vinegar or lemon juice to 1 ½ cups of milk, letting it sit for 5 minutes to curdle slightly before using. This gives the same tender crumb and slight tang as buttermilk.
Can I use regular food coloring instead of gel?
You can, but gel food coloring provides much more vibrant color without affecting the batter’s consistency. Regular liquid food coloring might require more quantity and can thin the batter, so gel is recommended for the best red velvet results.
How do I prevent the cheesecake from cracking?
To keep your cheesecake smooth and crack-free, avoid overbaking and gently bake it at a lower temperature, as instructed. Also, chilling the cheesecake slowly after baking helps it settle perfectly without developing cracks.
Is this recipe suitable for special occasions?
Definitely! This Red Velvet Cheesecake Layer Cake Recipe is perfect for birthdays, anniversaries, holidays, or any celebration where you want a dessert that looks stunning and tastes even better. Its layered complexity and elegant presentation are sure to impress.
Final Thoughts
Making this Red Velvet Cheesecake Layer Cake Recipe is truly a joyful experience from start to finish. With every slice, you get to savor a perfect marriage of bold red velvet flavor, creamy cheesecake richness, and a luscious frosting, all wrapped in one unforgettable dessert. I promise once you try it, this cake will find a permanent sweet spot in your heart and your dessert rotation. So go ahead, whip up this beauty, and treat yourself and your loved ones to sheer deliciousness!
Print
Red Velvet Cheesecake Layer Cake Recipe
- Prep Time: 30 minutes
- Cook Time: 1 hour 15 minutes
- Total Time: 1 hour 45 minutes
- Yield: 12 servings
- Category: Dessert
- Method: Baking
- Cuisine: American
- Diet: Vegetarian
Description
This Red Velvet Cheesecake Layer Cake combines the rich flavors of a classic red velvet cake with a creamy, luscious cheesecake center. Featuring a crunchy chocolate cookie crumb crust, moist red velvet cake layers, and a smooth cream cheese frosting topped with a glossy berry glaze and chocolate chips, this dessert is a show-stopper perfect for special occasions and celebrations.
Ingredients
Crust
- 2 cups (200 g) chocolate cookie crumbs (Oreo or similar, without filling)
- ½ cup (115 g) unsalted butter, melted
Red Velvet Cake
- 2 ½ cups (315 g) all-purpose flour
- 1 ½ cups (300 g) sugar
- 2 tbsp cocoa powder
- 1 tsp baking soda
- 1 tsp baking powder
- 1 tsp salt
- 1 ½ cups (360 ml) buttermilk (or milk + 1 tbsp vinegar)
- 1 cup (240 ml) vegetable oil
- 2 large eggs
- 2 tsp vanilla extract
- 1 tsp white vinegar
- 1–2 tbsp red gel food coloring
Cheesecake Layer
- 16 oz (450 g) cream cheese, softened
- ½ cup (100 g) sugar
- 2 large eggs
- 1 tsp vanilla extract
- ½ cup (120 ml) sour cream or heavy cream
Cream Cheese Frosting
- 16 oz (450 g) cream cheese, softened
- 1 cup (230 g) unsalted butter, softened
- 4 cups (480 g) powdered sugar
- 2 tsp vanilla extract
Glaze and Decoration
- ½ cup (120 ml) strawberry or raspberry jam
- 2 tbsp water
- 1 tsp lemon juice
- Red velvet crumbs (from cake trimming)
- Dark chocolate chips
- Extra cream cheese frosting for piping
Instructions
- Prepare the crust: Mix the chocolate cookie crumbs with melted butter until the mixture resembles wet sand. Press this evenly into the bottom of a 9-inch springform pan. Bake in a preheated oven at 350°F (175°C) for 10 minutes. Remove and let cool completely before adding the cheesecake layer.
- Make the red velvet cake layers: Preheat the oven to 350°F (175°C). Grease and line two 9-inch round cake pans. In a large bowl, whisk together the flour, cocoa powder, baking soda, baking powder, and salt. In another bowl, blend sugar, vegetable oil, eggs, buttermilk, white vinegar, vanilla extract, and red gel food coloring until smooth. Gradually mix the wet ingredients into the dry ingredients just until smooth to avoid overmixing. Divide the batter evenly between the pans and bake for 25 to 30 minutes, or until a toothpick inserted in the centers comes out clean. Let cool completely.
- Prepare the cheesecake layer: In a medium bowl, beat the softened cream cheese and sugar until smooth and creamy. Add eggs one at a time, beating well after each. Mix in vanilla extract and sour cream or heavy cream until fully incorporated. Pour the cheesecake batter over the cooled cookie crust or into a prepared pan if not using the crust. Bake at 325°F (160°C) for 40 to 45 minutes until the cheesecake is set but still slightly jiggly in the center. Cool fully, then chill in the refrigerator.
- Assemble the cake: Place one red velvet cake layer on your serving plate and spread a thin layer of cream cheese frosting on top. Carefully add the chilled cheesecake layer atop, spreading a light layer of frosting on it to help the next cake layer stick. Add the second red velvet cake layer on top. Finish frosting the entire cake, smoothing sides and top evenly.
- Prepare the glaze and decorate: Warm the strawberry or raspberry jam with water and lemon juice over low heat until pourable. Let it cool slightly, then gently pour over the top of the cake, allowing it to drip down the sides. Decorate with piped cream cheese frosting, red velvet crumbs from trimming, and scatter dark chocolate chips over the top for extra texture and visual appeal.
Notes
- Use room temperature ingredients for smoother batter and frosting.
- Be careful not to overmix the cake batter to keep the texture tender.
- Ensure the cheesecake is slightly jiggly when done to prevent cracking and overbaking.
- Chilling the cheesecake layer before assembly helps maintain its structure.
- The berry glaze adds a beautiful shine and subtle fruity flavor that complements the rich cake.
- Store leftovers covered in the refrigerator for up to 4 days.


