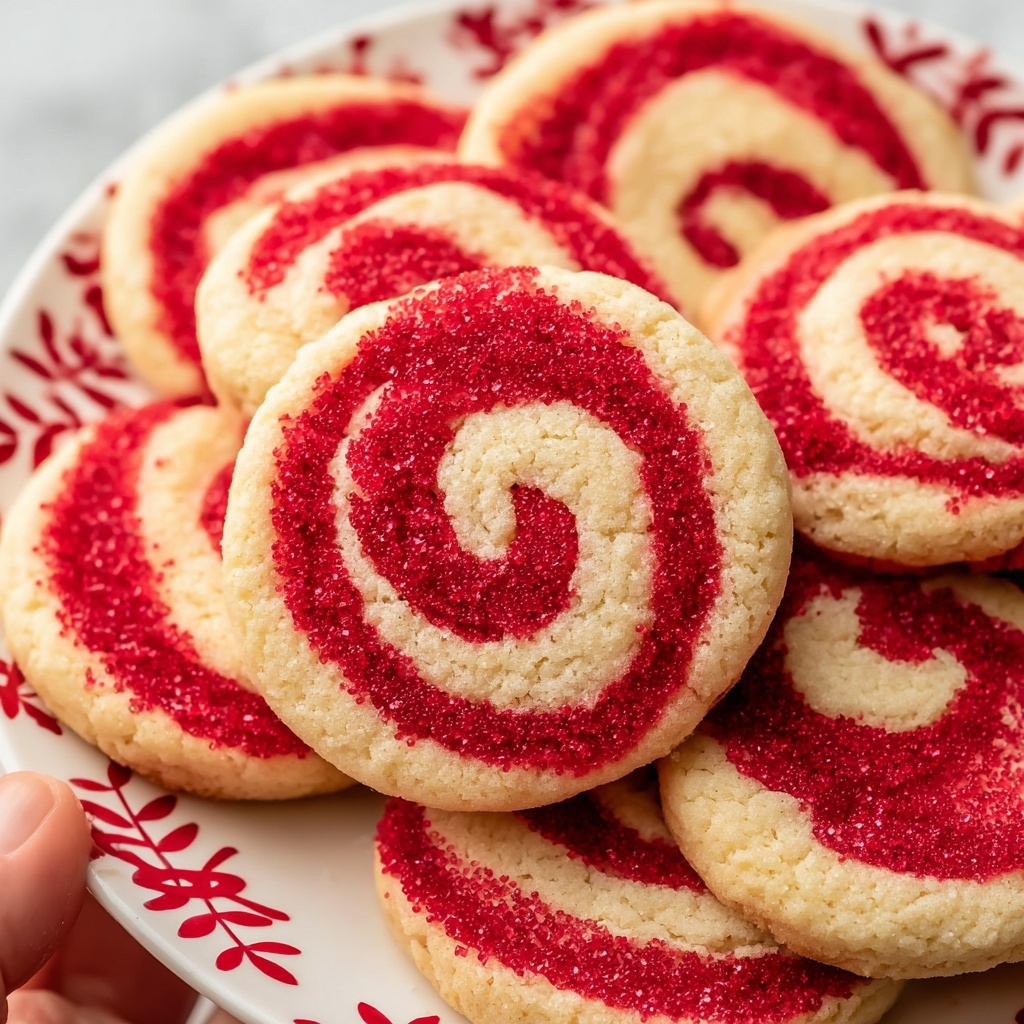
If you are looking for a festive and delightful treat to brighten your day or holiday season, this Peppermint Swirl Cookies Recipe is an absolute must-try! These cookies marry the refreshing, cool flavor of peppermint with a soft, buttery texture and striking red and white swirls that are almost too beautiful to eat — but trust me, you will want to dig right in. Each bite brings a perfect balance of sweetness and a hint of holiday magic that’s simply irresistible. Whether you’re baking for a party, gift-giving, or just to satisfy a seasonal craving, this recipe will become one of your cherished favorites.
Ingredients You’ll Need
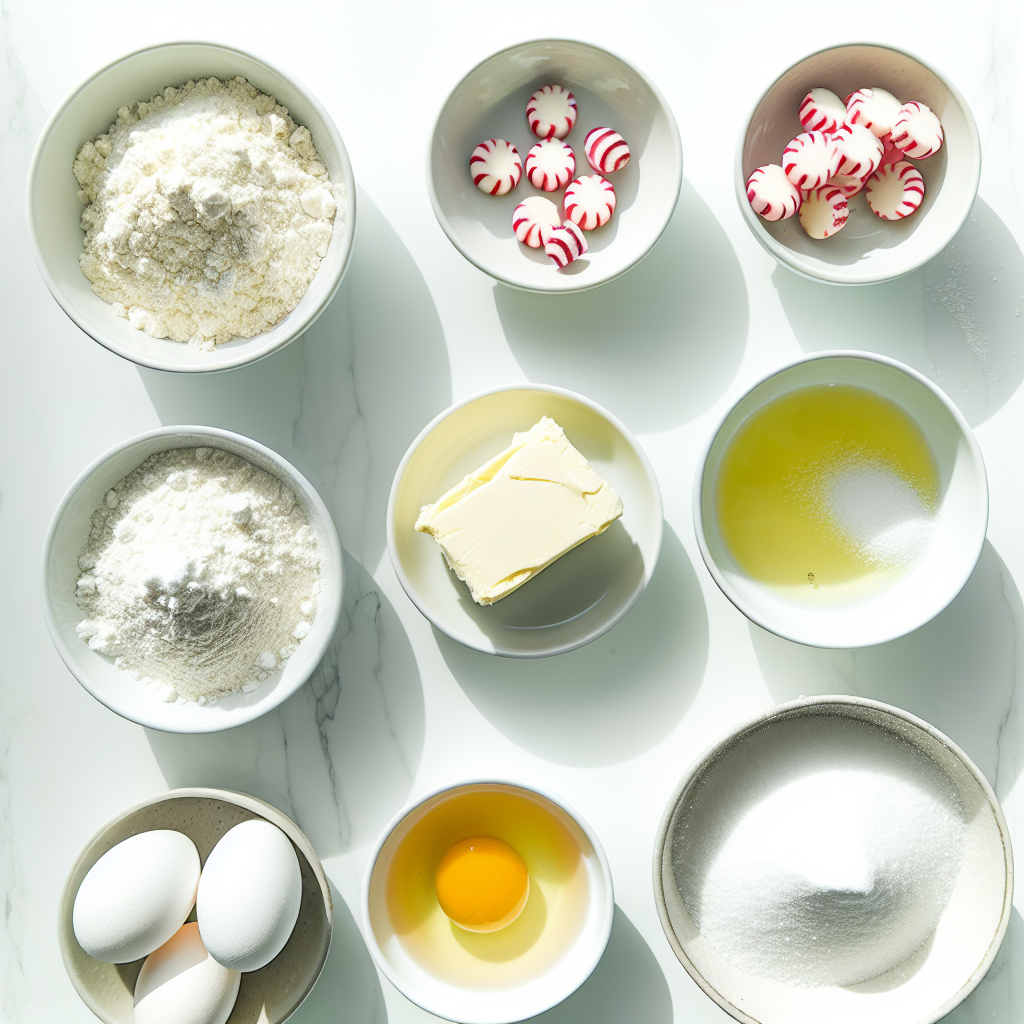
Creating the perfect Peppermint Swirl Cookies starts with simple, pantry-friendly ingredients you probably already have. Each element plays a special role in crafting the cookie’s tender crumb, delightful flavor, and vibrant appearance, making your baking experience both enjoyable and rewarding.
- 2 and 1/2 cups all-purpose flour: Provides the structure and base for the cookies, giving them a soft yet sturdy texture.
- 1 teaspoon baking powder: Adds just enough leavening to keep the cookies light and fluffy without spreading too much.
- 1/2 teaspoon salt: Balances the sweetness and enhances the flavors.
- 1 cup (2 sticks) unsalted butter, softened: Gives the cookies their rich, buttery flavor and tender crumb.
- 1 cup granulated sugar: Sweetens the dough perfectly, creating a delightful contrast with peppermint.
- 1 large egg: Binds the ingredients together and adds moisture.
- 1 teaspoon vanilla extract: Adds warmth and depth to flavor, complementing the peppermint.
- 1 teaspoon peppermint extract: The star ingredient delivering that refreshing, cool peppermint taste.
- Red gel food coloring: Creates those eye-catching red swirls that bring festive cheer.
- 1/4 cup coarse sugar or crushed peppermint candies for coating: Adds a sparkling, sweet crunch to the finished cookies.
How to Make Peppermint Swirl Cookies Recipe
Step 1: Combine Your Dry Ingredients
Start by whisking together the flour, baking powder, and salt in a medium bowl. This ensures your dry ingredients are evenly distributed, which is essential for a consistent dough.
Step 2: Cream Butter and Sugar
In a large bowl, use an electric mixer to beat the softened butter and granulated sugar until the mixture is light and fluffy. This step is crucial for that melt-in-your-mouth texture.
Step 3: Add Egg and Extracts
Beat in the egg, then stir in the vanilla and peppermint extracts, making sure everything is combined smoothly to infuse your cookies with rich flavor.
Step 4: Mix in Dry Ingredients
Gradually incorporate your dry mixture into the wet ingredients using a low speed setting on your mixer. Mix just until a soft dough forms; overmixing can make the cookies tough.
Step 5: Divide and Color the Dough
Split your dough in half. Leave one half plain, then add red gel food coloring to the other half. Mix just until the color is evenly distributed for those lovely swirls.
Step 6: Chill the Dough Balls
Wrap each portion of dough separately in plastic wrap and chill for at least 30 minutes. This step is key for easier handling and prevents colors from bleeding when you roll them out.
Step 7: Roll Out the Dough
On a floured surface, roll the plain dough into a 10×12 inch rectangle, approximately 1/4 inch thick. Repeat the process with the red dough so both rectangles match in size and thickness.
Step 8: Layer and Press
Gently place the red dough rectangle on top of the plain one. Press them together softly to ensure they stick without air pockets.
Step 9: Roll Into a Log
Starting from a long edge, tightly roll the layered dough into a log. Press gently as you roll to keep the dough compact and the swirls defined.
Step 10: Chill Again
Wrap your dough log tightly in plastic wrap and chill for at least two hours. This step firms up the dough, helping maintain perfect spiral shapes when sliced.
Step 11: Prep for Baking
Preheat your oven to 375 degrees F (190 degrees C) and line your baking sheets with parchment paper. This preparation prevents sticking and promotes even baking.
Step 12: Coat the Dough Log
Brushing the log lightly with water or egg white, then rolling it in coarse sugar or crushed peppermint candies, adds a delicate sugar crust and extra peppermint punch.
Step 13: Slice the Cookies
With a sharp knife, slice the dough log into 1/4 inch rounds. Space cookies about an inch apart on the baking sheets so they bake evenly without merging.
Step 14: Bake and Cool
Bake the cookies for 8 to 10 minutes or until the edges turn a lovely light golden. Be careful not to overbake to keep the texture tender. Let them cool on the sheets briefly before transferring them to a wire rack to cool completely.
How to Serve Peppermint Swirl Cookies Recipe
Garnishes
Adding a sprinkle of finely crushed peppermint candies or a light dusting of powdered sugar just before serving can elevate the presentation and intensify the minty freshness that makes these cookies so special.
Side Dishes
These cookies pair wonderfully with a warm cup of hot chocolate, peppermint mocha, or a glass of cold milk. They also make a festive complement to holiday desserts like gingerbread or fruitcake.
Peppermint Swirl Cookies Recipe Creative Ways to Present
Try stacking these cookies inside a clear jar tied with a festive ribbon for a charming gift. Alternatively, arrange them on a colorful holiday platter decorated with sprigs of evergreen and red berries to create a centerpiece-worthy display.
Make Ahead and Storage
Storing Leftovers
Keep leftover Peppermint Swirl Cookies fresh by storing them in an airtight container at room temperature. They typically stay soft and delicious for up to one week, making them perfect for enjoying throughout the season.
Freezing
You can freeze baked cookies by placing them in a single layer on a baking sheet until firm, then transferring them to a freezer-safe bag or container. This method preserves their flavor and texture for up to three months.
Reheating
If you want to enjoy your cookies warm after storage or freezing, pop them in the oven at 300 degrees F for 5 minutes or microwave briefly. The gentle warmth brings back that fresh-baked softness and makes the peppermint aroma pop.
FAQs
Can I use regular peppermint flavoring instead of peppermint extract?
While regular peppermint flavoring might be available, peppermint extract is preferred for this recipe as it provides a stronger, more natural mint flavor that stands up well against the rich butter and sugar.
What is the best way to get sharp, defined swirls?
Chilling the dough twice—first as separate balls and then again as the rolled log—is crucial. This keeps the dough firm, prevents bleeding of colors, and helps maintain those beautiful crisp spiral designs.
Can I make this recipe gluten-free?
Yes, you can substitute the all-purpose flour with a gluten-free flour blend designed for baking. Just ensure it contains xanthan gum or a similar binder for the best texture.
How long do these cookies keep their peppermint flavor?
The peppermint flavor is quite strong initially, especially when fresh, but it can mellow slightly over time. Storing in airtight containers slows the loss of freshness so you can enjoy that minty zing for days.
Can I add other colors or flavors to the swirls?
Absolutely! While the classic red and white is festive and beautiful, you can experiment with other gel food coloring colors or even add a hint of almond or vanilla flavor to one half for unique twists on this Peppermint Swirl Cookies Recipe.
Final Thoughts
This Peppermint Swirl Cookies Recipe is one of those joyful, crowd-pleasing creations that fills your kitchen with the scents of the season and brings smiles to every face. I encourage you to roll up your sleeves and try it out — baking these cookies is almost as rewarding as eating them, and sharing them spreads a little extra happiness around. Happy baking!
Print
Peppermint Swirl Cookies Recipe
- Prep Time: 40 minutes
- Cook Time: 10 minutes
- Total Time: 50 minutes
- Yield: About 4 dozen (44) cookies
- Category: Dessert
- Method: Baking
- Cuisine: American
Description
Delightfully festive and flavorful peppermint swirl cookies featuring a beautiful red and white swirl pattern made by layering and rolling colored doughs. These soft, buttery cookies combine classic vanilla and peppermint extracts with a crunchy sugar or crushed peppermint candy coating, perfect for holiday celebrations or anytime you crave a refreshing minty treat.
Ingredients
Dry Ingredients
- 2 1/2 cups all-purpose flour
- 1 teaspoon baking powder
- 1/2 teaspoon salt
Wet Ingredients
- 1 cup (2 sticks) unsalted butter, softened
- 1 cup granulated sugar
- 1 large egg
- 1 teaspoon vanilla extract
- 1 teaspoon peppermint extract
Additional Ingredients
- Red gel food coloring (enough to color half the dough)
- 1/4 cup coarse sugar or crushed peppermint candies for coating
Instructions
- Mix Dry Ingredients: In a medium bowl, whisk together the all-purpose flour, baking powder, and salt. Set aside for later use.
- Cream Butter and Sugar: In a large bowl, use an electric mixer to cream the softened unsalted butter and granulated sugar until the mixture is light and fluffy.
- Add Egg and Extracts: Beat in the large egg, followed by the vanilla extract and peppermint extract until the batter is well combined.
- Combine Wet and Dry: Gradually add the dry flour mixture to the wet ingredient mixture, mixing on low speed until just combined, forming a soft dough. Avoid overmixing to preserve tenderness.
- Divide and Color Dough: Divide the dough into two equal parts. Leave one half plain and add red gel food coloring to the other half, mixing until the color is uniform.
- Chill Dough Balls: Wrap each dough ball separately in plastic wrap and chill in the refrigerator for at least 30 minutes. This firms the dough and prevents color bleeding.
- Roll Out Dough: Once chilled, on a lightly floured surface, roll the plain dough into a 10×12 inch rectangle about 1/4 inch thick. Repeat this step with the red dough to the same dimensions.
- Layer Dough Rectangles: Carefully place the red dough rectangle on top of the plain dough rectangle, gently pressing them together to adhere.
- Roll Together into Log: Starting from one long side, roll the layered dough tightly into a log, pressing gently to remove air pockets and ensure an even swirl pattern.
- Second Chill: Wrap the dough log tightly in plastic wrap and chill again in the refrigerator for at least 2 hours, or until very firm. This ensures the swirls hold their shape when sliced.
- Prepare Baking Sheets: Preheat the oven to 375°F (190°C) and line baking sheets with parchment paper.
- Coat Dough Log: Remove the chilled dough log from the refrigerator. Optionally brush lightly with water or whisked egg white, then roll it in coarse sugar or crushed peppermint candies to coat evenly.
- Slice Cookies: Using a sharp knife, slice the dough log into 1/4 inch thick rounds. Arrange the slices about 1 inch apart on the prepared baking sheets.
- Bake Cookies: Bake in the preheated oven for 8 to 10 minutes, or until the edges are just lightly golden. Avoid overbaking to keep them soft.
- Cool Cookies: Allow cookies to cool on the baking sheets for a few minutes before transferring to a wire rack to cool completely.
Notes
- Use gel food coloring to avoid adding extra liquid to the dough, which can affect texture.
- Firm chilling of the dough is crucial to prevent colors from blending and to maintain sharp swirls.
- Rolling the dough log tightly ensures well-defined swirls without gaps.
- Coating the log in coarse sugar or crushed peppermint adds a delightful crunch and enhances the peppermint flavor.
- Slice cookies evenly to ensure uniform baking.
- Do not overbake; cookies should remain soft and tender with slightly golden edges.

