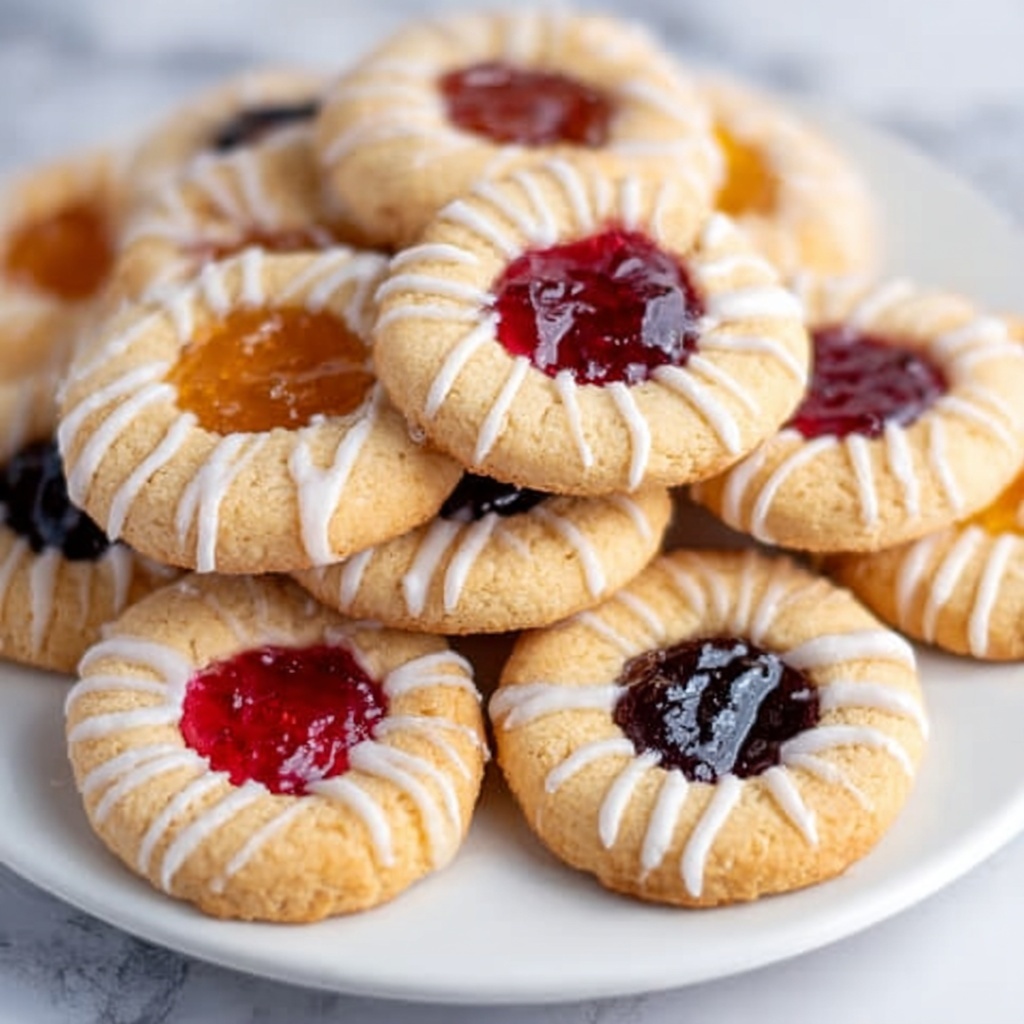
If you’ve been searching for a delightful, nostalgic treat that’s both simple to make and irresistibly delicious, look no further than this Jam Thumbprint Cookies Recipe. These buttery, melt-in-your-mouth cookies are perfectly crowned with a dollop of your favorite fruit jam, creating a charming balance of rich dough and sweet, fruity goodness. Whether you’re baking for a holiday, a special occasion, or just because, these classic cookies never fail to warm hearts and bring smiles.
Ingredients You’ll Need
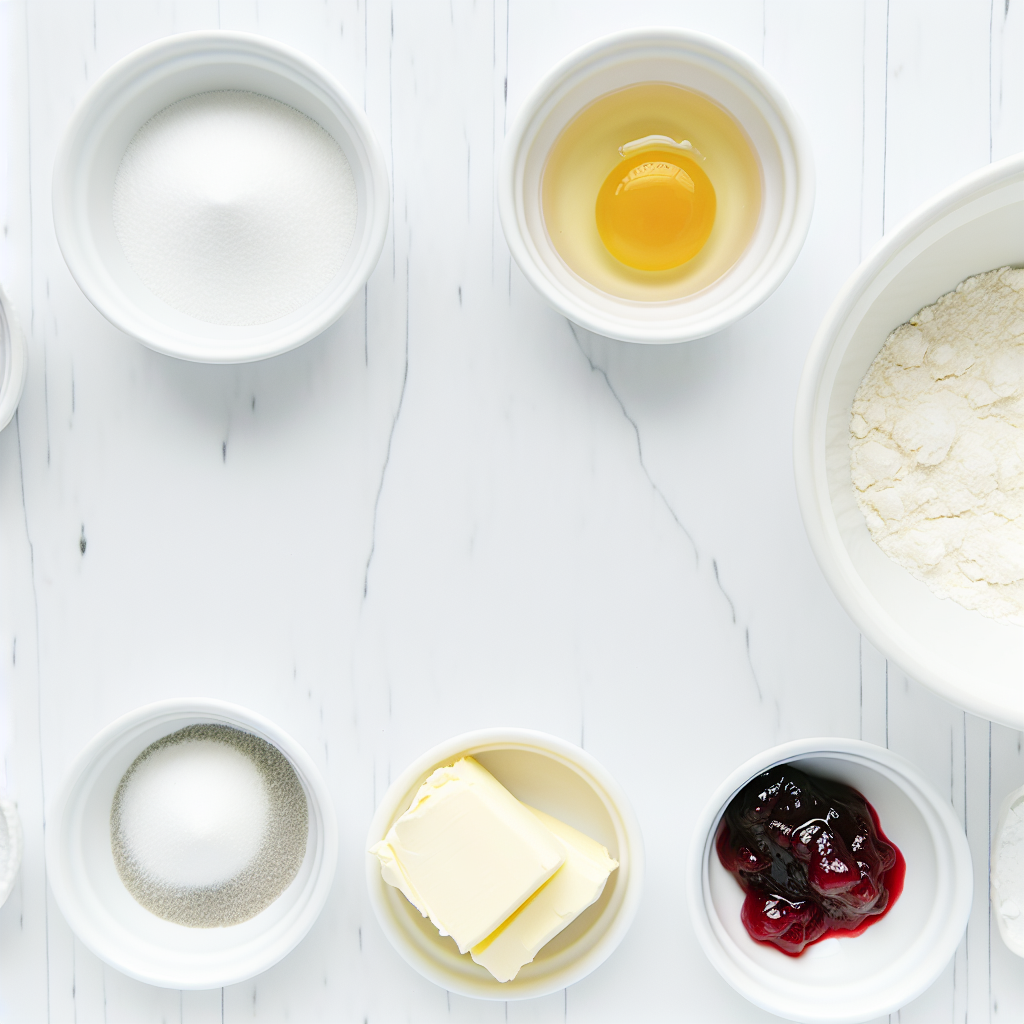
Gathering the right ingredients for this Jam Thumbprint Cookies Recipe is a breeze because each element is straightforward but essential. Together, they build the cookie’s tender texture, delightful flavor, and that inviting golden hue you’ll love.
- 1 cup unsalted butter, softened: Provides a creamy richness that makes the cookies tender and flavorful.
- ⅔ cup granulated sugar: Adds just the right amount of sweetness and helps create a light texture when creamed with butter.
- 1 large egg yolk: Binds the dough and enriches flavor without adding too much moisture.
- 1 teaspoon vanilla extract: Brings a subtle sweetness and depth that complements the buttery dough beautifully.
- 2 cups all-purpose flour: Forms the sturdy base of the cookies, balancing softness and structure.
- ¼ teaspoon salt: Enhances all the flavors, making sure the sweetness and butteriness shine.
- ½ cup fruit jam or preserves (raspberry, apricot, strawberry): The star component providing that luscious burst of fruity sweetness in every bite.
- Optional: powdered sugar for dusting: Adds a pretty finishing touch and a hint of extra sweetness.
How to Make Jam Thumbprint Cookies Recipe
Step 1: Preheat and Prep
Start by setting your oven to 350°F and lining your baking sheets with parchment paper. This simple prep will make cleanup easier and prevent your cookies from sticking, ensuring they come out looking just as perfect as they taste.
Step 2: Cream Butter and Sugar
In a large bowl, cream the softened butter and granulated sugar together until the mixture is light and fluffy—about 2 to 3 minutes. This step is crucial because it introduces air into the dough, giving the cookies their delicate texture.
Step 3: Add Egg Yolk and Vanilla
Beat in the egg yolk and vanilla extract until just combined. These ingredients add richness and aromatic warmth, creating a lovely base for the dough.
Step 4: Mix in Flour and Salt
Slowly add the all-purpose flour and salt, mixing until the dough comes together into a soft, smooth ball. Don’t overmix—just enough to bring everything together will keep your cookies tender.
Step 5: Shape the Cookies
Use a tablespoon to scoop portions of dough, rolling each into a neat ball. Place the dough balls about 2 inches apart on your prepared baking sheets. This spacing gives them room to spread slightly without running into each other.
Step 6: Make the Thumbprints and Add Jam
Press a shallow indentation into the center of each dough ball using your thumb or the back of a teaspoon. Fill each indentation with roughly ½ teaspoon of your chosen jam. Use thick jams or preserves here to prevent the filling from spreading too much during baking.
Step 7: Bake Until Golden
Bake the cookies for 12 to 14 minutes, or until the edges are just turning a lovely light golden color. This timing keeps the cookies soft while providing just enough crispness on the edges.
Step 8: Cool and Optional Dusting
Let the cookies cool on the baking sheets for about 5 minutes before gently transferring them to a wire rack to cool completely. If you want to add an extra special touch, sprinkle with powdered sugar before serving for a festive look.
How to Serve Jam Thumbprint Cookies Recipe
Garnishes
These cookies are pretty enough on their own but adding a dusting of powdered sugar can make them feel extra celebratory. You might also sprinkle a few finely chopped nuts around the jam center before baking for a subtle crunch and nutty flavor that pairs beautifully with the fruit.
Side Dishes
Jam Thumbprint Cookies make a perfect pairing with a cup of tea or coffee. Consider serving them alongside a creamy hot chocolate or a glass of cold milk to create a comforting snack break that’s sure to satisfy sweet cravings.
Creative Ways to Present
For an eye-catching dessert platter, use different flavors of jam in each cookie for a colorful array of reds, oranges, and pinks. You can also sandwich two cookies together with a layer of frosting or extra jam for a fun twist on the classic treat!
Make Ahead and Storage
Storing Leftovers
Once fully cooled, store your Jam Thumbprint Cookies in an airtight container at room temperature. They will stay fresh and tasty for up to one week, making them a perfect make-ahead treat for busy days or unexpected guests.
Freezing
You can freeze unbaked dough balls individually on a tray, then transfer them to a freezer-safe bag or container. When you’re ready, just thaw them overnight in the fridge, add your jam, and bake as usual. The baked cookies themselves can also be frozen for up to 3 months—just thaw at room temperature before serving.
Reheating
To bring back that freshly baked warmth, pop your cookies in a preheated 300°F oven for about 5 minutes. This quick reheat enhances their texture and aroma without drying them out.
FAQs
Can I use any type of jam for Jam Thumbprint Cookies Recipe?
Absolutely! While raspberry, apricot, and strawberry are classic choices, feel free to experiment with your favorites like blueberry, blackberry, or even marmalade. Just make sure the jam is thick enough to hold its shape during baking.
What if I don’t have unsalted butter?
You can use salted butter if that’s what’s on hand, but be sure to reduce or omit the added salt in the recipe to avoid oversalting your cookies.
Can I make these cookies vegan or dairy-free?
Substituting butter with vegan margarine or coconut oil and using a flax egg instead of a traditional egg yolk can work well. Keep in mind that texture and flavor might vary slightly from the original recipe.
Why are my cookies spreading too much?
If your cookies spread too much, it might be due to using a jam that’s too liquidy or dough that’s a bit too soft. Using thicker jams and chilling the dough briefly before baking can help maintain the shape.
How do I keep the jam from burning in the oven?
Using a thick jam and filling just a small portion into the center helps. Additionally, monitoring your baking time closely ensures the jam heats through without scorching.
Final Thoughts
There’s just something so comforting about homemade Jam Thumbprint Cookies Recipe that makes it an instant favorite in any household. Easy to whip up, endlessly customizable, and totally delicious, these cookies are sure to become a go-to baking project to share with friends and family. So don’t hesitate—grab your ingredients and start creating sweet moments today!
Print
Jam Thumbprint Cookies Recipe
- Prep Time: 15 minutes
- Cook Time: 14 minutes
- Total Time: 29 minutes
- Yield: 24 cookies
- Category: Dessert
- Method: Baking
- Cuisine: American
- Diet: Vegetarian
Description
Jam Thumbprint Cookies are classic buttery cookies with a sweet fruit jam center, perfect for holiday baking or any time you crave a delightful, fruity treat. These soft, tender cookies are easy to make and can be customized with your favorite jam flavors, making them a versatile and crowd-pleasing dessert.
Ingredients
Cookie Dough
- 1 cup unsalted butter, softened
- ⅔ cup granulated sugar
- 1 large egg yolk
- 1 teaspoon vanilla extract
- 2 cups all-purpose flour
- ¼ teaspoon salt
Filling and Garnish
- ½ cup fruit jam or preserves (such as raspberry, apricot, or strawberry)
- Optional: powdered sugar for dusting
Instructions
- Preheat Oven and Prepare Baking Sheets: Preheat your oven to 350°F (175°C) and line baking sheets with parchment paper to prevent sticking and ensure even baking.
- Cream Butter and Sugar: In a large bowl, beat the softened butter and granulated sugar together using an electric mixer until the mixture becomes light and fluffy, about 2 to 3 minutes. This step helps create a tender texture.
- Add Egg Yolk and Vanilla: Mix in the egg yolk and vanilla extract until fully incorporated, which adds richness and flavor to the dough.
- Combine Dry Ingredients: Gradually add the all-purpose flour and salt to the wet mixture, stirring until a soft, smooth dough ball forms. Avoid overmixing to keep cookies tender.
- Shape Dough Balls: Scoop tablespoon-sized portions of dough and roll each into a ball. Place them about 2 inches apart on the prepared baking sheets to allow room for spreading.
- Create Indentation and Add Jam: Use your thumb or the back of a spoon to gently press a shallow indentation into the center of each dough ball. Fill each indentation with approximately ½ teaspoon of your chosen jam or preserves.
- Bake the Cookies: Place the baking sheets in the preheated oven and bake for 12 to 14 minutes, or until the edges are lightly golden. This ensures a perfectly baked cookie with a soft center.
- Cool the Cookies: Allow the cookies to cool on the baking sheet for 5 minutes to firm up, then transfer them to a wire rack to cool completely for best texture.
- Optional Dusting: Once fully cooled, dust the cookies lightly with powdered sugar if desired to add an elegant finishing touch and a hint of extra sweetness.
Notes
- Use thick jam or preserves to prevent the filling from spreading during baking.
- For variety, divide the dough and use different jam flavors in each batch.
- Cookies freeze well; freeze unfilled dough balls for convenient baking later.
- Store baked cookies in an airtight container for up to one week to maintain freshness.

