
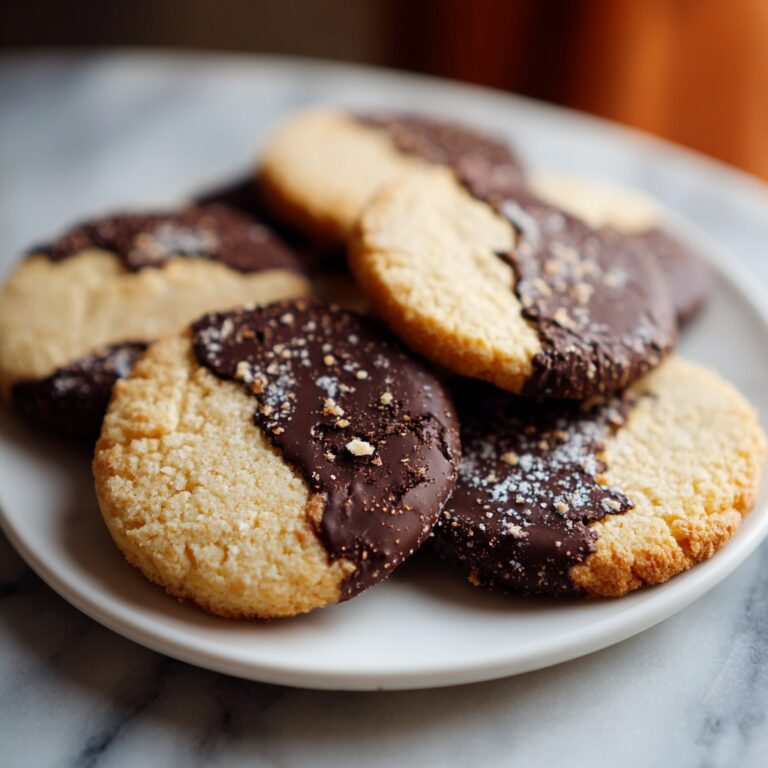
If you’ve ever wanted to bake a truly dazzling treat that’s as fun to look at as it is to eat, then the Irresistible Geode Cookies You Can’t Resist Trying! Recipe is exactly what you need in your baking repertoire. These cookies sparkle with edible glitter or colorful rock candy that mimics natural geode crystals, offering a magical crunch alongside a classic, chewy chocolate chip cookie base. From the moment you pull them from the oven to the last bite, you’ll be enchanted by their glittery charm and rich flavors. Trust me, these cookies are not just a cookie—they’re an experience you won’t soon forget.
Ingredients You’ll Need
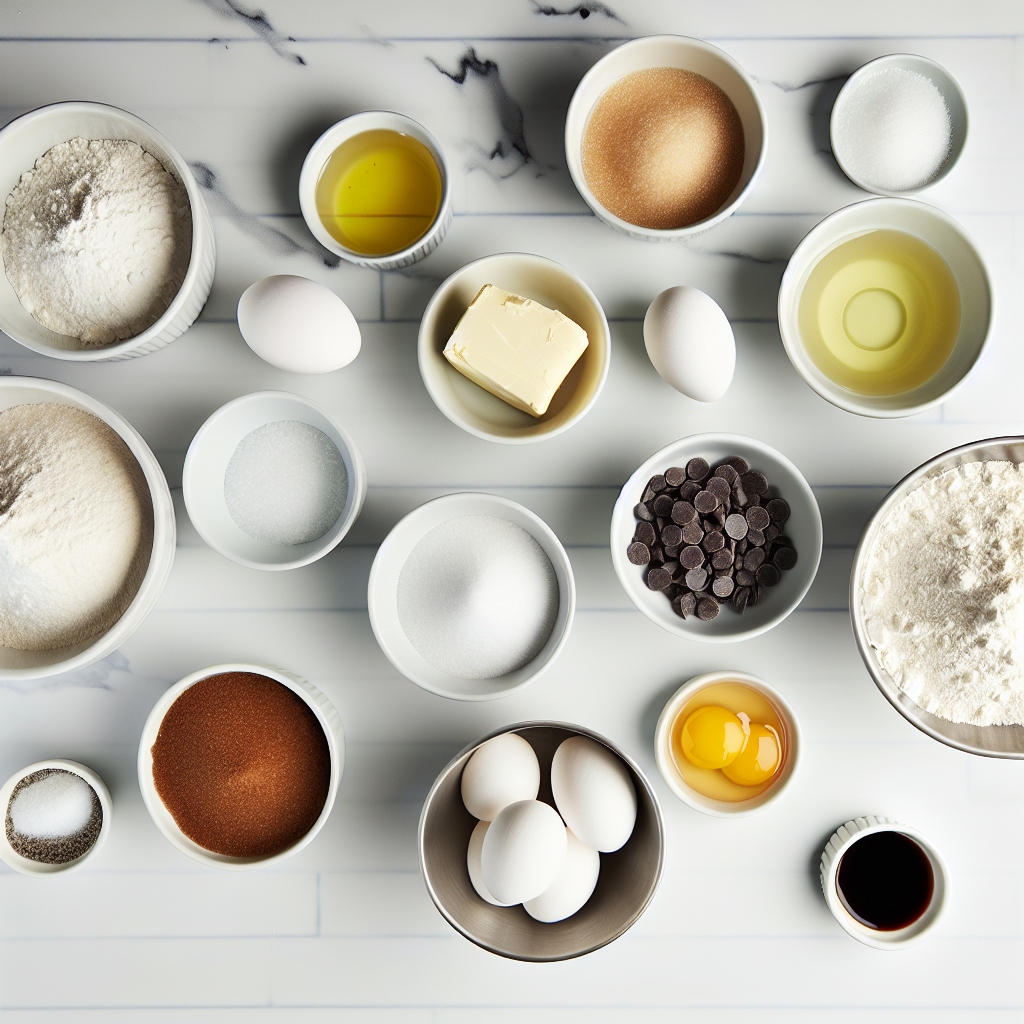
Gathering the right ingredients is key to nailing the perfect texture and flavor of the Irresistible Geode Cookies You Can’t Resist Trying! Recipe. Each item plays an essential role, from buttery richness to the sparkle that makes these cookies truly shine.
- All-purpose flour (2 1/4 cups): The sturdy base that gives your cookies structure and chewiness.
- Baking soda (1/2 teaspoon): Helps your cookies rise and achieve that lovely golden edge.
- Salt (1/2 teaspoon): Balances sweetness and enhances all the flavors.
- Unsalted butter, softened (1 cup): Adds moisture, richness, and a tender crumb.
- Granulated sugar (1 cup): Provides sweetness and a slight crispness on the edges.
- Brown sugar, packed (1 cup): Brings deep caramel notes and chewy texture.
- Large eggs (2): Bind everything together while adding moisture and richness.
- Vanilla extract (2 teaspoons): Infuses warm, aromatic depth into every bite.
- Chocolate chips (2 cups): The melty pockets of chocolate that make these cookies irresistible.
- Edible glitter or rock candy for decoration: The magical twist that creates the geode’s sparkling crystal effect.
How to Make Irresistible Geode Cookies You Can’t Resist Trying! Recipe
Step 1: Preheat and Prepare Dry Ingredients
Start by preheating your oven to 350°F (175°C). In a medium bowl, whisk together the all-purpose flour, baking soda, and salt. This blend ensures your cookies will have the perfect rise and just the right amount of saltiness to offset the sweet flavors.
Step 2: Cream Butter and Sugars
In a separate large bowl, beat together the softened unsalted butter, granulated sugar, and brown sugar until the mixture is smooth and creamy. This step is crucial because the creamed butter and sugars create air pockets that help give your cookies their tender texture.
Step 3: Add Eggs and Vanilla
Beat in the eggs one at a time, ensuring each one is fully incorporated before adding the next. Then stir in the vanilla extract. This liquid mixture is what brings moisture and flavor to your cookies.
Step 4: Combine Dry and Wet Ingredients
Gradually add the flour mixture to the wet ingredients, mixing gently until just combined. Over-mixing can make the cookies tough, so it’s best to stop as soon as the flour disappears into the batter.
Step 5: Fold in Chocolate Chips
Gently fold in the chocolate chips. These melty, rich bits are the ultimate crowd-pleaser in any cookie, and they pair beautifully with the sparkling geode decorations you’ll add later.
Step 6: Shape and Bake
Drop spoonfuls of cookie dough onto a parchment-lined baking sheet, spacing them about two inches apart. Bake for 10 to 12 minutes, or until the edges are golden brown but the centers still look soft. This ensures a perfect balance of chewy and crisp.
Step 7: Decorate with a Geode Sparkle
Once the cookies have cooled, adorn the tops with edible glitter or small clusters of rock candy. This final touch transforms your cookies into gorgeous, iridescent geodes — the kind everyone will talk about and want to try.
How to Serve Irresistible Geode Cookies You Can’t Resist Trying! Recipe
Garnishes
To elevate the visual appeal even more, consider sprinkling a tiny pinch of coarse sugar or a swirl of colored icing around the edible glitter. Edible gold dust can also amplify the gem-like sparkle and make your cookies feel ultra-luxe.
Side Dishes
These cookies shine as a dessert on their own, but they also make a fun pairing with a scoop of vanilla ice cream or a warm mug of creamy hot chocolate. The warm drink perfectly complements the cookie’s rich, chocolatey goodness and adds to the cozy experience.
Creative Ways to Present
Arrange your cookies on a mirrored tray or serve them in a clear glass jar to showcase their sparkling geode centers. You could even gift them in a decorated box with tissue paper and a handwritten note—these cookies make stunning, thoughtful homemade gifts!
Make Ahead and Storage
Storing Leftovers
Your Irresistible Geode Cookies You Can’t Resist Trying! Recipe cookies will stay fresh in an airtight container at room temperature for up to a week. Place a slice of bread in the container to help keep them soft and chewy.
Freezing
You can freeze unbaked cookie dough balls individually on a baking sheet and then transfer them to a freezer-safe bag for up to three months. Bake straight from frozen, adding a couple of extra minutes to the baking time. Baked cookies also freeze well when stored in a sealed container.
Reheating
Warm leftover cookies in a low oven or microwave for just a few seconds to bring back their fresh-baked softness and melt the chocolate chips slightly. This little trick will make each bite taste like they’ve just come out of the oven.
FAQs
Can I use different types of chocolate instead of chocolate chips?
Absolutely! Feel free to use chunks of dark, milk, or white chocolate depending on your preference. Just chop the chocolate into roughly chip-sized pieces to ensure even melting.
Is it necessary to use edible glitter or rock candy?
While the edible glitter or rock candy creates the signature geode look, your cookies will still taste incredible without it. The classic chocolate chip base is delicious on its own.
Can I make these cookies vegan or gluten-free?
For vegan versions, substitute butter with vegan butter and eggs with flax or chia egg equivalents. Gluten-free flour blends can replace all-purpose flour, but results may vary—experiment for the best texture.
How do I prevent my cookies from spreading too much?
Make sure your butter is softened but not melted, and chilling the dough for about 30 minutes before baking can also help keep your cookies from spreading excessively in the oven.
Why do my cookies sometimes turn out flat or cakey?
Flat cookies often result from over-creaming the butter and sugar or using too much butter, while cakey cookies may need a bit more flour or less mixing. Sticking to the recipe measurements and mixing instructions is key!
Final Thoughts
There’s something truly magical about the Irresistible Geode Cookies You Can’t Resist Trying! Recipe that combines simplicity with stunning visual appeal. Whether you’re baking for a special occasion or just to brighten an ordinary day, these cookies will wow anyone lucky enough to try them. Trust me, once you make these radiant treats, you’ll be reaching for this recipe again and again. Go ahead, treat yourself and your loved ones—you won’t regret it!
Print
Irresistible Geode Cookies You Can’t Resist Trying! Recipe
- Prep Time: 15 minutes
- Cook Time: 12 minutes
- Total Time: 27 minutes
- Yield: 24 servings
- Category: Dessert
- Method: Baking
- Cuisine: American
- Diet: Vegetarian
Description
These Irresistible Geode Cookies combine classic chocolate chip cookie goodness with a sparkling twist. Decorated with edible glitter or rock candy, they mimic the stunning appearance of geodes, making them a visually captivating and delicious treat perfect for parties or special occasions.
Ingredients
Dry Ingredients
- 2 1/4 cups all-purpose flour
- 1/2 teaspoon baking soda
- 1/2 teaspoon salt
Wet Ingredients
- 1 cup unsalted butter, softened
- 1 cup granulated sugar
- 1 cup brown sugar, packed
- 2 large eggs
- 2 teaspoons vanilla extract
Mix-ins and Decoration
- 2 cups chocolate chips
- Edible glitter or rock candy for decoration
Instructions
- Preheat the Oven: Preheat your oven to 350°F (175°C) to ensure it reaches the right temperature for baking the cookies evenly.
- Combine Dry Ingredients: In a mixing bowl, whisk together the all-purpose flour, baking soda, and salt to evenly distribute the leavening and seasoning agents.
- Cream Butter and Sugars: In a separate large bowl, cream the softened unsalted butter with the granulated sugar and brown sugar using an electric mixer until the mixture is smooth and fluffy, which will contribute to the cookie’s texture.
- Add Eggs and Vanilla: Beat in the large eggs and vanilla extract to the creamed butter and sugar mixture until well combined, ensuring the wet ingredients are fully incorporated.
- Combine Wet and Dry Ingredients: Gradually add the dry ingredients into the wet mixture, mixing gently until just combined to prevent overworking the dough and keep cookies tender.
- Fold in Chocolate Chips: Gently fold the chocolate chips into the batter, distributing them evenly throughout the dough for bursts of chocolate in every bite.
- Form Cookies: Drop spoonfuls of cookie dough onto a baking sheet lined with parchment paper, spacing them apart to allow for spreading during baking.
- Bake: Bake the cookies in the preheated oven for 10-12 minutes or until the edges turn golden brown, ensuring they are perfectly cooked but still soft inside.
- Cool and Decorate: Allow the cookies to cool completely on a wire rack before decorating with edible glitter or rock candy to mimic the stunning geode effect, adding visual appeal and a touch of sparkle.
Notes
- For best results, use room temperature butter and eggs to help the ingredients blend smoothly.
- Do not overmix the dough once the dry ingredients are added, as this can make the cookies tough.
- Using parchment paper on the baking sheet prevents sticking and promotes even baking.
- Allow cookies to cool completely before applying edible glitter or decorations to ensure they adhere properly.
- Store cookies in an airtight container at room temperature for up to 5 days or freeze for longer storage.


