
If you have been searching for a delightful, fuss-free cookie recipe that brings a burst of variety and joy to your kitchen, the Icebox Slice & Bake Cookies (5 Flavors) Recipe is your new best friend. This recipe delivers the perfect balance between buttery, tender dough and customizable add-ins, allowing you to explore five different flavor profiles that will wow both your taste buds and guests. Whether you’re prepping ahead for a cozy gathering or a sweet treat anytime, this slice-and-bake method makes it super convenient, satisfying your cookie cravings with ease and elegance.
Ingredients You’ll Need
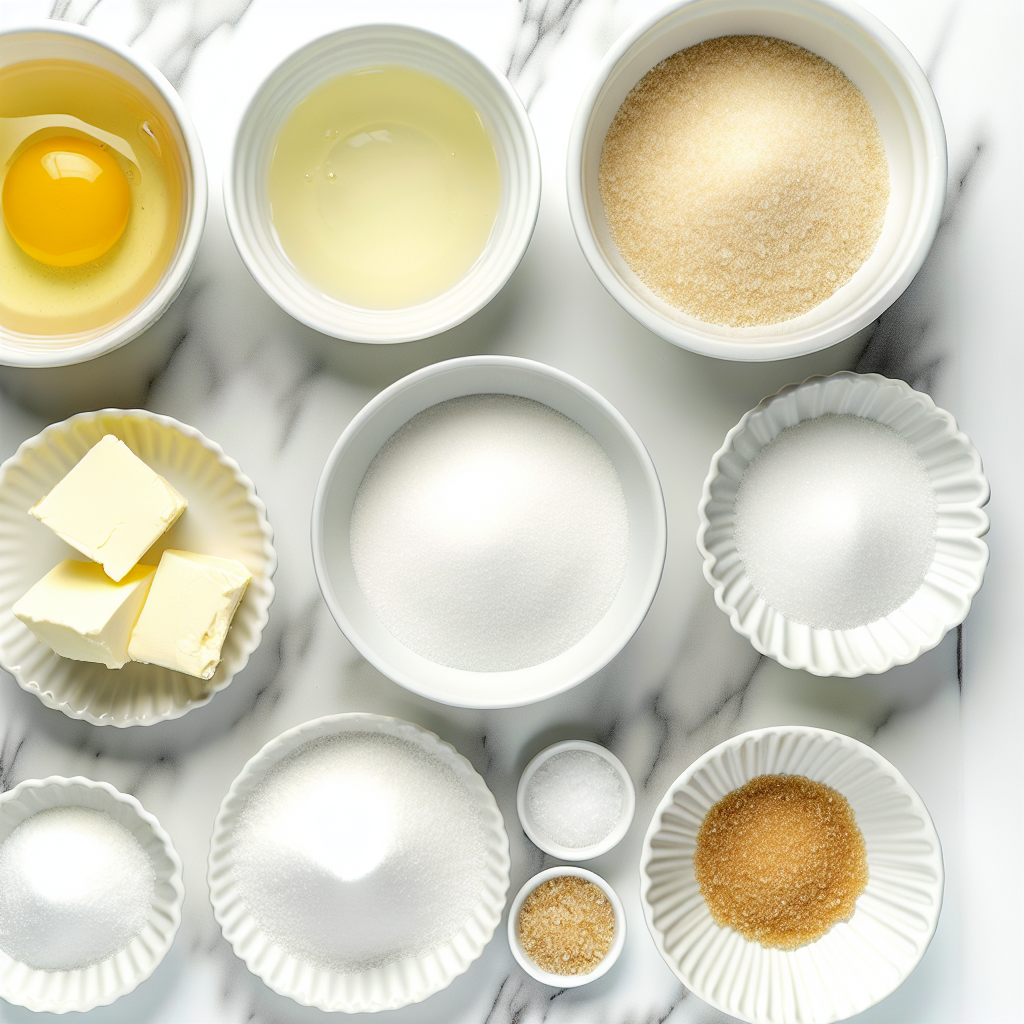
Creating the perfect slice-and-bake cookie dough is surprisingly simple, and every ingredient plays a crucial role in crafting that tender crumb, luscious flavor, and inviting texture you want in each bite. Here’s a rundown of what you’ll need to bring this versatile treat to life:
- Unsalted butter: 3/4 cup softened to room temperature ensures a creamy base and rich flavor without added saltiness.
- Brown sugar: 1/2 cup packed adds deep molasses sweetness and moisture for chewiness.
- Granulated sugar: 1/4 cup balances sweetness and contributes to a tender crisp edge.
- Egg: 1 large, at room temperature, acts as a binder and adds richness to the dough.
- Pure vanilla extract: 1 teaspoon enhances the overall flavor with warmth and depth.
- All-purpose flour: 2 cups plus 2 tablespoons, spooned and leveled, creates structure without toughness.
- Salt: 1/4 teaspoon highlights the sweetness and rounds out the other flavors.
- Coarse sugar: for rolling, such as sparkling sugar, adds an irresistible crunchy texture and a pretty finish.
- Add-ins & toppings: customize with your favorite nuts, chocolate chips, dried fruit, or sprinkles to explore all five flavors uniquely.
How to Make Icebox Slice & Bake Cookies (5 Flavors) Recipe
Step 1: Cream the Butter and Sugars
Start by placing your softened butter, brown sugar, and granulated sugar into a large mixing bowl. Using a stand mixer or handheld mixer fitted with a paddle attachment, beat them together on medium-high speed for about 3 minutes until the mixture is creamy and light. This step is the magic that sets the foundation for a tender and flavorful cookie, so don’t rush it!
Step 2: Incorporate the Egg and Vanilla
Next, add the egg and vanilla extract to the bowl and increase the mixer speed to high. Beat everything until fully combined, stopping occasionally to scrape down the sides and bottom of the bowl. This ensures the dough is well mixed, giving that perfect uniform texture in every cookie.
Step 3: Add Dry Ingredients
Switch your mixer to low speed and slowly add the flour and salt to the wet mixture. Beat just until combined to avoid developing too much gluten, which can make cookies tough. Remember, gentle mixing here keeps your cookies tender and crumbly in the best way.
Step 4: Mix in Your Flavor Add-Ins
Choose your favorite flavor add-ins—whether that’s crunchy nuts, bursts of dried fruit, or melty chocolate chips—and fold them into your dough on low speed just until they’re evenly distributed. Be careful not to overmix; you want that dough to remain pliable but thick enough to roll into logs.
Step 5: Shape and Chill the Dough Logs
Turn the dough out onto a floured surface and divide in half. Roll each piece into an 8-inch log about 1.5 to 2 inches in diameter. Wrap these logs tightly in plastic wrap and chill in the refrigerator for at least 4 hours — or up to 5 days. This chilling step is key because it allows flavors to develop and firms up the dough for easy slicing.
Step 6: Prepare for Baking
When you’re ready to bake, preheat your oven to 350°F (177°C). Line your baking sheets with parchment paper or silicone mats. If you want to add a sparkle and crunch, pour some coarse sugar on a plate and roll the chilled dough logs in it before slicing. This not only makes your cookies look stunning but imparts a lovely texture contrast.
Step 7: Slice and Bake
Slice each log into 12 equally thick cookies and arrange them on your baking sheets, leaving about 2 inches between each to allow for spreading. Bake for 13 to 15 minutes until the edges are lightly brown — the cookies won’t brown much but will be perfectly baked inside.
Step 8: Cool and Decorate
Allow the cookies to cool on the baking sheet for 5 minutes, then transfer them to a cooling rack. If you’re feeling extra indulgent, dip or drizzle them with melted chocolate or sprinkle additional toppings as you like. This extra touch makes the Icebox Slice & Bake Cookies (5 Flavors) Recipe truly unforgettable.
How to Serve Icebox Slice & Bake Cookies (5 Flavors) Recipe
Garnishes
A simple dusting of powdered sugar or a drizzle of your favorite melted chocolate instantly elevates the classic cookie. Sprinkles, finely chopped nuts, or colorful sugar crystals also add a festive touch that looks as good as it tastes.
Side Dishes
These cookies pair beautifully with a glass of cold milk, a warm cup of coffee, or a cozy mug of hot chocolate. For an adult twist, serving alongside a scoop of vanilla ice cream or a rich espresso martini makes for an unforgettable dessert experience.
Creative Ways to Present
Slice the chilled dough as a fun family activity and arrange the cookies on a platter reflecting their five different flavors. You could also create charming cookie gift boxes or stack a tower of cookies tied with a ribbon for a beautiful and delicious centerpiece at parties.
Make Ahead and Storage
Storing Leftovers
Once baked and cooled, store these cookies in an airtight container at room temperature for up to one week. The airtight seal preserves their soft texture and fresh flavors, so you can enjoy them gradually without losing quality.
Freezing
For longer storage, freeze the dough logs wrapped tightly in plastic wrap and stored in a freezer-safe bag for up to three months. When you’re ready, simply thaw in the refrigerator overnight before slicing and baking. You can also freeze baked cookies by layering parchment paper between them.
Reheating
If you want to enjoy a warm cookie, pop a baked cookie in the microwave for 10 to 15 seconds or heat in a preheated oven at 300°F for 5 minutes. This reheating keeps your cookie soft and melty, as if freshly baked.
FAQs
Can I make all five flavors in one batch?
Absolutely! The dough recipe is a fantastic base for endless variations. Simply divide your dough into five portions and add your chosen flavorings separately before rolling into logs. This way, you can bake a delicious assortment all at once.
How long do these cookies stay fresh?
When stored properly in an airtight container, these cookies remain fresh for up to one week at room temperature, maintaining their soft and chewy texture.
Can I substitute ingredients like butter or sugar?
While the classic unsalted butter and specific sugars deliver the best texture and flavor, you can experiment with alternatives like margarine or coconut sugar, though results may vary slightly in taste and texture.
Is this recipe suitable for beginners?
Definitely! The step-by-step process is straightforward, and the slice-and-bake method simplifies portioning. It’s a perfect recipe for anyone wanting to feel confident in their baking skills.
What are your favorite flavor combinations?
Some crowd-pleasers include classic chocolate chip, cinnamon sugar, white chocolate with macadamia nuts, cranberry-orange zest, and peanut butter with chocolate drizzle. The Icebox Slice & Bake Cookies (5 Flavors) Recipe encourages you to get creative, so have fun experimenting!
Final Thoughts
There is something truly special about the simplicity and versatility of the Icebox Slice & Bake Cookies (5 Flavors) Recipe. Whether you’re a seasoned baker or just looking for a reliable, delicious way to satisfy your sweet tooth, this recipe offers dreamy results every time. Give it a try, share with loved ones, and watch these cookies become a new family favorite that you’ll reach for over and over again.
Print
Icebox Slice & Bake Cookies (5 Flavors) Recipe
- Prep Time: 30 minutes
- Cook Time: 15 minutes
- Total Time: 5 hours 45 minutes
- Yield: 24 cookies
- Category: Dessert
- Method: Baking
- Cuisine: American
- Diet: Vegetarian
Description
Classic Icebox Slice & Bake Cookies in five delicious flavors. These buttery, soft cookies are rolled into logs, chilled, sliced, and baked to perfection. Easy to prepare and perfect for gifting or enjoying any time, these cookies offer a wonderful mix of creamy texture and customizable add-ins.
Ingredients
Base Dough
- 3/4 cup (12 Tbsp; 170g) unsalted butter, softened to room temperature
- 1/2 cup (100g) packed light or dark brown sugar
- 1/4 cup (50g) granulated sugar
- 1 large egg, at room temperature
- 1 teaspoon pure vanilla extract
- 2 cups + 2 Tablespoons (267g) all-purpose flour (spooned & leveled)
- 1/4 teaspoon salt
Add-Ins & Toppings
- Coarse sugar for rolling (such as sparkling sugar)
- Varies by flavor (see notes for specific measurements and types, e.g., chocolate chips, nuts, dried fruit)
Instructions
- Cream Butter and Sugars: In a large bowl, use a handheld or stand mixer fitted with a paddle attachment to beat the softened butter, brown sugar, and granulated sugar on medium-high speed until creamy and fully combined, about 3 minutes.
- Add Egg and Vanilla: Beat in the egg and vanilla extract on high speed, scraping down the sides and bottom of the bowl as needed to ensure full incorporation.
- Combine Dry Ingredients: Add the all-purpose flour and salt, then beat on low speed until just combined to form a thick dough.
- Mix in Flavor Add-Ins: Gently fold in the chosen flavor add-ins on low speed until evenly distributed. Avoid overmixing to keep the dough tender. If dough feels too sticky to roll, incorporate an additional 1-2 tablespoons of flour.
- Shape Dough Logs: Turn dough onto a floured work surface. Divide in half and shape each into an 8-inch log about 1.5 to 2 inches in diameter. Wrap tightly in plastic wrap.
- Chill Dough: Refrigerate wrapped logs for at least 4 hours or up to 5 days to firm up the dough for slicing.
- Prepare for Baking: Preheat oven to 350°F (177°C). Line large baking sheets with parchment paper or silicone mats.
- Optional Sugar Coating: Pour coarse sugar onto a plate and roll chilled dough logs in it, pressing gently to adhere the sugar evenly.
- Slice Cookies: Cut each log into 12 equal slices. Place cookies 2 inches apart on prepared baking sheets.
- Bake: Bake cookies for 13–15 minutes until edges are very lightly browned, but the cookies remain soft. Remove and cool on baking sheets for 5 minutes, then transfer to cooling racks.
- Decorate: Optionally, dip or drizzle cookies with melted chocolate and add toppings for extra flavor and visual appeal.
- Storing: Store cooled cookies in an airtight container at room temperature for up to one week.
Notes
- Flavor Add-Ins vary by choice; common options include chocolate chips, chopped nuts, dried fruit, or spices. Adjust quantity according to desired flavor intensity.
- Rolling dough logs in sugar is easiest after chilling as the dough is less sticky.
- For firmer cookies, add 1-2 tablespoons extra flour if dough is too sticky to handle.
- Cookies have a soft texture and delicate browning, so watch baking time carefully.
- For decorating, use melted chocolate or sprinkle toppings like sea salt or sprinkles after baking.


