If you’re looking for a snack that’s both irresistibly crunchy and delightfully sweet, this Easy Glazed Nuts Recipe is about to become your new favorite treat. It combines the warm, toasty flavors of your favorite nuts with a shiny, sugary glaze that’s buttery, slightly caramelized, and totally addictive. Perfect for sharing or keeping all to yourself, these glazed nuts are simple to make but wildly impressive in taste and texture. Once you’ve tried this recipe, you’ll see why it’s such a beloved classic for any occasion.
Ingredients You’ll Need
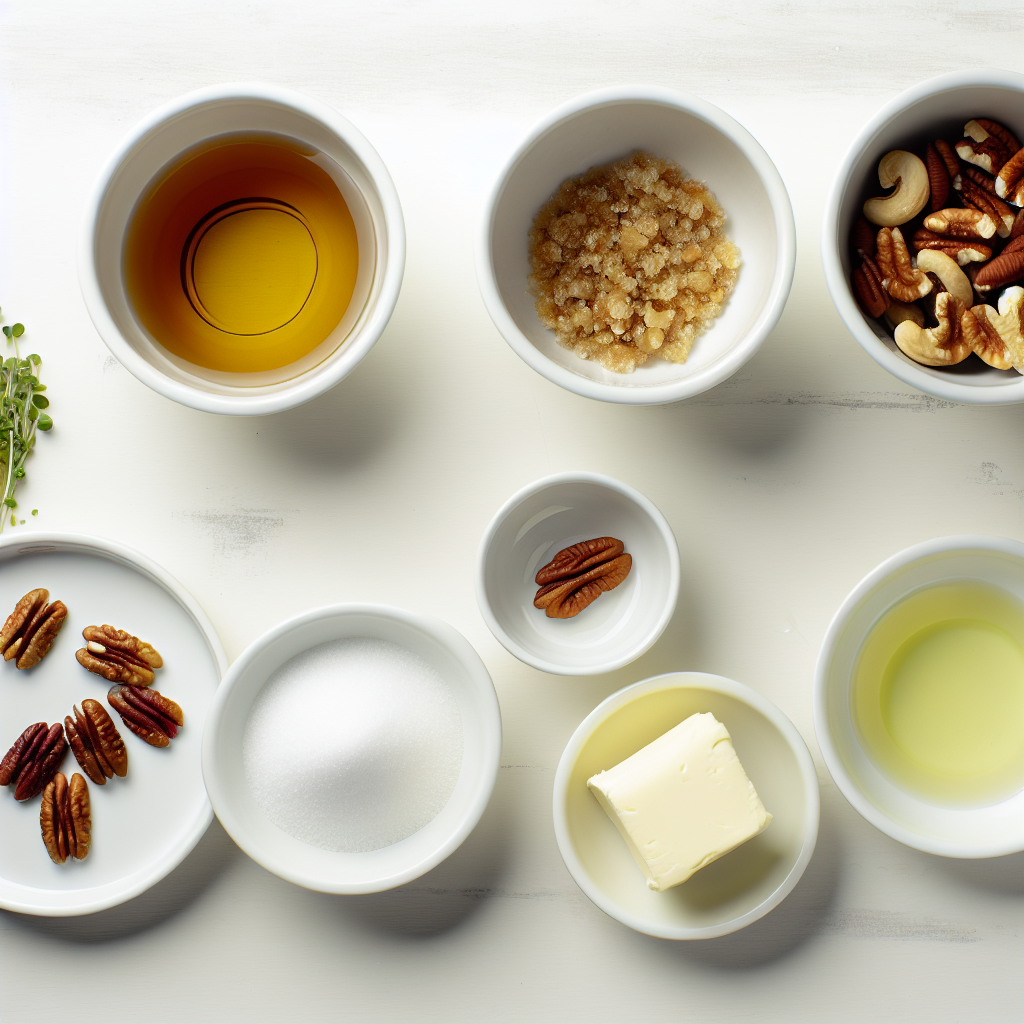
The beauty of this Easy Glazed Nuts Recipe is how straightforward and accessible the ingredients are, yet how each plays a crucial role in building that perfect balance of flavor and crunch. These pantry staples transform plain nuts into a snack with a golden, buttery sweetness and a luscious gloss.
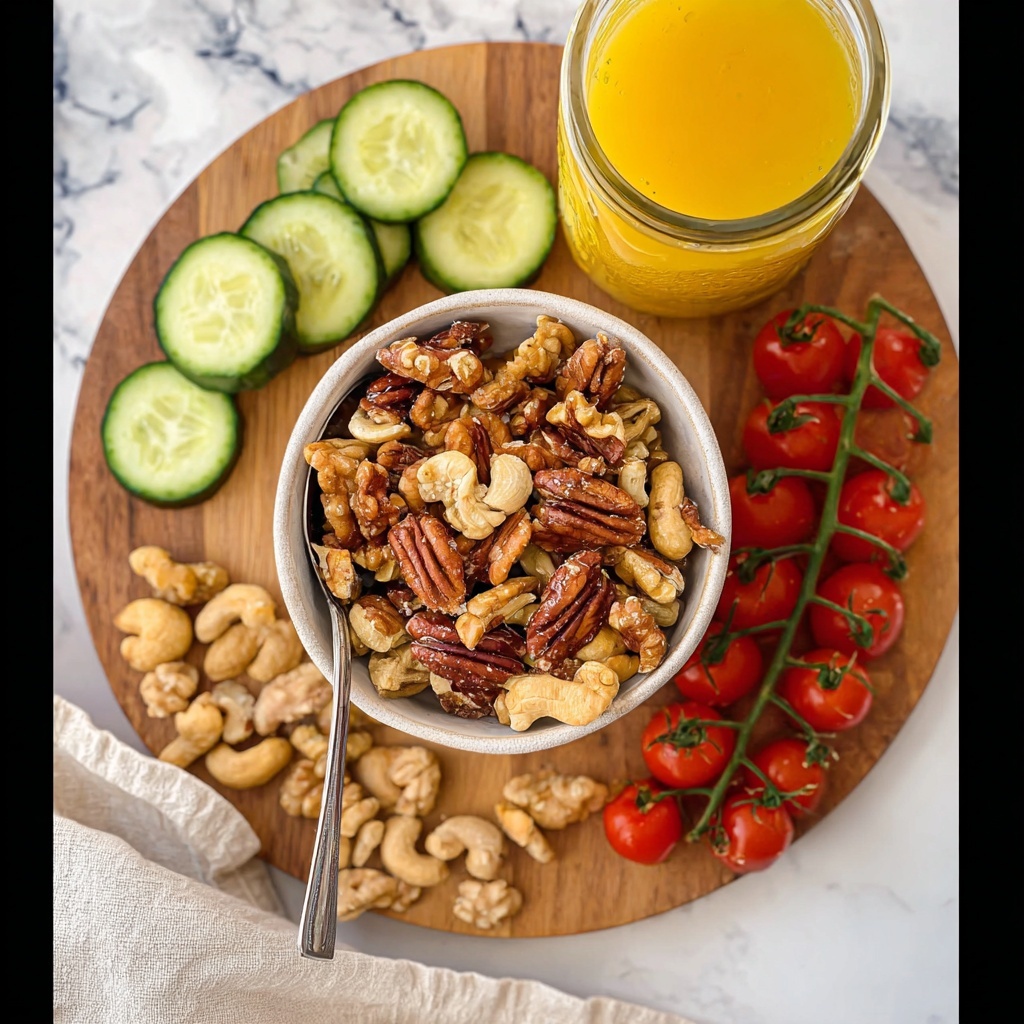
- 1 cup nuts: Choose pecans, walnuts, almonds, or cashews for their rich flavor and satisfying crunch that hold up beautifully under the glaze.
- 2 tablespoons granulated sugar: This adds the essential sweetness and helps form the shiny glaze that coats each nut evenly.
- 1 tablespoon cold butter: Cut into small pieces, it melts slowly to enrich the glaze with a silky texture and a hint of indulgence.
- 1 tablespoon water: Helps dissolve the sugar and ensures the glaze cooks evenly around the nuts for that perfect sticky finish.
How to Make Easy Glazed Nuts Recipe
Step 1: Toast the Nuts
Start by preheating your oven to 350°F. Spread your chosen nuts evenly on a small baking sheet and toast them for about 5 minutes. This step is key because it brings out the natural oils and aromas in the nuts, making them taste even more flavorful. You’ll know they’re ready when the room fills with a warm, nutty scent and the nuts look lightly browned.
Step 2: Prepare the Glaze in the Skillet
Immediately transfer the toasted nuts to the bottom of a 10-inch nonstick skillet. Sprinkle the sugar evenly over the top and dot with the cold butter pieces. Place the skillet over medium-low heat and stir occasionally as the butter melts and the sugar starts to dissolve. The gentle heat allows the sugars to slowly caramelize and the butter to infuse its richness, creating that perfect glaze base.
Step 3: Finish Cooking the Glaze
Add the water to the skillet and turn the heat to medium. Stir continuously and shake the pan now and then for about 2 to 3 minutes. You’ll see the water evaporate, and soon the sugar and butter mixture will thicken and cling beautifully to each nut. This is the magic moment where the nuts transform into that irresistible glazed snack.
Step 4: Cool and Separate
Once the nuts are evenly coated, pour them out onto a sheet of wax paper or foil. Use a wooden spoon to gently separate the nuts while they’re still warm to prevent clumping. Allow them to cool completely to let the glaze harden to a delightful crisp that snaps when you bite.
How to Serve Easy Glazed Nuts Recipe
Garnishes
To elevate the presentation, consider tossing in a pinch of flaky sea salt right after glazing for a sweet-salty contrast that’s absolutely addictive. Fresh herbs like rosemary or a sprinkle of cinnamon can also add interesting layers of flavor and aroma to your glazed nuts.
Side Dishes
These glazed nuts are a fantastic companion to cheese boards, pairing wonderfully with creamy brie or sharp cheddar. They also make a delightful topping for salads, adding crunch and sweetness that brighten up mixed greens or roasted vegetable dishes.
Creative Ways to Present
For parties or gifts, package your Easy Glazed Nuts Recipe in small mason jars or decorative bags tied with rustic twine. They also shine as a crunchy salad sprinkle or a fun addition mixed into your favorite trail mix, adding that sweet glazed touch to energize your snack time.
Make Ahead and Storage
Storing Leftovers
Store your glazed nuts in an airtight container at room temperature to keep them crisp and fresh for up to two weeks. Keeping moisture out ensures the glaze stays crunchy and the nuts don’t become sticky or lose their snap.
Freezing
If you want to keep these goodies longer, freezing is a great option. Place the glazed nuts in a freezer-safe bag or container, removing as much air as possible before sealing. They’ll last up to three months this way, and when you’re ready, just thaw them at room temperature.
Reheating
To bring back that fresh-glazed crispness after storage, simply spread the nuts on a baking sheet and pop them in a 300°F oven for about 5 minutes. This quick reheat refreshes the glaze and warms the nuts for optimal crunch.
FAQs
Can I use other types of nuts?
Absolutely! The recipe is very flexible. Feel free to experiment with hazelnuts, macadamias, or even mixed nuts. Each will bring its own unique flavor and texture, making your Easy Glazed Nuts Recipe your personal favorite.
Is it necessary to use butter?
Butter is key to achieving that rich, shiny glaze and smooth texture. While you could substitute other fats, like coconut oil, butter adds a traditional depth of flavor that really makes this recipe special.
How long do the glazed nuts stay fresh?
Stored properly in an airtight container, these nuts stay delicious for up to two weeks at room temperature. They’re perfect for prepping ahead of events or enjoying throughout the week.
Can I add spices or flavorings?
Definitely! Adding cinnamon, chili powder, vanilla extract, or even a pinch of cayenne can personalize the glaze and enhance the nuts to suit sweet or savory cravings.
What texture should the glaze have?
The glaze should be glossy, thin enough to coat each nut evenly but thick enough to harden as it cools. It’s this balance that gives the nuts a crisp, irresistible crunch.
Final Thoughts
I hope this Easy Glazed Nuts Recipe inspires you to bring a little extra joy and warmth to your snacking or entertaining. It’s an easy way to transform simple nuts into a beautifully glossy, buttery treat that everyone will love. Try it once, and I bet you’ll find yourself making these glazed nuts again and again, sharing them with friends and family as your new signature snack.
Print
Easy Glazed Nuts Recipe
- Prep Time: 2 minutes
- Cook Time: 8 minutes
- Total Time: 10 minutes
- Yield: 4 servings
- Category: Snack
- Method: Stovetop
- Cuisine: American
Description
Delicious and easy-to-make glazed nuts featuring a sweet, buttery coating perfect for snacks or toppings. This quick recipe uses simple ingredients like nuts, sugar, butter, and water, combined with toasting and stovetop glazing for a crunchy, flavorful treat.
Ingredients
Ingredients
- 1 cup nuts (pecans, walnuts, almonds, or cashews)
- 2 tablespoons granulated sugar
- 1 tablespoon cold butter (cut into about 6 small pieces)
- 1 tablespoon water
Instructions
- Preheat Oven: Preheat your oven to 350°F (175°C) to prepare for toasting the nuts.
- Toast Nuts: Spread the nuts evenly over a small baking sheet and bake them for 5 minutes or until fragrant and lightly toasted, enhancing their flavor and crunch.
- Prepare Glaze: Remove the nuts from the oven and transfer them evenly onto the bottom of a 10-inch nonstick skillet. Sprinkle the granulated sugar over the nuts and scatter the cold butter pieces on top.
- Melt Butter and Dissolve Sugar: Turn the heat to medium-low. Cook while stirring occasionally until the butter melts and the sugar is nearly dissolved, creating a smooth, sweet base.
- Add Water and Finish Glazing: Add the water to the skillet, increase the heat to medium, and cook while stirring constantly for 2 to 3 minutes. Shake the pan occasionally until the water evaporates and the glaze coats the nuts evenly.
- Cool the Nuts: Pour the glazed nuts onto wax paper or foil. Use a wooden spoon to gently separate them so they don’t stick together, and allow them to cool completely before serving.
Notes
- You can use any combination of your favorite nuts such as pecans, walnuts, almonds, or cashews for variety.
- Be careful not to burn the nuts while toasting or the sugar while cooking; keep the heat controlled and stir frequently.
- Use cold butter pieces to help create a smooth glaze as they melt slowly.
- Store cooled glazed nuts in an airtight container at room temperature for up to two weeks.


