Description
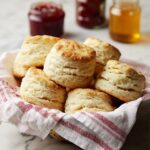
These Easy Buttermilk Biscuits are tender, flaky, and buttery, perfect for breakfast or as a side with any meal. Made with self-rising flour and cultured buttermilk, they come together quickly and bake to golden perfection with a soft interior and slightly crisp edges.
Ingredients
Scale
Dry Ingredients
- 2 cups White Lily Self-Rising Flour
Wet Ingredients
- 3/4 cup cultured nonfat buttermilk
Butter
- 1/2 cup cold unsalted butter
- 2 tablespoons unsalted butter, melted (for brushing)
Instructions
- Preheat Oven: Preheat your oven to 450°F (232°C) and line a baking pan with a silicone baking mat or parchment paper for easy cleanup and to prevent sticking.
- Measure Flour: In a large bowl, spoon the white lily self-rising flour into a dry measuring cup and level it off to ensure accurate measurement.
- Cut in Butter: Cut the cold unsalted butter into the flour using a pastry blender until the pieces are about the size of small peas. Alternatively, freeze the butter then grate it and mix it into the flour to form a coarse mixture.
- Add Buttermilk: Pour in the cultured nonfat buttermilk and stir gently just until the dough comes together. It should resemble thick mashed potatoes and not be overly sticky. Adjust by adding a little more flour if too wet, or a bit more buttermilk if too dry.
- Knead and Fold Dough: Turn the dough onto a floured surface and knead gently a few times if it doesn’t hold together well. Flatten it into a rectangle and fold it in thirds like a letter (tri-fold) to create flaky layers. Repeat flattening and tri-folding around three times, dusting with flour as needed to prevent sticking.
- Cut Biscuits: Roll or pat the dough out into a 3/4 to 1-inch thick rectangle. Use a floured, sharp biscuit cutter (2 to 2 1/2 inches) to cut biscuits with a quick up and down motion without twisting to preserve layers. Place biscuits close together on the baking pan for soft sides or spaced apart for crispier edges.
- Recycle Dough and More Biscuits: Gather the scraps, gently flatten, and cut out additional biscuits until you have 10 to 12 total.
- Brush and Bake: Brush the tops of the biscuits with melted butter. Bake in the preheated oven for about 15 minutes until the tops are golden brown and biscuits are cooked through.
Notes
- Using self-rising flour simplifies the recipe by including leavening agents, so no additional baking powder or salt is needed.
- Handle the dough gently to avoid tough biscuits; overmixing or twisting the cutter can inhibit flakiness.
- For a richer flavor, use cultured buttermilk instead of regular milk or non-cultured versions.
- Place biscuits closely for soft sides, or spaced apart for crispier edges, depending on your texture preference.
- Cold butter is essential to creating flaky layers; keep ingredients chilled when possible.
- Biscuits are best enjoyed fresh but can be stored in an airtight container for 1–2 days and reheated gently.