
“`html
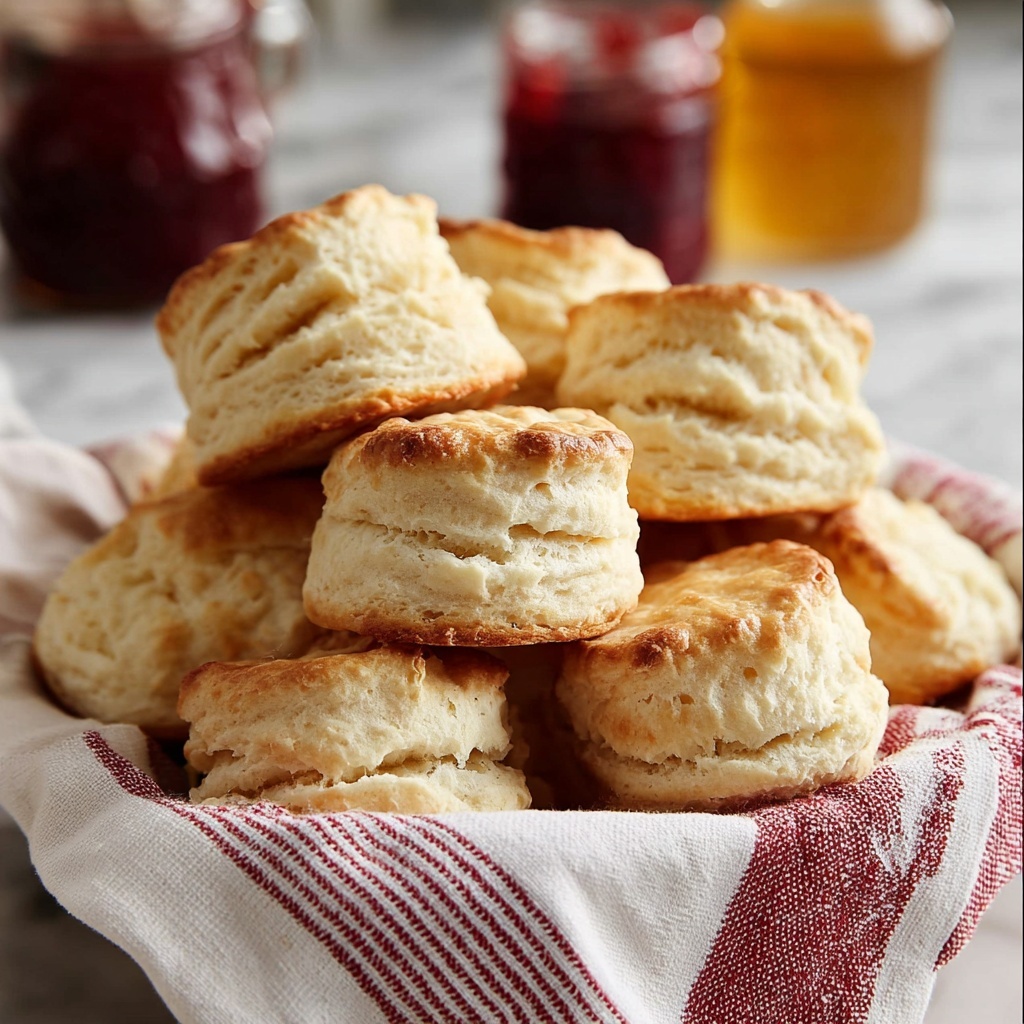
If you’ve been searching for a foolproof, delicious, and tender biscuit that practically melts in your mouth, this Easy Buttermilk Biscuits Recipe is your new best friend. Bursting with buttery flavor and fluffy, flaky layers, these biscuits are the perfect homemade treat that everyone will rave about. Whether you’re breakfasting with jam and honey or serving alongside a hearty dinner, these biscuits bring warmth, comfort, and that irresistible southern charm right to your kitchen table.
Ingredients You’ll Need
Simple, staple ingredients come together effortlessly in this recipe, each playing a vital role in crafting biscuits with the perfect tender crumb, flaky layers, and golden crust. These humble essentials are the secret behind that classic biscuit taste and texture that you’ll crave repeatedly.
- 2 cups White Lily Self-Rising Flour: This special flour is key for light, tender biscuits with just the right amount of rise and fluff.
- 1/2 cup cold unsalted butter: Chilled butter helps create those fabulous flaky layers by steaming in the hot oven.
- 3/4 cup cultured nonfat buttermilk: Buttermilk adds tangy depth and tenderizes the dough perfectly for biscuits that aren’t dry.
- 2 tablespoons unsalted butter, melted: Brushed on top, it gives your biscuits a glossy finish and irresistible buttery flavor.
How to Make Easy Buttermilk Biscuits Recipe
Step 1: Prep Your Oven and Baking Surface
Start by preheating your oven to a hot 450°F to ensure your biscuits get that beautiful rise and golden brown crust quickly. Line your baking pan with a silicone baking mat or parchment paper so the biscuits bake evenly without sticking.
Step 2: Measure and Mix the Flour
Accurate measuring is important here—spoon the White Lily Self-Rising Flour into a dry measuring cup and level it perfectly. This keeps the ratio just right so your biscuits have the ideal tenderness and rise.
Step 3: Cut the Butter into the Flour
Using a pastry blender, cut the cold butter into the flour until the mixture resembles small peas. You can also freeze the butter and grate it for a quicker method. This step is crucial for those flaky layers everyone loves.
Step 4: Add Buttermilk and Form the Dough
Add your cultured nonfat buttermilk and gently stir just until the dough comes together. It should be thick like mashed potatoes but not too sticky. If it’s too wet, add a little more flour; if too dry, add a splash more buttermilk.
Step 5: Fold, Knead, and Layer the Dough
Turn the dough onto a floured surface and knead gently a few times if needed. Then flatten into a rectangle, fold it like a letter into thirds, and dust with flour to prevent sticking. Repeat this folding three times to create those flaky, buttery layers.
Step 6: Cut and Arrange the Biscuits
Press or roll the dough out to about 3/4 to 1-inch thickness. Use a floured 2 to 2 1/2-inch biscuit cutter to cut the rounds without twisting, which keeps the edges tender. Place the biscuits close together on your prepared pan for soft edges or slightly apart for crispier ones.
Step 7: Bake and Finish with Butter
Re-roll any scraps to cut out a few more biscuits and place on the pan. Brush the tops with melted butter for that perfect golden finish. Bake for around 15 minutes or until they’re beautifully golden brown and irresistible.
How to Serve Easy Buttermilk Biscuits Recipe

Garnishes
While these biscuits shine on their own, a warm drizzle of honey, a pat of herbed butter, or a smear of creamy jam takes them to the next level. Fresh herbs like chives or parsley sprinkled on top add a subtle pop of color and fresh flavor.
Side Dishes
These biscuits are wonderfully versatile alongside classic breakfast staples like scrambled eggs and crispy bacon, or alongside comforting dinners with fried chicken, stews, or creamy gravies. Their fluffy texture soaks up sauces beautifully, making every bite a delight.
Creative Ways to Present
For a little twist, slice one biscuit in half and layer with cheddar and ham for a quick breakfast sandwich. Or tear into pieces and mix with cooked greens or sausage gravy to create a warm, hearty bowl perfect for chilly mornings.
Make Ahead and Storage
Storing Leftovers
Keep leftover biscuits fresh by placing them in an airtight container at room temperature for up to two days. To maintain softness, you can wrap them individually in foil, which works great if you plan to reheat them later.
Freezing
These biscuits freeze beautifully! Arrange them on a baking sheet to flash freeze, then transfer to a zip-top bag or airtight container. They’ll keep for up to three months and are perfect to pull out for a quick homemade treat anytime.
Reheating
Warm biscuits in a preheated oven at 350°F for 10 to 15 minutes wrapped in foil to keep them moist, or pop them in the microwave for 15–20 seconds for a quick fix. For a crispier top, remove the foil for the last few minutes in the oven.
FAQs
Can I use regular flour instead of White Lily Self-Rising Flour?
While you can substitute, White Lily Self-Rising Flour gives the biscuits their light, tender crumb. If you use all-purpose flour, add baking powder and salt to mimic the rising effect but expect a slightly different texture.
Why is the butter so cold when making biscuits?
Cold butter creates tiny steam pockets in the dough when baking, which is what makes biscuits flaky and tender. Warm butter won’t produce that effect and can lead to denser biscuits.
How important is the folding step in this Easy Buttermilk Biscuits Recipe?
Folding the dough creates multiple layers that bake into delicate flakiness. Skipping this step may result in biscuits that are tasty but less flaky and layered.
Can I make these biscuits dairy-free?
You can substitute the buttermilk with a dairy-free milk plus a splash of lemon juice or vinegar, and use a dairy-free butter alternative. While the texture may vary slightly, the biscuits will still be delicious!
How do I get soft edges versus crispy edges on my biscuits?
Place biscuits touching on the baking pan to keep edges soft and tender. For crispier edges, space the biscuits farther apart so heat circulates around each one evenly.
Final Thoughts
There’s nothing quite like the smell of fresh homemade biscuits baking in the oven, and this Easy Buttermilk Biscuits Recipe brings that magic right into your home with ease and confidence. I can’t recommend it enough for anyone wanting to create those comforting, flaky bites everyone loves. Trust me, once you try these biscuits, they will quickly become a beloved staple in your kitchen too—so go ahead, bake a batch and soak up all the buttery goodness!
“`
Print
Easy Buttermilk Biscuits Recipe
- Prep Time: 15 minutes
- Cook Time: 15 minutes
- Total Time: 30 minutes
- Yield: 10 to 12 biscuits
- Category: Baked Goods
- Method: Baking
- Cuisine: American
Description
These Easy Buttermilk Biscuits are tender, flaky, and buttery, perfect for breakfast or as a side with any meal. Made with self-rising flour and cultured buttermilk, they come together quickly and bake to golden perfection with a soft interior and slightly crisp edges.
Ingredients
Dry Ingredients
- 2 cups White Lily Self-Rising Flour
Wet Ingredients
- 3/4 cup cultured nonfat buttermilk
Butter
- 1/2 cup cold unsalted butter
- 2 tablespoons unsalted butter, melted (for brushing)
Instructions
- Preheat Oven: Preheat your oven to 450°F (232°C) and line a baking pan with a silicone baking mat or parchment paper for easy cleanup and to prevent sticking.
- Measure Flour: In a large bowl, spoon the white lily self-rising flour into a dry measuring cup and level it off to ensure accurate measurement.
- Cut in Butter: Cut the cold unsalted butter into the flour using a pastry blender until the pieces are about the size of small peas. Alternatively, freeze the butter then grate it and mix it into the flour to form a coarse mixture.
- Add Buttermilk: Pour in the cultured nonfat buttermilk and stir gently just until the dough comes together. It should resemble thick mashed potatoes and not be overly sticky. Adjust by adding a little more flour if too wet, or a bit more buttermilk if too dry.
- Knead and Fold Dough: Turn the dough onto a floured surface and knead gently a few times if it doesn’t hold together well. Flatten it into a rectangle and fold it in thirds like a letter (tri-fold) to create flaky layers. Repeat flattening and tri-folding around three times, dusting with flour as needed to prevent sticking.
- Cut Biscuits: Roll or pat the dough out into a 3/4 to 1-inch thick rectangle. Use a floured, sharp biscuit cutter (2 to 2 1/2 inches) to cut biscuits with a quick up and down motion without twisting to preserve layers. Place biscuits close together on the baking pan for soft sides or spaced apart for crispier edges.
- Recycle Dough and More Biscuits: Gather the scraps, gently flatten, and cut out additional biscuits until you have 10 to 12 total.
- Brush and Bake: Brush the tops of the biscuits with melted butter. Bake in the preheated oven for about 15 minutes until the tops are golden brown and biscuits are cooked through.
Notes
- Using self-rising flour simplifies the recipe by including leavening agents, so no additional baking powder or salt is needed.
- Handle the dough gently to avoid tough biscuits; overmixing or twisting the cutter can inhibit flakiness.
- For a richer flavor, use cultured buttermilk instead of regular milk or non-cultured versions.
- Place biscuits closely for soft sides, or spaced apart for crispier edges, depending on your texture preference.
- Cold butter is essential to creating flaky layers; keep ingredients chilled when possible.
- Biscuits are best enjoyed fresh but can be stored in an airtight container for 1–2 days and reheated gently.


