Description
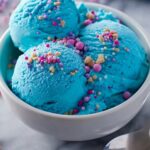
This no-cook blue ice cream recipe offers a creamy, vibrant treat perfect for family fun. Quick and easy to prepare without the need for an ice cream maker, it combines half & half, whipping cream, sugar, and vanilla with a splash of blue food coloring for a delightful homemade dessert everyone will love.
Ingredients
Scale
Base Ingredients
- 2 cups Half & Half (Substitute with whole milk for a lighter version.)
- 1 cup Whipping Cream (Can replace with dairy-free cream for a non-dairy option.)
- 3/4 cup Sugar (Use less for lower sugar content or substitute with honey or agave syrup.)
- 1 tablespoon Pure Vanilla Extract (Imitation vanilla can be a cost-effective option.)
- 1/4 teaspoon Salt (A pinch is essential for balancing sweetness.)
- A few drops Blue Food Coloring (Consider natural options like spirulina powder for a healthier twist.)
Instructions
- Combine Ingredients: In a large mixing bowl, pour 2 cups of half & half and 1 cup of whipping cream. Add 3/4 cup sugar and 1 tablespoon of pure vanilla extract.
- Mix Thoroughly: Whisk all ingredients together until the sugar is completely dissolved and the mixture is smooth. This ensures a creamy texture in your ice cream.
- Add Salt and Color: Sprinkle in 1/4 teaspoon of salt to balance the sweetness, then add a few drops of blue food coloring. Stir well to achieve an even, vibrant blue color throughout the mixture.
- Chill the Mixture: Pour the mixture into a shallow container and place it in the freezer. Chill for about 30 minutes.
- Stir During Freezing: Every 30 minutes, remove the container from the freezer and vigorously stir the ice cream mixture with a fork or whisk. Repeat this process 3 to 4 times over 2 hours to break up ice crystals and create smooth, creamy texture.
- Freeze Until Set: After the final stirring, let the ice cream freeze undisturbed for another 2 to 3 hours until fully firm and scoopable.
- Serve and Enjoy: Scoop into bowls or cones and serve your homemade blue ice cream for a fun, colorful dessert that the whole family will enjoy.
Notes
- For a dairy-free version, substitute whipping cream with non-dairy cream alternatives.
- Use natural food coloring options such as spirulina powder for a healthier, natural blue hue.
- Adjust sugar quantity to taste or substitute with natural sweeteners like honey or agave syrup.
- Stirring the ice cream mixture multiple times during freezing helps prevent large ice crystals and improves texture.
- This recipe does not require an ice cream maker, making it accessible for all home cooks.