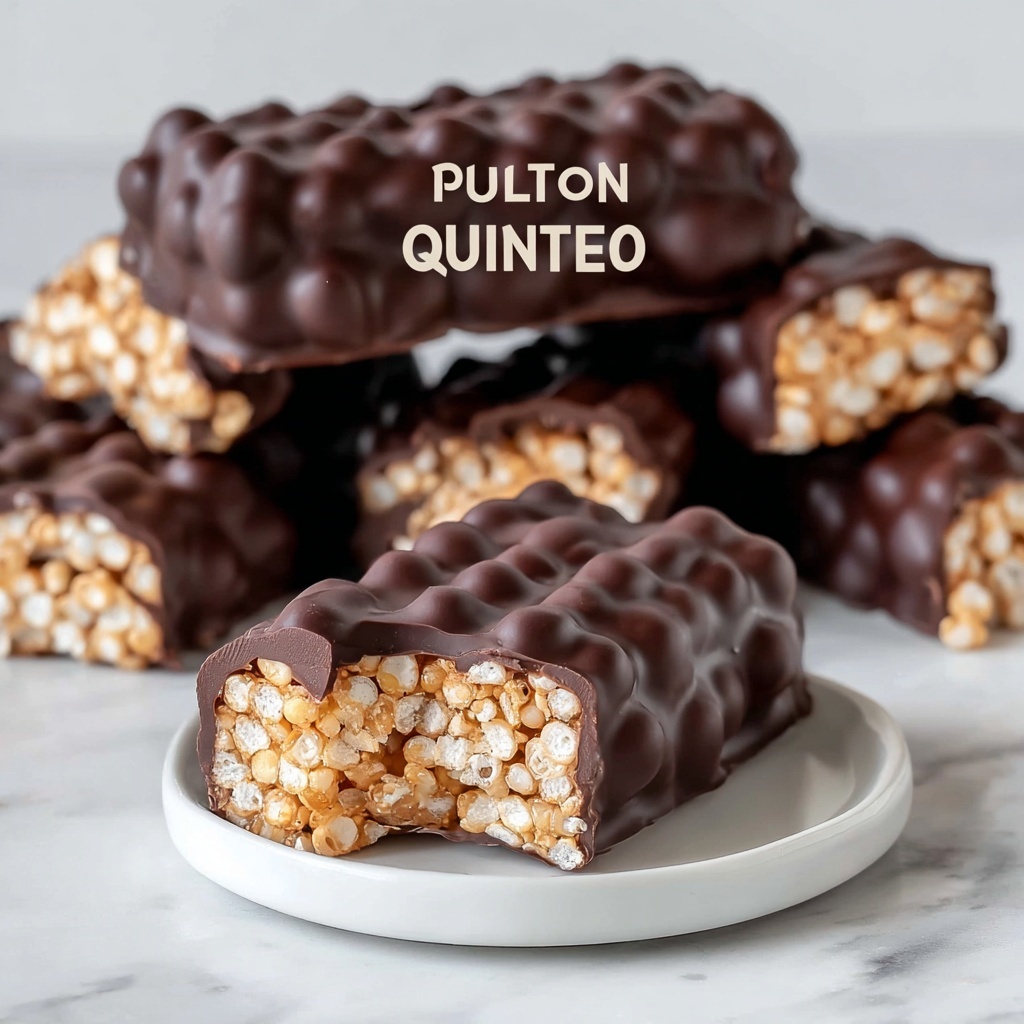
If you are on the hunt for a delicious, wholesome snack that perfectly combines nutrition with indulgence, look no further than this Chocolate Quinoa Protein Bars Recipe. These bars are an absolute game changer when it comes to fueling your body with plant-powered protein and fiber, all wrapped up in a luscious chocolate coating. The puffed quinoa provides a delightful crunch, while the almond butter and honey create a smooth, sticky base, making these bars both satisfying and energizing. Whether you need a quick bite before a workout or a guilt-free dessert, these bars bring joy in every bite and will quickly become a staple in your snack rotation.
Ingredients You’ll Need
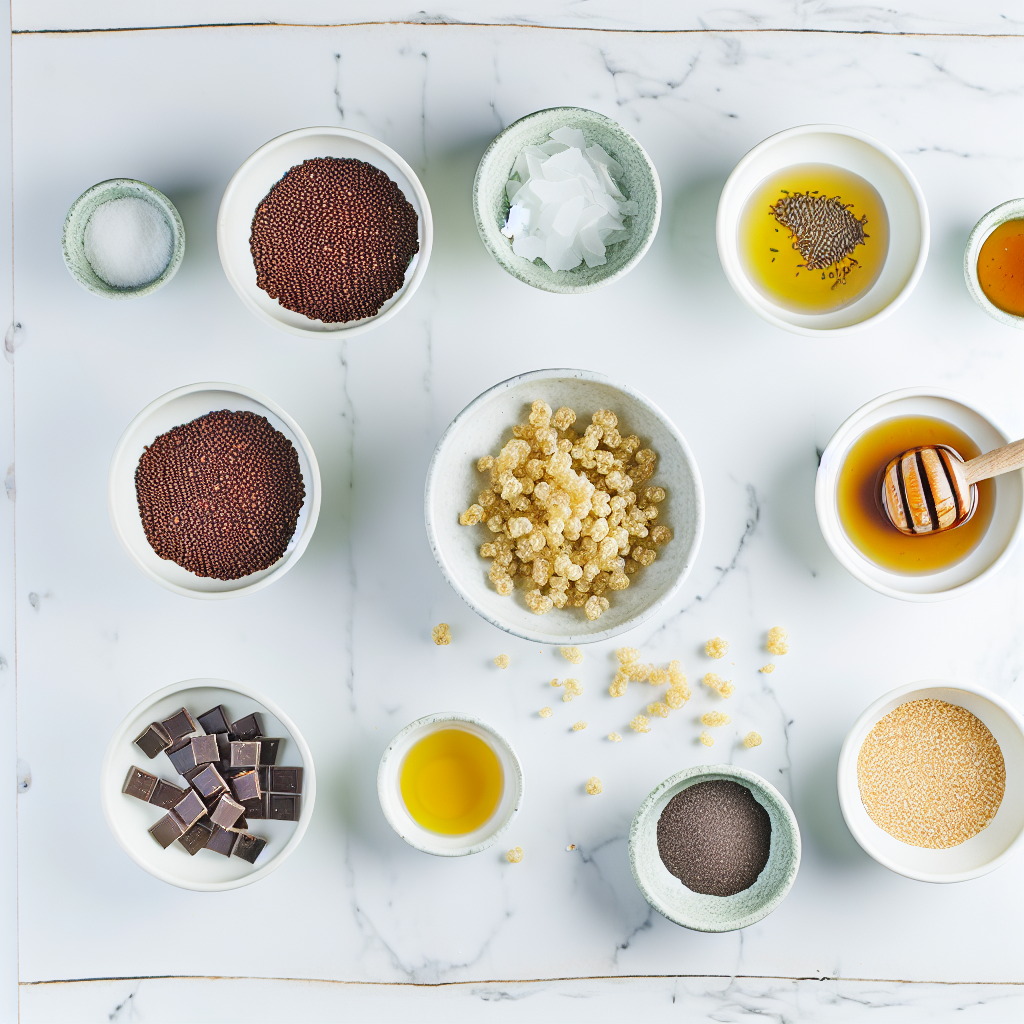
Gathering the right ingredients is key to creating the perfect balance of flavor, texture, and nutrition in your Chocolate Quinoa Protein Bars Recipe. Each component plays an essential role, from the crunchy quinoa to the rich chocolate topping.
- Puffed quinoa: This provides a light, crispy texture and is packed with protein and fiber to keep you full.
- Vanilla or chocolate protein powder: Choose your favorite plant-based or whey option to boost the protein content and add flavor.
- Chia seeds or ground flaxseed: Optional but highly recommended for an extra fiber punch and omega-3 benefits.
- Almond butter (or peanut butter): Acts as the creamy, sticky binder that holds everything together with a nutty richness.
- Honey or maple syrup: Natural sweeteners that add just the right amount of sweetness while keeping the bars moist.
- Vanilla extract: Enhances all the flavors with a subtle, warm aroma.
- Sea salt: A pinch sharpens the overall taste and balances the sweetness.
- Dark chocolate chips or chopped dark chocolate: This makes the irresistible glossy top layer that hardens into a perfect shell of chocolatey goodness.
- Coconut oil: Added to the chocolate for a smooth melt and shiny finish.
How to Make Chocolate Quinoa Protein Bars Recipe
Step 1: Prep the Pan
Start off by lining an 8×8-inch baking dish with parchment paper. The overhang will be your best friend when it’s time to lift out the bars, making slicing a breeze and cleanup quicker. Having this ready upfront is a small step that makes a big difference later on.
Step 2: Mix the Dry Ingredients
In a large bowl, combine the puffed quinoa, protein powder, and if you decide to include them, the chia seeds or ground flaxseed. Give it a good stir to make sure everything is evenly distributed. This dry base is the crunchy heart of your bars, so mix it gently but thoroughly.
Step 3: Heat the Binder
In a small saucepan set on low heat, warm your almond butter together with honey or maple syrup, vanilla extract, and a pinch of sea salt. Keep stirring until the mixture is smooth and warm but never boiling—this gentle heat helps everything meld together without scrambling the flavors.
Step 4: Combine Wet and Dry
Pour your warm binder mixture over the dry ingredients. Using a spatula, carefully fold everything together until the quinoa and protein powder is fully coated and the mixture sticks together in a cohesive, sticky mass. This step is what holds the bars firmly without any crumbling.
Step 5: Press into Pan
Transfer the sticky mixture to your prepared baking pan. Press it down firmly and evenly — you want a compact layer without air pockets for that perfect bite. Use the back of a spoon, a spatula, or even another piece of parchment paper to help press it down.
Step 6: Chill the Base
Pop the pan into the refrigerator for 20 to 30 minutes. This chilling step allows the base to firm up nicely, giving you a sturdy canvas for the chocolate topping that won’t melt or mix prematurely.
Step 7: Make the Chocolate Coating
While the base chills, melt your dark chocolate chips with the coconut oil in a microwave-safe bowl or double boiler. Heating slowly and stirring every 20 seconds ensures your chocolate turns out glossy and silky-smooth, ready to coat those bars like a dream.
Step 8: Top with Chocolate
Pour the melted chocolate evenly over your chilled quinoa base and spread it out gently with an offset spatula or back of a spoon. A few gentle taps on the counter will help remove any air bubbles and give you a perfect, shiny chocolate surface.
Step 9: Chill Until Set
Return the pan to the refrigerator and chill for at least one hour, allowing the chocolate to harden completely. Once set, the bars will hold their shape beautifully and be ready to slice.
Step 10: Slice and Store
Using the parchment overhang, lift the entire slab out of the pan. Slice into 10 to 12 bars with a sharp knife, and store them in an airtight container in the refrigerator for up to a week. These bars also freeze beautifully if you want to keep a stash ready for longer occasions.
How to Serve Chocolate Quinoa Protein Bars Recipe
Garnishes
If you want to dress up your bars, consider sprinkling a touch of sea salt flakes or some crushed nuts on top of the melted chocolate before chilling. Not only does it add a pretty finish, but it also introduces a delightful texture contrast with the smooth chocolate.
Side Dishes
These bars are fantastic on their own, but pairing them with a fresh fruit salad or a dollop of Greek yogurt can turn a simple snack into a refreshing mini-meal. The creamy or fruity accompaniment complements the nutty quinoa and rich chocolate beautifully.
Creative Ways to Present
Turn snack time into a fun experience by wrapping individual bars in parchment paper tied with colorful strings for grab-and-go treats. They also make great gifts, especially when arranged in pretty boxes or jars, highlighting the care you put into the Chocolate Quinoa Protein Bars Recipe.
Make Ahead and Storage
Storing Leftovers
Your leftover bars will stay fresh for up to one week in an airtight container stored in the refrigerator. This ensures they keep their texture and chocolate coating nice and firm, ready to satisfy any snack attack.
Freezing
To extend their shelf life, freeze your Chocolate Quinoa Protein Bars Recipe in a zip-top bag or container for up to three months. Separate layers with parchment paper to prevent sticking, so you can pull out one or two bars whenever you need a quick protein boost.
Reheating
While these bars are typically enjoyed cold or at room temperature, if you prefer a softer, melt-in-your-mouth texture, let frozen bars thaw at room temperature for about 30 minutes before eating. Avoid microwave reheating as it can change the texture of the chocolate and almond butter.
FAQs
Can I use a different type of nut butter?
Absolutely! Peanut butter, cashew butter, or even sunflower seed butter will work wonderfully. Just keep in mind that each nut butter will bring its own flavor and slightly different texture.
Is it necessary to use protein powder?
Protein powder is essential in this Chocolate Quinoa Protein Bars Recipe to increase protein content and help bind the ingredients. However, you can experiment with adding extra puffed quinoa or nuts if you prefer to skip it, though the texture might differ.
Can I make this recipe vegan?
Yes! Use maple syrup instead of honey and choose a plant-based protein powder and dark chocolate that is dairy-free. This way, you keep the bars completely vegan while still enjoying all the delicious flavors.
How crunchy are these bars?
The puffed quinoa gives the bars a light crunch that contrasts beautifully with the creamy almond butter and smooth chocolate topping. They’re firm, yet not hard, perfect for a satisfying chew without being tough on your teeth.
Can I add extras like dried fruit or nuts?
You can! Adding chopped nuts, dried cranberries, or even coconut flakes can personalize the bars to your taste. Just be mindful of maintaining the right balance so the bars still hold together nicely.
Final Thoughts
Trust me when I say this Chocolate Quinoa Protein Bars Recipe is a must-try for anyone looking to blend health and happiness in a snack. They’re incredibly simple to make, adaptable to your preferences, and utterly delicious. Once you’ve tasted the perfect combo of crunchy quinoa and rich chocolate, you’ll wonder how you ever snacked without them. Grab your ingredients and start crafting these bars today — your future self will thank you!
Print
Chocolate Quinoa Protein Bars Recipe
- Prep Time: 15 minutes
- Cook Time: 15 minutes
- Total Time: 1 hour 15 minutes
- Yield: 12 bars
- Category: Snack
- Method: No-Cook
- Cuisine: American
- Diet: Gluten Free
Description
These Chocolate Quinoa Protein Bars are a delicious and nutritious homemade snack combining puffed quinoa, protein powder, and a smooth almond butter binder with a rich dark chocolate coating. Perfect for a post-workout boost or an energy-packed treat, these bars are easy to make, naturally gluten-free, and provide a balanced mix of protein, healthy fats, and fiber. The no-bake preparation ensures a quick process with wholesome ingredients and customizable options for sweetness and texture.
Ingredients
For the Dry Base
- 1 ½ cups puffed quinoa
- ½ cup vanilla or chocolate protein powder (plant-based or whey)
- 2 tbsp chia seeds or ground flaxseed (optional for extra fiber)
For the Binding Mixture
- ½ cup almond butter (or peanut butter)
- ⅓ cup honey or maple syrup
- 1 tsp vanilla extract
- Pinch of sea salt
For the Chocolate Coating
- 1 ½ cups dark chocolate chips or chopped dark chocolate
- 1 tbsp coconut oil (for smoother melting)
Instructions
- Prep the Pan: Line an 8×8-inch baking dish with parchment paper, ensuring enough overhang on the sides to lift out the bars easily once set. Set the pan aside.
- Mix the Dry Ingredients: In a large mixing bowl, stir together the puffed quinoa, protein powder, and chia seeds or flaxseed if using, ensuring the mixture is evenly combined.
- Heat the Binder: In a small saucepan over low heat, combine almond butter, honey or maple syrup, vanilla extract, and a pinch of sea salt. Stir continuously until smooth and warm without boiling.
- Combine Wet and Dry: Pour the warm binder mixture over the dry ingredients. Mix thoroughly with a spatula until all dry ingredients are coated and the mixture is sticky and uniform.
- Press into Pan: Transfer the mixture to the prepared pan. Press firmly into an even layer using a spatula, back of a spoon, or parchment paper sheet.
- Chill the Base: Refrigerate the pan for 20 to 30 minutes to let the base firm up before adding chocolate.
- Make the Chocolate Coating: Melt the chocolate chips and coconut oil together in a microwave-safe bowl or double boiler, stirring every 20 seconds if microwaving, until fully melted and glossy.
- Top with Chocolate: Pour melted chocolate over the chilled quinoa base. Spread evenly to the edges and gently tap the pan to remove air bubbles.
- Chill Until Set: Return the pan to the refrigerator and chill for at least 1 hour until the chocolate hardens and bars are firm.
- Slice and Store: Lift the bars out using parchment overhang. Cut into 10 to 12 bars. Store in an airtight container in the refrigerator for up to 1 week or freeze for longer storage.
Notes
- For extra fiber, include chia seeds or ground flaxseed in the dry ingredients.
- You can use peanut butter instead of almond butter based on preference or availability.
- Maple syrup is a great vegan substitute for honey to keep the bars plant-based.
- The protein powder can be plant-based or whey protein, depending on dietary needs.
- To speed firming, place bars in the freezer for 15-20 minutes before the chocolate coating.
- If you prefer a crunchier texture, toast the puffed quinoa lightly before mixing.
- Store bars in the fridge to maintain firmness, especially in warmer climates.


