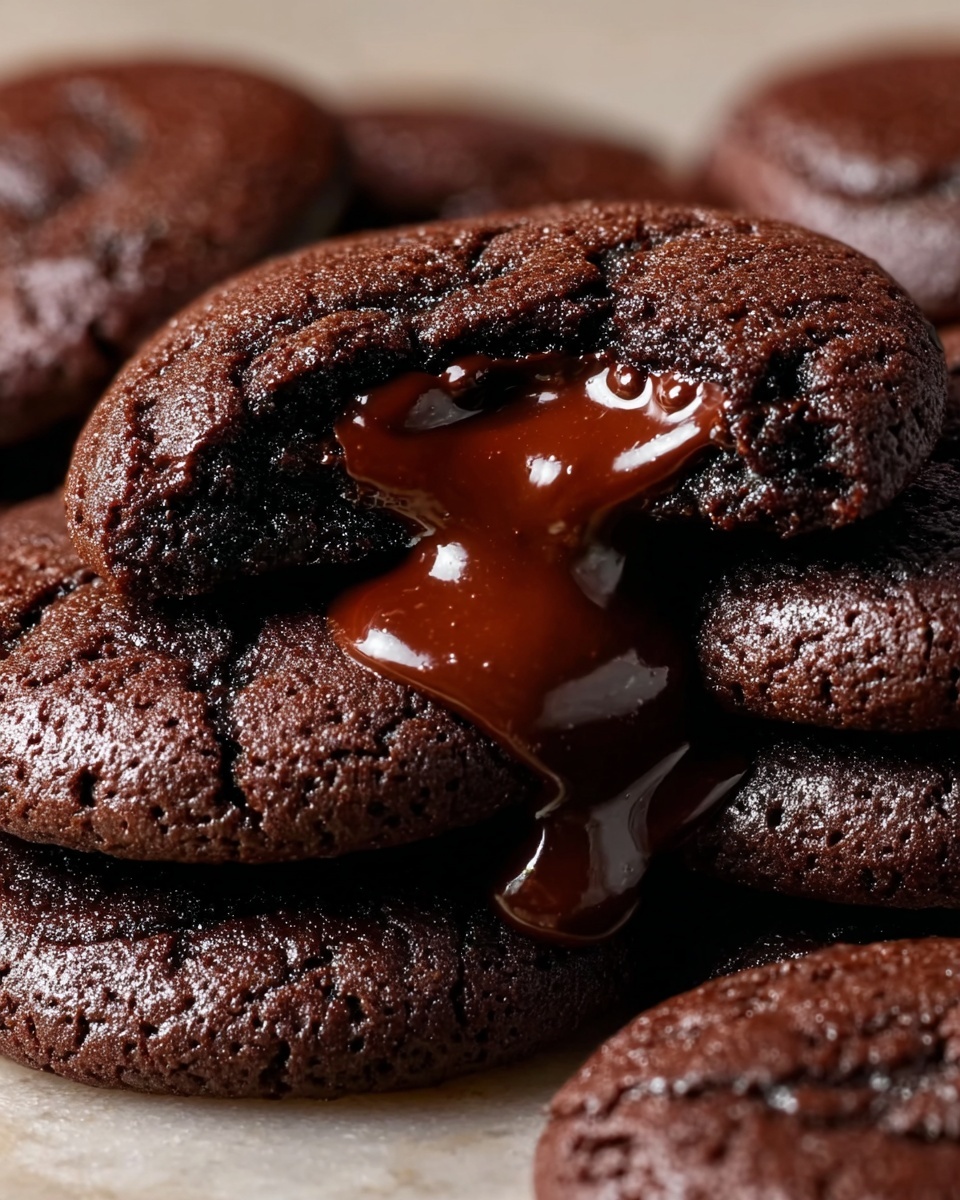
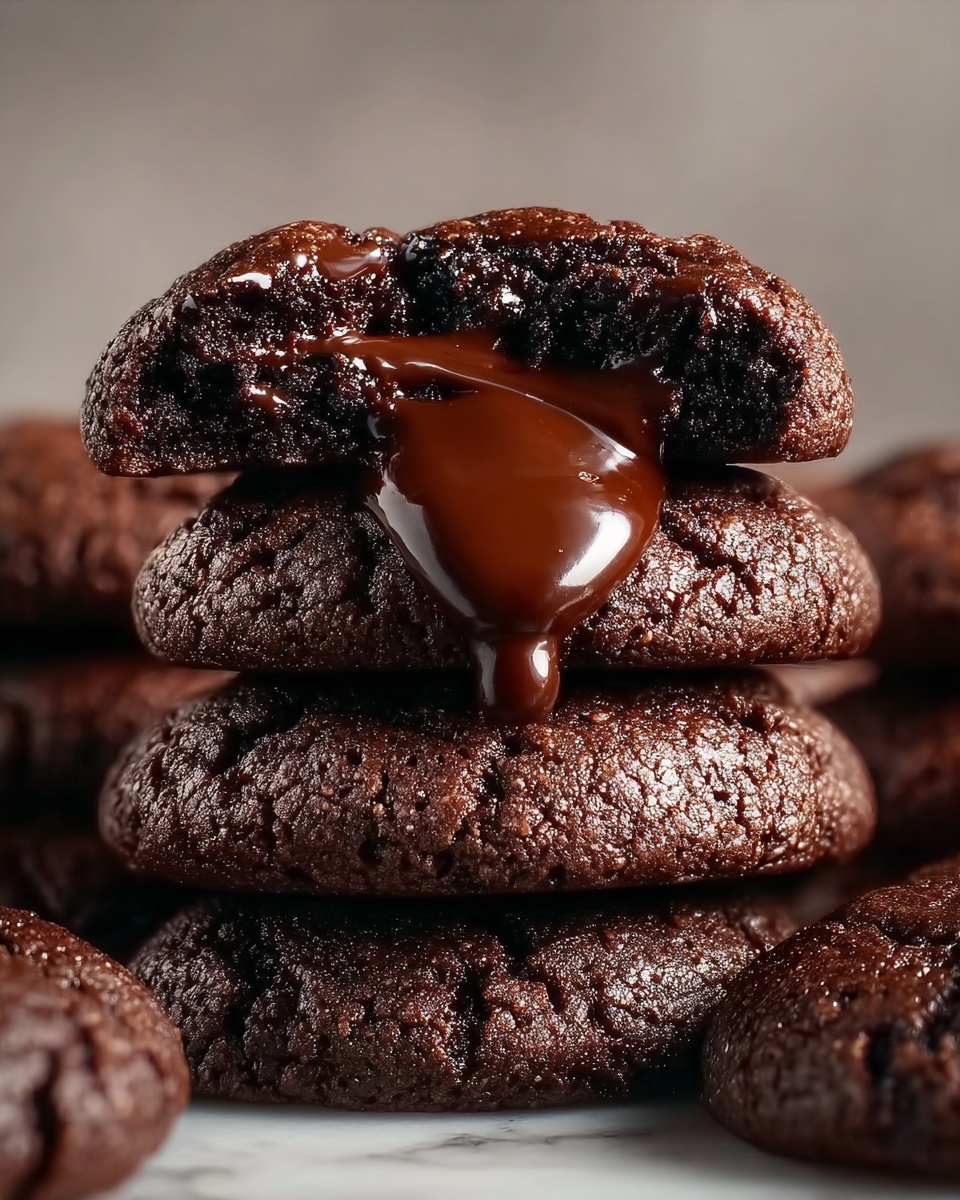
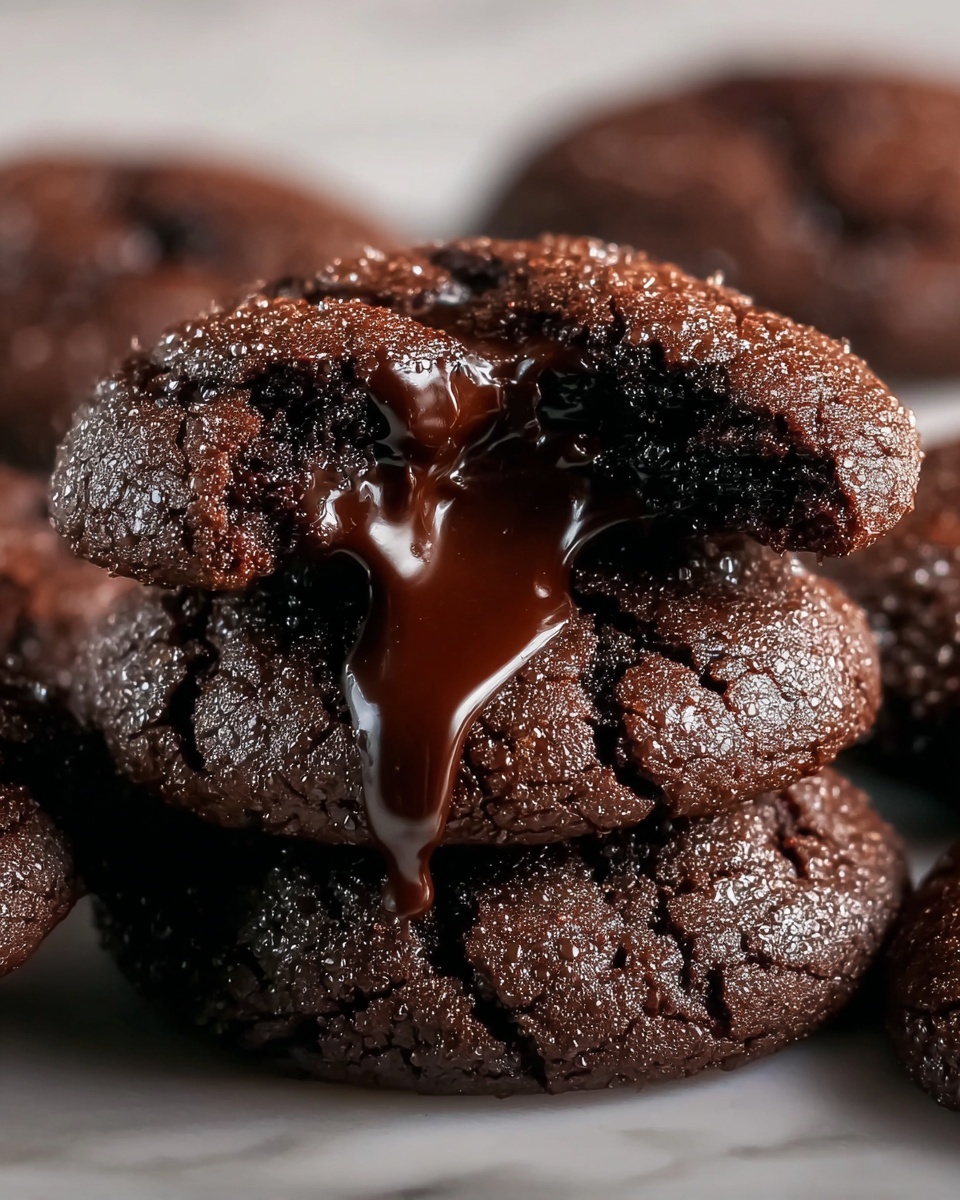
If you have a serious sweet tooth and love the idea of combining gooey chocolate with brownie-like cookies, you are going to fall head over heels for this Chocolate Lava Brownie Cookies Recipe. Imagine biting into a soft, rich cookie that hides a molten, fudgy chocolate center that oozes out with every bite—pure indulgence that hits all the right spots. This recipe brings together the best of chewy brownies and decadent lava cakes in a portable, easy-to-share cookie form that’s perfect for parties, cozy nights in, or whenever you want a showstopper dessert with minimal fuss.
Ingredients You’ll Need
These ingredients may seem simple, but each one plays a crucial role in bringing out the perfect texture, flavor, and color in our Chocolate Lava Brownie Cookies Recipe. From the rich dark chocolate to the luscious condensed milk, every component adds something special.
- Dark or bittersweet chocolate (120g): Provides the deep, intense chocolate flavor and the molten core inside the cookies.
- Sweetened condensed milk (1/2 cup or 6 oz): Adds luscious sweetness and creates that dreamy fudge lava center.
- Unsalted butter, divided (2 tbsp + 1/2 cup softened): Ensures the cookies remain tender and rich without overpowering the chocolate taste.
- Granulated sugar (1/3 cup): Helps create a slight crisp edge on the cookie for contrast.
- Brown sugar, packed (1/3 cup): Adds moistness and depth with a slight caramel undertone.
- Large egg (1): Binds everything together while contributing to the chewy texture.
- All-purpose flour (1 cup or 130g): Forms the cookie structure and gives just the right softness.
- Dutch processed cocoa powder (1/3 cup or 35g): Intensifies the chocolate flavor and imparts a dark, beautiful color.
- Baking soda (1/4 tsp): Helps the cookies gently rise without losing their dense chewiness.
- Baking powder (1/4 tsp): Adds a touch of lift keeping the cookies perfectly tender.
- Salt (1/4 tsp): Balances the sweetness and amplifies the chocolate notes.
How to Make Chocolate Lava Brownie Cookies Recipe
Step 1: Create the Chocolate Lava Fudge
Start by melting the dark chocolate together with the sweetened condensed milk over low heat. Stir carefully until the chocolate becomes smooth and glossy. Adding butter here makes the fudge luscious and easy to scoop later. Once combined, turn off the heat and let this molten magic set in the freezer before popping it into your cookies.
Step 2: Prepare the Cookie Dough
In a large mixing bowl, beat the softened butter with both granulated and brown sugars until light and fluffy—this is where the magic of texture begins. Next, whisk in the egg until fully incorporated. Gently fold in your dry ingredients: all-purpose flour, cocoa powder, baking soda, baking powder, and salt. Be careful not to overmix; you want a tender dough that holds together well but stays soft.
Step 3: Freeze the Dough and Fudge Balls
Freezing is your best friend in this recipe. Place spoonfuls of the fudge mixture onto a parchment-lined tray to freeze into small balls. Meanwhile, chill the cookie dough in the fridge for about 10 minutes to make it easier to handle and to prevent spreading during baking.
Step 4: Assemble the Cookies
Divide the cookie dough into equal portions. Flatten each piece slightly and nestle one frozen fudge ball in the center. Wrap the dough completely around the fudge, ensuring there are no gaps exposed, then roll it back into a smooth ball shape. This seal traps the molten center perfectly inside your cookie.
Step 5: Bake to Perfection
Place the cookies on a parchment-lined baking sheet with enough room between each. Bake in a preheated 375°F oven for about 12 to 13 minutes until the cookies appear semi-firm but still soft to the touch. Remember, they will continue to set as they cool, so don’t worry if they look slightly underdone at first!
Step 6: Cool and Enjoy
Allow the cookies to cool for at least 15 minutes before biting in—this wait is well worth it as the lava center firms up slightly but remains delectably molten. Then dig into the gooey, chocolatey wonder that is this Chocolate Lava Brownie Cookies Recipe.
How to Serve Chocolate Lava Brownie Cookies Recipe
Garnishes
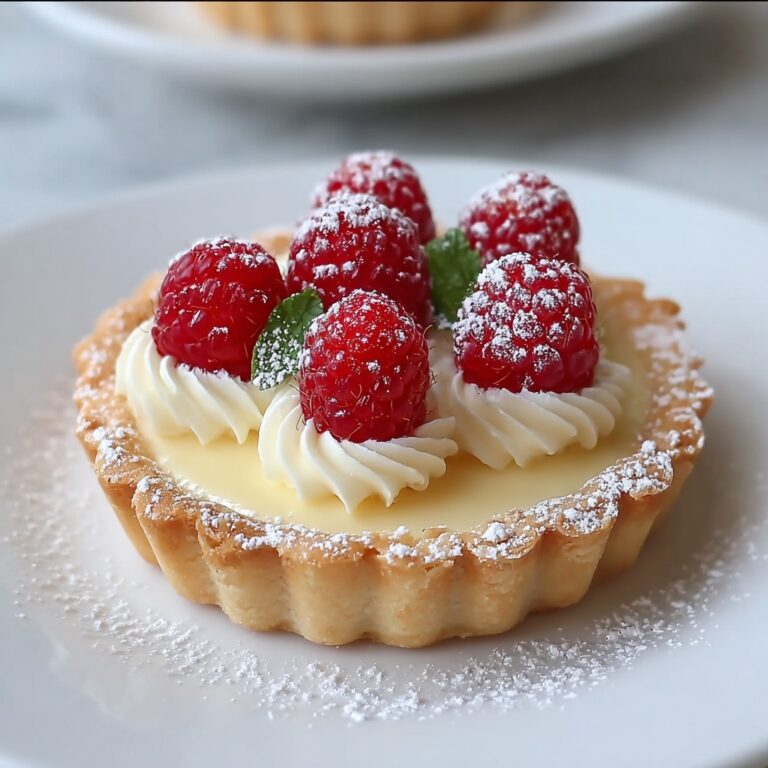
To take these cookies to the next level, sprinkle a light dusting of powdered sugar or cocoa powder just before serving. A dollop of whipped cream or a scoop of vanilla ice cream pairs beautifully, balancing the rich chocolate with creamy lightness. Fresh raspberries or strawberries also add a lovely tangy freshness and a pop of color.
Side Dishes
While these chocolate lava brownie cookies are indulgent on their own, serving them alongside a hot cup of coffee or a milky latte can elevate your dessert moment into a truly cozy experience. For a party, set these out with a variety of chilled milk options or a rich dark hot chocolate for the ultimate chocolate lover’s dream.
Creative Ways to Present
Arrange the cookies on a rustic wooden board or inside a decorative cake dome for an inviting centerpiece. For a bit of theatrical fun, serve them warm and encourage guests to break one open to reveal that molten lava center. Drizzle with homemade caramel or chocolate sauce for an added wow factor that’s sure to impress.
Make Ahead and Storage
Storing Leftovers
These cookies keep wonderfully at room temperature in an airtight container for up to 3 days. Make sure they are completely cooled before storing to avoid sogginess. Their fudgy centers stay delightfully soft, making them just as good the next day.
Freezing
If you want to enjoy these treats later, freeze the assembled cookie dough balls before baking. Place them on a parchment-lined tray, freeze until solid, then transfer to a freezer-safe container or bag. They can be stored frozen for up to 2 months and baked fresh when you’re ready.
Reheating
To warm up leftover cookies and revive their molten centers, pop them in a 300°F oven for about 5 to 7 minutes. Avoid microwaving if possible, as this can make the cookies too soft or unevenly heated. Reheating this way helps restore the gooey chocolate center and the tender cookie exterior perfectly.
FAQs
Can I use milk chocolate instead of dark chocolate for the lava center?
Absolutely! Milk chocolate will give you a sweeter, milder lava center, which some people might prefer. Just keep in mind it won’t have that deep fudgy intensity that dark or bittersweet chocolate provides, but it will still be delicious.
Is it necessary to freeze the fudge balls before adding them to the dough?
Yes, freezing the fudge balls helps them hold their shape when you wrap them in the cookie dough and during baking. It prevents the fudge from melting too quickly and leaking out, ensuring that perfect molten core inside every cookie.
Can I make smaller or larger cookies with this recipe?
You sure can! Just adjust the baking time accordingly. Smaller cookies will bake faster and may require about 8-10 minutes, while larger ones might need a couple extra minutes. Keep an eye on them so the centers stay molten.
What’s the best way to prevent the fudge lava from leaking during baking?
Wrapping the cookie dough completely around the frozen fudge ball and sealing any gaps tightly is key. Also, chilling or freezing the cookie dough before assembly makes it sturdier and less likely to spread or break open during baking.
Can I substitute the all-purpose flour for gluten-free flour?
Yes, you can try a 1-to-1 gluten-free baking flour blend, but the texture may vary slightly. You might want to add a bit more moisture or binding agents like xanthan gum depending on your blend. These cookies rely on a tender yet sturdy dough to encase the lava center, so adjustments could be needed.
Final Thoughts
I honestly can’t recommend this Chocolate Lava Brownie Cookies Recipe enough—it’s one of those desserts that feels fancy but comes together with straightforward ingredients and steps. Whether you’re impressing friends or simply treating yourself, these cookies deliver warm, molten gooey happiness in every bite. So grab your ingredients, preheat your oven, and get ready for a chocolate experience that will surely become a new favorite!
Print
Chocolate Lava Brownie Cookies Recipe
- Prep Time: 20 minutes
- Cook Time: 13 minutes
- Total Time: 43 minutes
- Yield: 6 cookies
- Category: Dessert
- Method: Baking
- Cuisine: American
Description
Indulge in these decadent Chocolate Lava Brownie Cookies, featuring a rich, molten chocolate center encased in a soft, fudgy brownie cookie. Combining the best of both worlds, these cookies deliver a gooey lava surprise with every bite, perfect for chocolate lovers seeking a delightful homemade treat.
Ingredients
For the Chocolate Lava Filling
- 120g dark or bittersweet chocolate
- 1/2 cup sweetened condensed milk (6 oz)
- 2 tbsp unsalted butter (28g)
For the Cookie Dough
- 1/2 cup unsalted butter, softened (113g)
- 1/3 cup granulated sugar (67g)
- 1/3 cup brown sugar, packed (67g)
- 1 large egg
- 1 cup all-purpose flour (130g)
- 1/3 cup Dutch processed cocoa powder (35g)
- 1/4 tsp baking soda
- 1/4 tsp baking powder
- 1/4 tsp salt
Instructions
- Prepare the Chocolate Lava Filling: Place the dark or bittersweet chocolate and sweetened condensed milk in a nonstick pan over low heat. Stir continuously until the chocolate fully melts and the mixture becomes shiny and smooth. Add in 2 tablespoons of unsalted butter and stir until completely combined. Turn off the heat and allow the mixture to cool slightly.
- Form the Chocolate Balls: Using a tablespoon, scoop the fudge mixture onto a parchment-lined baking sheet, forming balls weighing approximately 30-35g each. Freeze the balls until firm, as only 6 will be used to fill the cookies.
- Cream the Butter and Sugars: In a mixing bowl, use an electric mixer to whisk the softened butter, granulated sugar, and brown sugar together for 2-3 minutes until the mixture is light and creamy.
- Add the Egg: Incorporate the large egg into the creamed butter and sugars, whisking for another 30 seconds until well combined.
- Mix Dry Ingredients: In a separate bowl, combine the all-purpose flour, Dutch processed cocoa powder, baking soda, baking powder, and salt. Gently fold these dry ingredients into the wet mixture using a spatula, mixing just until combined to avoid overworking the dough.
- Chill the Dough: Freeze the cookie dough for 10 minutes to make it easier to handle and shape.
- Preheat the Oven: Preheat your oven to 375°F (190°C) using the conventional setting.
- Shape the Cookies: Divide the chilled dough into 6 equal portions of about 75g each. Roll each portion into a ball.
- Stuff the Cookies: Flatten each dough ball and place one frozen chocolate fudge ball in the center. Fully enclose the fudge by wrapping the dough around it and then roll again into smooth balls.
- Arrange for Baking: Place the stuffed dough balls on a parchment-lined baking sheet, ensuring there is enough space between each ball to allow for spreading.
- Bake: Bake the cookies for 12 to 13 minutes until they become semi-firm to the touch. Keep in mind they will firm up further as they cool.
- Cool and Serve: Allow the cookies to cool on the baking sheet for 15 minutes before serving to let the chocolate lava set slightly and enhance the gooey texture inside.
Notes
- Freezing the fudge balls is essential to prevent them from melting too quickly during baking and to maintain the lava center.
- Do not overmix the dough after adding the dry ingredients to keep cookies tender.
- If you prefer a more intense chocolate flavor, use a higher percentage of dark chocolate for the fudge filling.
- These cookies are best enjoyed slightly warm to experience the molten center at its best.
- Store leftover cookies in an airtight container at room temperature for up to 3 days or refrigerate to extend freshness.


