
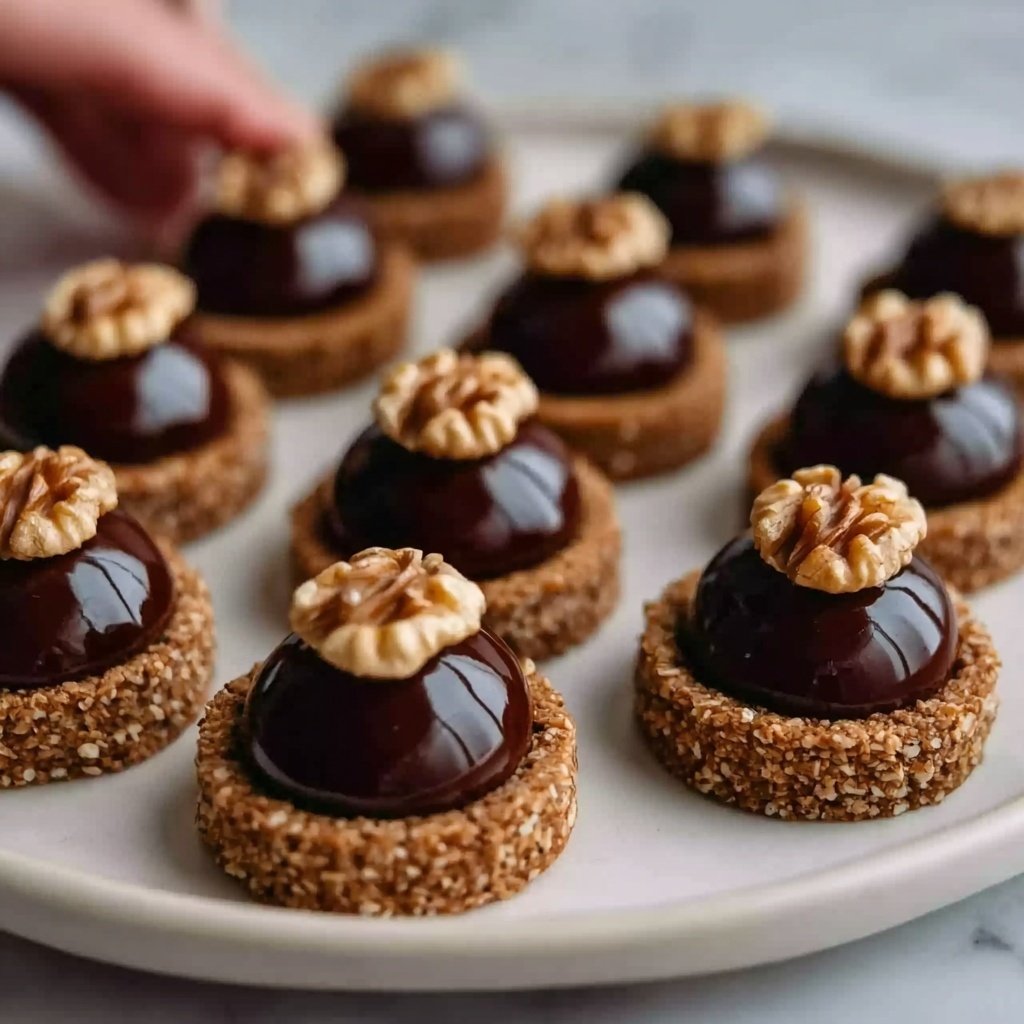
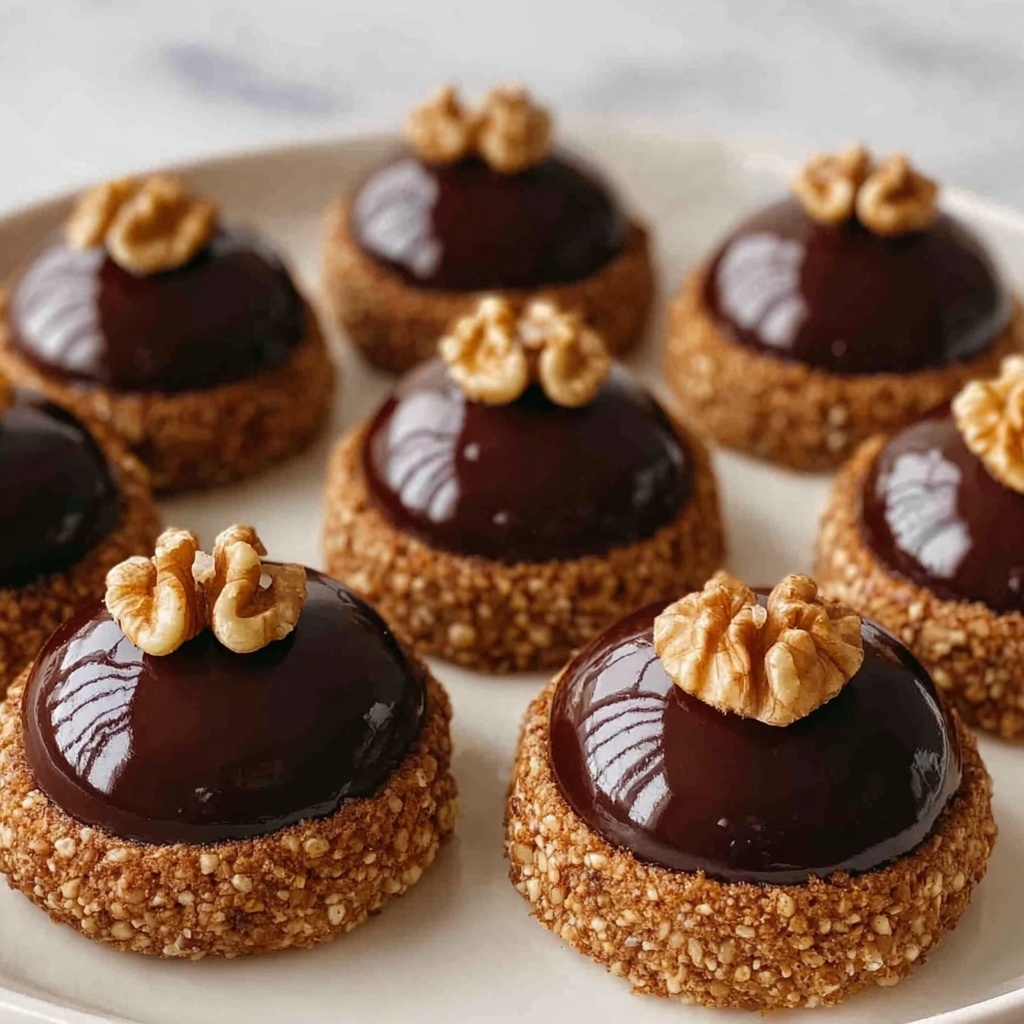
If you are a fan of rich, nutty, and chocolatey bites, then this Chocolate Hazelnut Thumbprint Cookies Recipe is destined to become one of your all-time favorites. These cookies are a charming twist on the classic thumbprint treat, boasting a tender cocoa-infused dough with the perfect crunch of toasted hazelnuts, crowned by a luscious dollop of melty chocolate or chocolate hazelnut spread. This recipe brings together simple ingredients to create a cookie that is as delightful to make as it is to enjoy. Whether you’re baking for a holiday, a cozy night in, or to impress friends, these cookies deliver a homemade touch that feels truly special and irresistible.
Ingredients You’ll Need
Every ingredient in the Chocolate Hazelnut Thumbprint Cookies Recipe plays an essential role in building flavor, texture, and that gorgeous rich color. With just a handful of pantry staples and fresh toasted hazelnuts, you’re set to make a batch of show-stopping cookies.
- 1 cup all-purpose flour: Provides the sturdy base for the cookie’s soft and tender crumb.
- 1/4 cup unsweetened cocoa powder: Adds deep chocolate flavor and a beautiful dark hue.
- 1/2 cup unsalted butter, softened: Ensures richness and helps create a melt-in-your-mouth texture.
- 1/4 cup granulated sugar: Balances the richness with subtle sweetness and slight crispness.
- 1/4 cup brown sugar, packed: Adds moisture, a hint of caramel, and chewy complexity.
- 1 egg yolk: Binds the dough and enriches the flavor with a silky touch.
- 3/4 cup toasted hazelnuts, chopped: Gives a nutty crunch and irresistible aroma.
- 1/2 cup semi-sweet chocolate chips or chocolate hazelnut spread: The crowning indulgence that fills the thumbprint and delivers that signature gooey center.
How to Make Chocolate Hazelnut Thumbprint Cookies Recipe
Step 1: Prepare Your Oven and Baking Sheets
Start by heating your oven to 350°F (175°C). While the oven warms, line two baking sheets with parchment paper. This simple step not only helps prevent sticking but also makes cleanup a breeze after baking your delicious cookies.
Step 2: Cream the Butter and Sugars
Next, cream together the softened butter with both the granulated and brown sugars until the mixture becomes light and fluffy. This aeration is key to giving your cookies a tender crumb and a slight lift. The combination of sugars also adds a subtle caramel undertone that contrasts beautifully with the cocoa.
Step 3: Mix in Flour and Cocoa Powder
Gradually add the all-purpose flour along with the cocoa powder to the creamed butter and sugars. Mix carefully until just combined—overmixing can toughen the dough. At this stage, you’ll notice the dough taking on a rich, chocolate color that promises deep flavor in every bite.
Step 4: Fold in the Toasted Hazelnuts
Gently stir in your chopped toasted hazelnuts. Toasting the nuts beforehand is a game changer; it intensifies their flavor while adding a lovely crunch that perfectly contrasts with the cookie’s soft texture.
Step 5: Shape the Cookies and Create Thumbprints
Roll the dough into 1-inch balls and place them evenly spaced on your prepared baking sheets. Using your thumb, gently press down in the center of each ball to create a small indentation—this is where the chocolate magic will go later!
Step 6: Bake and Fill
Bake your cookies for 10-12 minutes, or until the edges have set and are slightly firm to the touch. Immediately after removing the cookies from the oven, fill each thumbprint with chocolate chips or a spoonful of chocolate hazelnut spread while they are still warm. This lets the filling melt slightly, creating a luscious, gooey center that’s utterly irresistible. Allow the cookies to cool completely before serving.
How to Serve Chocolate Hazelnut Thumbprint Cookies Recipe
Garnishes
To elevate your cookies, consider a light dusting of powdered sugar for a festive and elegant look. You could also sprinkle finely chopped hazelnuts or shave a bit of dark chocolate over the tops for added texture and visual appeal.
Side Dishes
These cookies pair wonderfully with a simple glass of cold milk, a creamy cappuccino, or a cozy cup of tea. Their rich flavors also complement a fresh berry salad or a scoop of vanilla ice cream when you want to turn your snack into a dessert experience.
Creative Ways to Present
For gift-giving or parties, arrange the cookies on a decorative platter with some fresh hazelnuts and chocolate curls around them. You can also package them in small mason jars or tins with a festive ribbon—perfect for sharing the joy of this Chocolate Hazelnut Thumbprint Cookies Recipe with friends and family.
Make Ahead and Storage
Storing Leftovers
Keep your cookies fresh by placing them in an airtight container at room temperature. They maintain their texture and flavor beautifully for up to 5 days, making them a great choice for baking ahead of time.
Freezing
For longer storage, freeze unbaked dough balls on a tray until solid, then transfer them to a freezer-safe bag. When ready, bake directly from frozen, adding a couple of extra minutes to the baking time. Baked cookies can also be frozen in an airtight container for up to 3 months—just thaw them at room temperature before enjoying.
Reheating
If desired, warm the cookies briefly in a preheated oven at 300°F (150°C) for about 5 minutes to revive their soft texture and refresh the melted chocolate filling. This little touch can make all the difference when serving leftovers.
FAQs
Can I substitute hazelnuts with other nuts?
Absolutely! While hazelnuts give a classic flavor profile, chopped almonds, pecans, or walnuts work beautifully and bring their own unique crunch and taste to the cookies.
Is it possible to make these cookies gluten-free?
Yes, you can substitute the all-purpose flour with a gluten-free flour blend designed for baking. Just be sure to check the blend includes xanthan gum or a similar binding agent for the best texture.
How do I prevent the cookies from spreading too much during baking?
Make sure your butter is softened but not melted, and chill the dough if your kitchen is warm before shaping. Using parchment paper also helps the cookies hold their shape better.
Can I use store-bought chocolate hazelnut spread for the filling?
Definitely! Using a store-bought spread like Nutella adds incredible flavor and ease, especially if you want that smooth, creamy filling without melting chocolate chips.
What if I don’t have a thumb to make the indentations?
No worries! You can use the back of a spoon, a melon baller, or even a small bottle cap to press indents into the dough balls. The goal is just to create a little well to hold the chocolate.
Final Thoughts
This Chocolate Hazelnut Thumbprint Cookies Recipe is truly a keeper in any baker’s repertoire. It combines simple ingredients with straightforward steps, resulting in delightfully fudgy, nutty cookies that feel both comforting and special. Whether you’re treating yourself or sharing a batch with loved ones, these cookies bring the joy of homemade baking to every bite. So grab your apron, preheat that oven, and get ready to enjoy some chocolate-hazelnut bliss!
Print
Chocolate Hazelnut Thumbprint Cookies Recipe
- Prep Time: 10 minutes
- Cook Time: 12 minutes
- Total Time: 22 minutes
- Yield: 24 servings (approximate size: 24 cookies)
- Category: Dessert
- Method: Baking
- Cuisine: American
Description
Delight in these rich and crunchy Chocolate Hazelnut Thumbprint Cookies featuring a tender cocoa-infused dough, toasted hazelnuts, and a luscious chocolate filling. Perfectly baked to crisp edges with a soft center, they’re an irresistible treat for any chocolate lover.
Ingredients
Dry Ingredients
- 1 cup all-purpose flour
- 1/4 cup unsweetened cocoa powder
Wet Ingredients
- 1/2 cup unsalted butter, softened
- 1/4 cup granulated sugar
- 1/4 cup brown sugar, packed
- 1 egg yolk
Add-ins and Filling
- 3/4 cup toasted hazelnuts, chopped
- 1/2 cup semi-sweet chocolate chips or chocolate hazelnut spread
Instructions
- Preheat oven: Preheat your oven to 350°F (175°C) and line two baking sheets with parchment paper to prevent sticking and ensure even baking.
- Cream butter and sugars: In a mixing bowl, cream together the softened butter, granulated sugar, and brown sugar until light and fluffy using a hand mixer or stand mixer. This incorporates air for a tender cookie texture.
- Combine dry ingredients: Gradually add the all-purpose flour and unsweetened cocoa powder to the creamed butter mixture. Mix just until combined to avoid overworking the dough.
- Add hazelnuts: Stir the toasted, chopped hazelnuts into the dough to evenly distribute the crunchy nuts throughout.
- Shape dough balls: Roll the dough into 1-inch diameter balls and place them about 2 inches apart on the prepared baking sheets. Gently press your thumb into the center of each ball to create an indentation for the filling.
- Bake cookies: Bake the cookies for 10-12 minutes or until the edges are firm but the centers remain soft. The cookies will set further while cooling.
- Add chocolate filling: Immediately after removing the cookies from the oven, fill each indentation with semi-sweet chocolate chips or a dollop of chocolate hazelnut spread while the cookies are still warm, allowing the chocolate to slightly melt and set perfectly.
- Cool completely: Allow the cookies to cool completely on the baking sheet before transferring them to a wire rack or serving, ensuring the chocolate filling solidifies and the cookies firm up.
Notes
- Use room temperature butter for easier creaming and better dough consistency.
- To toast hazelnuts, bake them on a baking sheet at 350°F for 8-10 minutes, then rub skins off with a kitchen towel for improved flavor and texture.
- Chocolate chips can be replaced with chocolate hazelnut spread based on preference for a smoother filling.
- For crisper cookies, bake an additional 1-2 minutes but be cautious not to overbake.
- Store cookies in an airtight container at room temperature for up to 5 days.
- Freezing the dough is possible for up to 1 month; thaw before baking.


