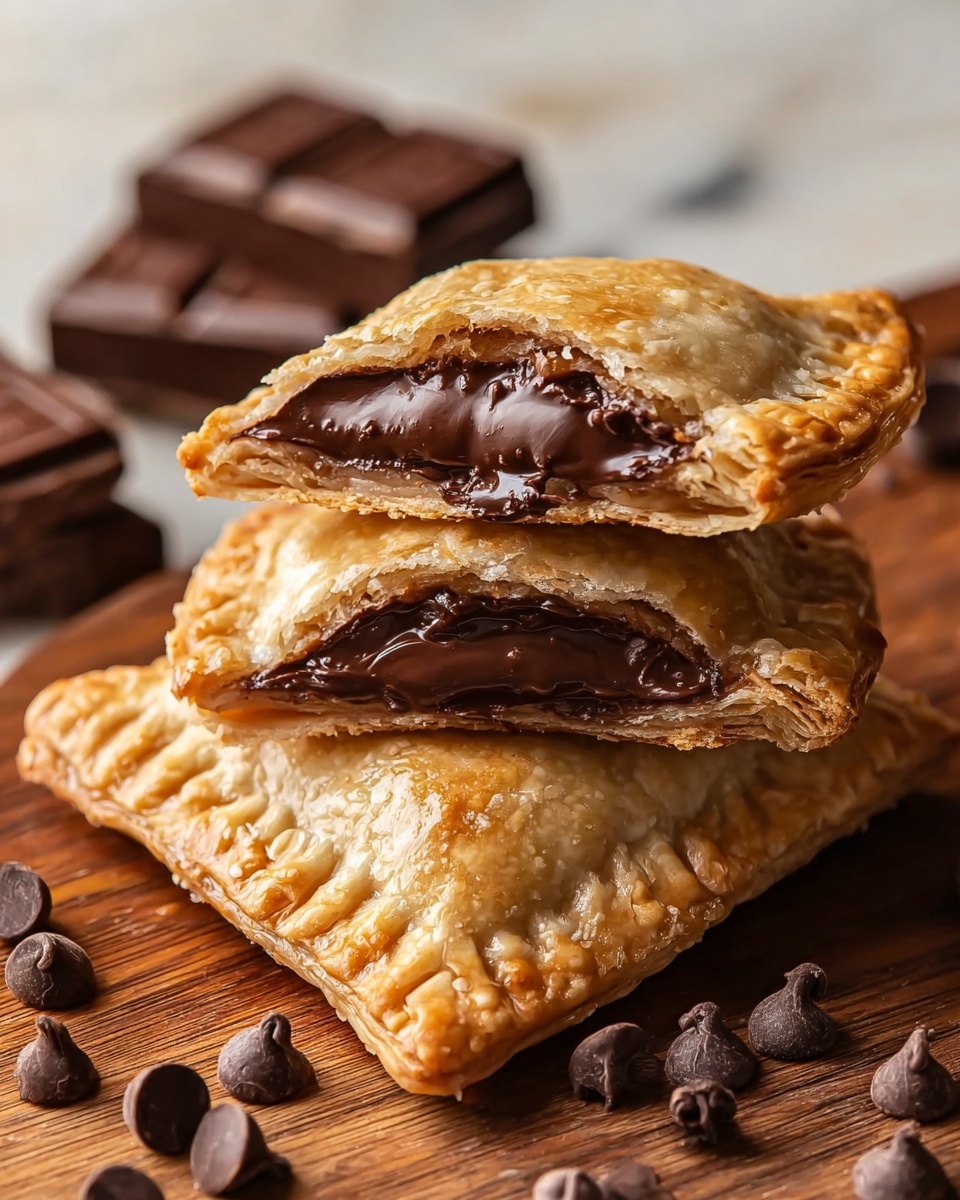
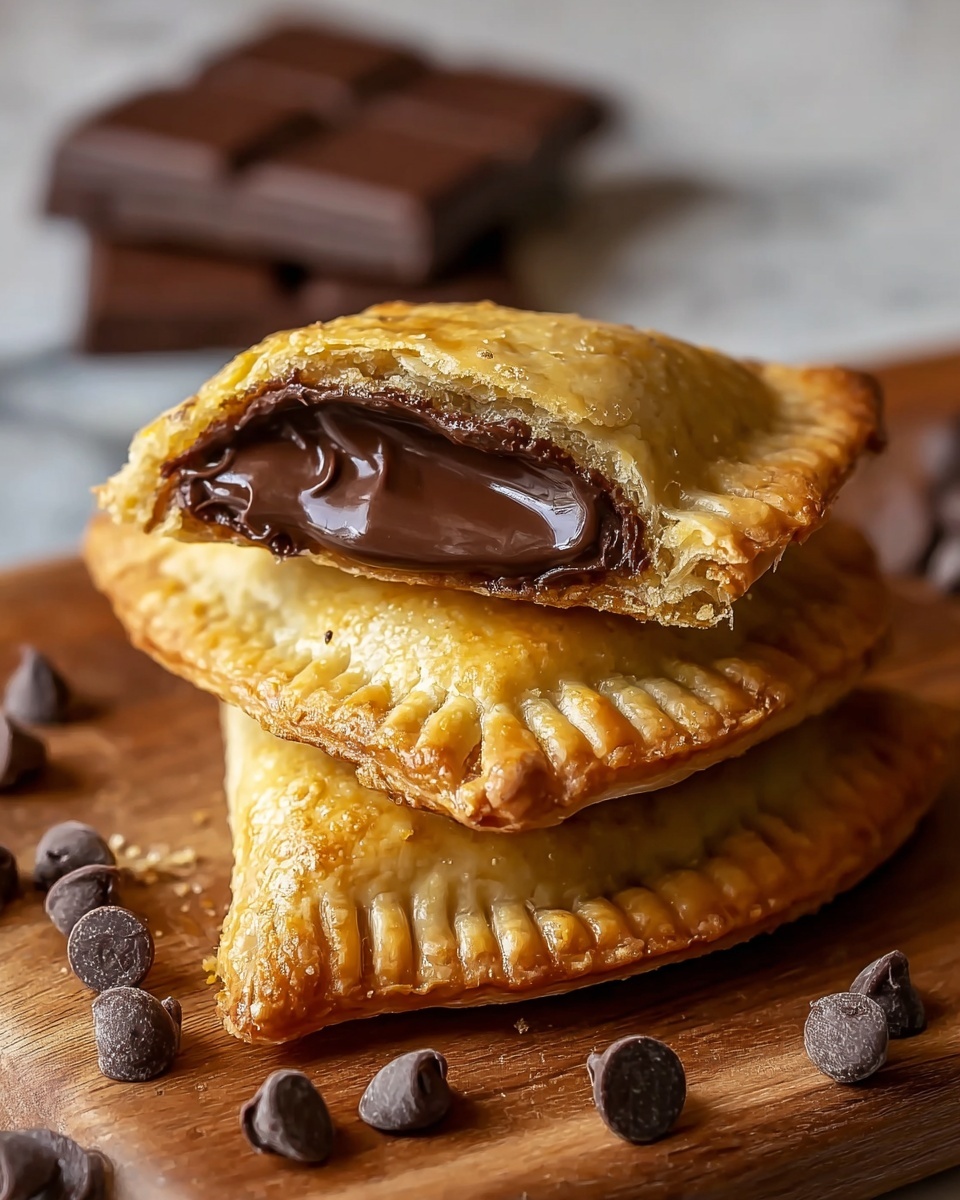
If you have a sweet tooth and love handheld treats, this Chocolate-Filled Hand Pies Recipe is about to become your new best friend in the kitchen. Imagine flaky golden crusts wrapped around a luscious, gooey molten chocolate center that melts in your mouth with every bite. These hand pies are not only easy and quick to whip up but also incredibly satisfying—perfect for sharing or indulging on your own. Whether it’s a cozy afternoon snack or a delightful dessert after dinner, this recipe brings joy and a touch of homemade magic to your table.
Ingredients You’ll Need
These straightforward ingredients come together to create the perfect balance of flaky crust and rich chocolate filling. Each one plays an essential role, from the buttery base of the pie crust to the creamy chocolate center that makes every bite heavenly.
- Refrigerated Pie Crusts (1 package, 2 sheets): The flaky and buttery foundation that gives your hand pies that perfect crisp and tender texture.
- Granulated Sugar (1 tbsp): Sprinkled on top for a slight crunch and a beautiful golden finish.
- Semi-Sweet Chocolate Chips (1/2 cup): The star of the filling, providing rich, melty pockets of chocolate goodness.
- Heavy Cream (2 tbsp): Adds a creamy smoothness to the chocolate filling, making it decadently soft.
- Vanilla Extract (1/2 tsp): Brings a lovely warmth and depth to the chocolate, enhancing its flavor.
- Powdered Sugar (1/4 cup, optional): A touch of extra sweetness to balance the semi-sweet chocolate if desired.
How to Make Chocolate-Filled Hand Pies Recipe
Step 1: Prepare the Chocolate Filling
Start by gently warming the semi-sweet chocolate chips with the heavy cream over a double boiler or in short bursts in the microwave. Stir continuously until the mixture is completely smooth and velvety. Next, mix in the vanilla extract for that irresistible aroma and, if you like your filling sweeter, add powdered sugar until the texture is creamy and luscious. This chocolate filling is the heart of your hand pies and should be smooth enough to melt deliciously inside.
Step 2: Cut the Pie Dough
Roll out the refrigerated pie crusts on a lightly floured surface to keep the dough from sticking. Using a round cutter or even the edge of a glass, cut out circles that are about 4 to 5 inches in diameter. From two sheets of dough, you should easily get 8 to 10 circles. These will be your little pockets to hold all that amazing chocolate.
Step 3: Assemble the Hand Pies
Place a spoonful of the chocolate filling right in the center of each dough circle. Be careful not to overfill to avoid leaking. Fold the dough over to form a half-moon shape, gently pressing down to flatten slightly.
Step 4: Seal the Edges
Use the tines of a fork to firmly press around the edges of each hand pie, sealing in the chocolate and creating a pretty crimped edge. This step ensures that your filling stays put and that each hand pie looks as charming as it tastes.
Step 5: Add Sugar and Bake
Arrange the assembled hand pies on a parchment-lined baking sheet. Lightly sprinkle granulated sugar over the tops for an attractive sparkle and a hint of sweetness that will caramelize beautifully in the oven. Bake at 375°F (190°C) for 12 to 15 minutes, or until they turn a gorgeous golden brown and your kitchen fills with that enticing aroma of warm chocolate and buttery crust.
How to Serve Chocolate-Filled Hand Pies Recipe

Garnishes
For a little extra flair, dust the hand pies lightly with powdered sugar before serving to add a delicate touch of sweetness and a beautiful finish. A drizzle of warm melted chocolate or a sprinkle of sea salt can also take these treats up a notch.
Side Dishes
Pair your chocolate-filled hand pies with a dollop of whipped cream or a scoop of vanilla ice cream to complement the warmth and richness. A hot cup of coffee or chai tea also makes a perfect companion, balancing the sweetness and making the experience even more delightful.
Creative Ways to Present
Serve your hand pies on a rustic wooden board or a pretty dessert plate lined with a colorful napkin for a cozy vibe. For gatherings, arrange them in a circle around a small bowl of chocolate dipping sauce or fresh berries to make it visually stunning as well as delicious.
Make Ahead and Storage
Storing Leftovers
Keep any leftover Chocolate-Filled Hand Pies tucked away in an airtight container at room temperature for up to 2 days to maintain crispness. If you want them softer, storing in the fridge is also fine for 3 to 4 days, though the crust might lose some of its flaky texture.
Freezing
You can freeze these hand pies either before or after baking. To freeze before baking, assemble and seal them, then freeze on a baking sheet before transferring to a freezer-safe container. When ready to bake, just pop them into the oven directly, increasing the baking time slightly. For baked pies, wrap them individually and freeze for up to a month for a quick chocolate treat anytime.
Reheating
To bring leftover or frozen hand pies back to life, reheat them in a preheated oven at 350°F (175°C) for about 10 minutes or until warm and crispy again. Avoid microwaving if you want to keep that perfect flakiness, as microwaves tend to make the crust chewy.
FAQs
Can I use homemade pie crust instead of store-bought?
Absolutely! Homemade pie crust adds a personal touch and can make these hand pies even more special. Just ensure your dough is chilled and easy to roll out for the best results.
What type of chocolate works best in this recipe?
Semi-sweet chocolate chips are perfect because they balance sweetness with rich cocoa flavor. However, feel free to experiment with milk, dark, or even flavored chocolates to tailor the filling to your taste.
Can I make these hand pies vegan or dairy-free?
Yes! Use a vegan pie crust recipe or store-bought vegan crust, dairy-free cream alternatives like coconut cream, and dairy-free chocolate to create a delicious vegan-friendly version.
How do I prevent the filling from leaking during baking?
Make sure not to overfill the pies and press the edges firmly with a fork to seal. Chilling the pies briefly before baking can also help the dough hold its shape better.
Can I add fruit to the chocolate filling?
Definitely! Adding chopped berries or a spoonful of fruit preserves can create a lovely twist on the chocolate-filled hand pies, bringing in a fresh burst of flavor.
Final Thoughts
Once you try this Chocolate-Filled Hand Pies Recipe, I promise it will become a favorite go-to recipe for cozy afternoons and special occasions alike. It’s simple, rewarding, and delivers that perfect mix of flaky crust and indulgent chocolate in every bite. So grab your rolling pin, whip up this delightful treat, and watch smiles blossom with each warm hand pie you share!
Print
Chocolate-Filled Hand Pies Recipe
- Prep Time: 15 minutes
- Cook Time: 15 minutes
- Total Time: 30 minutes
- Yield: 8-10 servings
- Category: Dessert
- Method: Baking
- Cuisine: American
Description
Delicious homemade chocolate-filled hand pies featuring flaky pie crusts filled with a smooth, rich chocolate cream. Perfectly baked to golden perfection and topped with a sprinkle of sugar for a sweet, crunchy finish.
Ingredients
Pie Crust
- 1 package (2 sheets) Refrigerated Pie Crusts (or homemade if preferred)
Filling
- 1/2 cup Semi-Sweet Chocolate Chips (or chopped chocolate)
- 2 tbsp Heavy Cream
- 1/2 tsp Vanilla Extract
- 1/4 cup Powdered Sugar (optional, for added sweetness)
Topping
- 1 tbsp Granulated Sugar (for sprinkling on top)
Instructions
- Prepare the Dough: Roll out the pie crusts on a lightly floured surface to create a smooth even texture. Using a round cutter or the edge of a glass, cut the dough into circles approximately 4-5 inches in diameter. You should yield around 8-10 circles from the two sheets of dough.
- Make the Chocolate Filling: In a small bowl, combine the semi-sweet chocolate chips, heavy cream, and vanilla extract. Stir well until the mixture is smooth and creamy. If you prefer a sweeter filling, add the powdered sugar and mix thoroughly to combine.
- Assemble the Hand Pies: Place a spoonful of the chocolate filling onto the center of each dough circle. Fold the dough over to create a half-moon shape, carefully enclosing the filling.
- Seal the Edges: Use the tines of a fork to press down along the edges of each pie, sealing them securely to prevent filling leakage during baking.
- Add Topping: Lightly sprinkle granulated sugar on top of each hand pie for added sweetness and a beautiful golden finish.
- Bake: Preheat the oven to 375°F (190°C). Arrange the hand pies on a baking sheet lined with parchment paper. Bake for 12-15 minutes or until the crust is golden brown and flaky.
- Cool and Serve: Allow the hand pies to cool slightly before serving to let the filling set and avoid burns.
Notes
- For a homemade touch, feel free to substitute refrigerated pie crusts with your favorite homemade pastry dough.
- Adjust powdered sugar quantity in the filling according to your preferred sweetness level.
- Ensure the edges are sealed tightly to avoid any filling leakage during baking.
- Serve warm for gooey melted chocolate, or at room temperature as a convenient snack.
- Store leftovers in an airtight container and reheat gently before serving.


