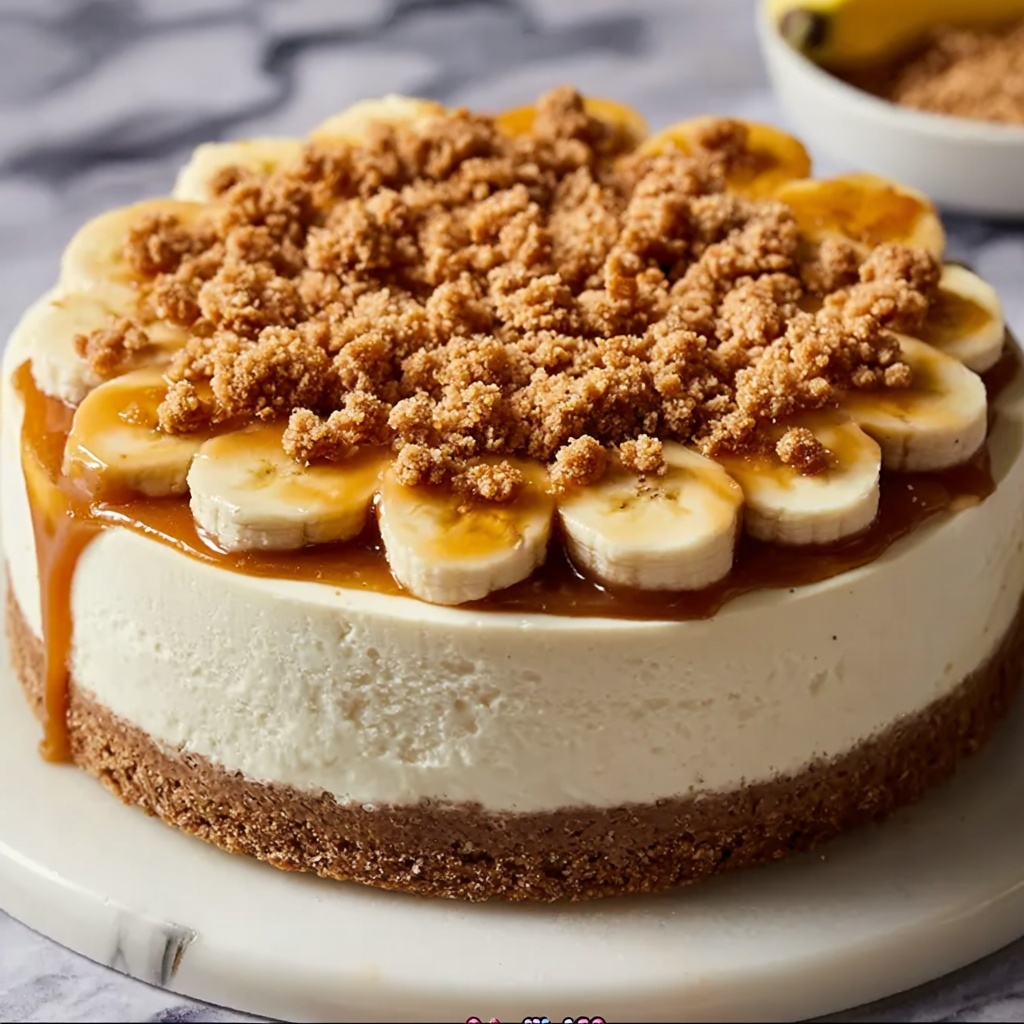
If you’ve ever dreamed of a dessert that perfectly balances creamy, crunchy, and fruity flavors, you absolutely must try this Banana Pudding Crunch Cheesecake Recipe. It brings together the nostalgic taste of classic banana pudding with the richness of cheesecake and a delightful crispy topping that takes every bite to cloud nine. Whether serving up slices for a crowd or savoring it as a special treat for yourself, this recipe is a guaranteed showstopper that’s surprisingly simple to pull together.
Ingredients You’ll Need
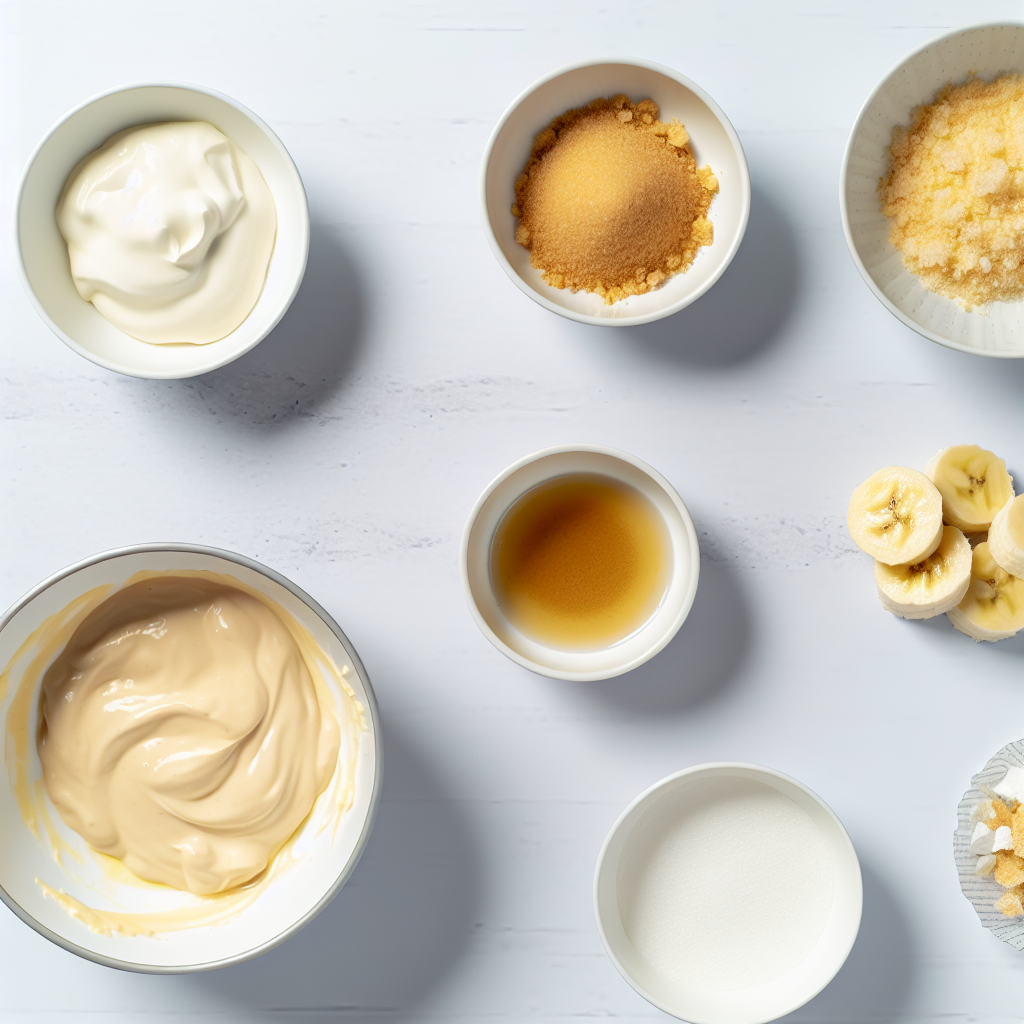
Getting the ingredients right is half the magic here, and thankfully, each one is straightforward yet plays a crucial role. From the buttery crust to the smooth cheesecake filling and the crunchy topping, these components come together to create layers of texture and flavor that dance on your palate.
- Vanilla wafer crumbs (2 1/2 cups): The base of the crust providing that irresistible nostalgic cookie flavor.
- Unsalted butter, melted (1/2 cup): Binds the crust crumbs and adds richness without overpowering.
- Brown sugar (2 tablespoons, optional plus extra for topping): Adds warmth and a touch of caramel flavor in the crust and crunch.
- Cream cheese, softened (24 oz): The star of the cheesecake, lending velvety smoothness and tang.
- Granulated sugar (1 cup): Sweetens the filling to just the right level.
- Sour cream (1/2 cup): Adds a subtle tanginess that balances the sweetness.
- Instant banana cream pudding mix (3.4 oz): Brings in that unmistakable classic banana pudding flavor.
- Vanilla extract (1 teaspoon): Enhances all the flavors and adds a fragrant warmth.
- Salt (1/4 teaspoon): A small pinch to brighten flavors and cut through richness.
- Heavy whipping cream (1 cup): Whipped to fluffy perfection, folded into the filling for lightness.
- Powdered sugar (1 tablespoon): Sweetens the whipped cream without graininess.
- Crushed vanilla wafers (1 cup): Used for the crunchy topping that gives every bite delightful texture contrast.
- Butter, melted (2 tablespoons): Melds the topping crumbs together and helps them crisp up when toasted.
- Fresh banana slices: The fresh fruit element that adds juiciness and the clearest nod to banana pudding tradition.
- Optional toppings: Whipped cream swirls or extra vanilla wafers for extra flair and flavor.
How to Make Banana Pudding Crunch Cheesecake Recipe
Step 1: Create the Crust
Start by pulsing the vanilla wafers into fine crumbs. Then, mix those crumbs with melted butter and brown sugar to form a deliciously sweet and buttery base. Press this mixture firmly into the bottom of a springform pan to create that perfect foundation, and chill it while you prepare the rest.
Step 2: Prepare the Cheesecake Filling
Beat your softened cream cheese until it’s exceptionally smooth and creamy. Gradually incorporate granulated sugar, sour cream, banana cream pudding mix, vanilla extract, and salt to form a luscious, flavorful filling that’s guaranteed to make taste buds sing.
Step 3: Whip and Combine
In a separate bowl, whip the heavy cream with powdered sugar until stiff peaks develop – this step is key to achieving a light, airy texture. Gently fold the whipped cream into the cream cheese mixture, carefully preserving all that fluffy goodness.
Step 4: Assemble and Chill
Pour the luscious filling over your chilled crust, smoothing out the top with a spatula. Refrigerate this beauty for at least 6 hours or overnight to let it fully set and meld those fabulous flavors.
Step 5: Prepare the Crunchy Topping
Combine crushed vanilla wafers with melted butter and brown sugar, then toast the mixture briefly in a pan for a warm, caramelized crunch. Let this cool completely to maintain that crispy texture when added to the cheesecake.
Step 6: Final Touches
Before serving, generously sprinkle the toasted crunch over the cheesecake, then adorn with fresh banana slices and optional whipped cream swirls or extra wafers for a stunning presentation that tastes as good as it looks.
How to Serve Banana Pudding Crunch Cheesecake Recipe
Garnishes
Using fresh banana slices on top not only adds a pop of color but also provides juicy sweetness that highlights the banana pudding flavor. Whipped cream swirls or a sprinkle of additional crushed vanilla wafers can add elegance and more texture to each slice.
Side Dishes
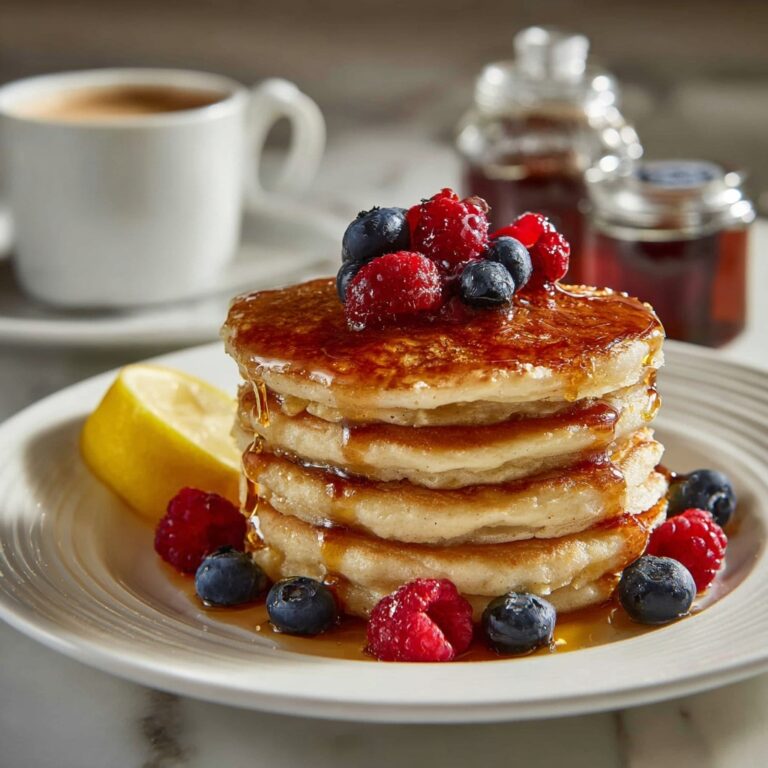
This cheesecake pairs beautifully with a hot cup of coffee or a cold glass of milk, making for a comforting dessert experience. For a twist, serve it alongside fresh berries or a light citrus sorbet to cut through the richness and keep things refreshing.
Creative Ways to Present
Consider serving the cheesecake in individual clear glasses layered with additional crushed wafers and banana slices for a trendy parfait. Another idea is to plate slices with a drizzle of caramel sauce or a dusting of cinnamon for added warmth and charm.
Make Ahead and Storage
Storing Leftovers
Once you’ve indulged in a few slices, cover the remaining cheesecake tightly with plastic wrap or store in an airtight container in the refrigerator. It will stay fresh and delicious for up to 4 days, making it perfect for preparing ahead of time.
Freezing
If you want to keep your cheesecake longer, wrap it well with plastic wrap and aluminum foil, then freeze. It’s best to enjoy it within 2 months. When ready to eat, thaw overnight in the refrigerator to preserve the texture and taste.
Reheating
This dessert is best enjoyed chilled, so reheating isn’t recommended. If you prefer it slightly less cold, simply let it sit at room temperature for 10 to 15 minutes before serving to soften the flavors and textures gently.
FAQs
Can I use fresh bananas in the filling?
While fresh bananas are delicious as a topping, adding them directly into the filling can cause the cheesecake to become watery. It’s best to stick with the instant banana pudding mix inside and use fresh slices as a garnish.
Is it necessary to use a springform pan?
A springform pan is ideal because it makes removing the cheesecake much easier without damaging the crust or sides, ensuring your masterpiece stays intact when serving.
Can I make this recipe dairy-free?
You can substitute dairy ingredients with plant-based alternatives like vegan cream cheese and coconut cream, but note that the texture and flavor will vary slightly from the original recipe.
How long does the cheesecake need to chill?
For the best texture and flavor development, chilling for at least 6 hours or overnight is recommended. Rushing this step can affect how well the cheesecake sets.
Can I prepare parts of this cheesecake ahead of time?
Absolutely! You can make the crust and the crunch topping up to two days in advance and keep them chilled separately. Just assemble the filling and final touches when you’re ready to serve.
Final Thoughts
There’s something truly special about the Banana Pudding Crunch Cheesecake Recipe that combines cherished flavors with a crunchy texture that feels like a warm hug in dessert form. I can’t wait for you to make this and watch it become a fast favorite at your table. So go ahead, dig in, and enjoy every creamy, crunchy, banana-filled bite!
Print
Banana Pudding Crunch Cheesecake Recipe
- Prep Time: 30 minutes
- Cook Time: 10 minutes (topping toasting only)
- Total Time: 6 hours 40 minutes (including chilling time)
- Yield: 10-12 slices
- Category: Dessert
- Method: No-Cook
- Cuisine: American
Description
This Banana Pudding Crunch Cheesecake is a luscious no-bake dessert that combines creamy banana-flavored cheesecake with a crunchy vanilla wafer crust and topping. With layers of smooth cream cheese filling infused with instant banana pudding and finished with fresh banana slices and a buttery, crunchy wafer topping, it’s an irresistible treat perfect for any occasion.
Ingredients
Crust
- 2 1/2 cups vanilla wafer crumbs
- 1/2 cup unsalted butter, melted
- 2 tablespoons brown sugar (optional)
Cheesecake Filling
- 24 oz cream cheese, softened
- 1 cup granulated sugar
- 1/2 cup sour cream
- 1 package (3.4 oz) instant banana cream pudding mix
- 1 teaspoon vanilla extract
- 1/4 teaspoon salt
- 1 cup heavy whipping cream
- 1 tablespoon powdered sugar
Topping
- 1 cup crushed vanilla wafers
- 2 tablespoons unsalted butter, melted
- 2 tablespoons brown sugar
- Fresh banana slices
- Optional: whipped cream swirls or extra wafers
Instructions
- Prepare the crust. Pulse vanilla wafers in a food processor to make fine crumbs. In a bowl, combine these crumbs with melted unsalted butter and brown sugar, mixing thoroughly. Press this mixture evenly into the bottom of a springform pan. Chill in the refrigerator while preparing the filling to set the crust.
- Make the cheesecake filling. Using a mixer, beat the softened cream cheese until smooth and creamy. Gradually add granulated sugar, sour cream, instant banana cream pudding mix, vanilla extract, and salt. Mix well until the mixture is fully combined and creamy with no lumps.
- Whip the heavy cream. In a separate chilled bowl, whip the heavy whipping cream with the powdered sugar until stiff peaks form, indicating it’s light and airy.
- Combine fillings. Gently fold the whipped cream into the cream cheese mixture, ensuring you keep the mixture light and fluffy without deflating the whipped cream.
- Assemble and chill. Pour the creamy filling onto the chilled crust, smoothing the top with a spatula for an even layer. Cover and refrigerate the cheesecake for at least 6 hours or overnight to allow it to set properly.
- Prepare the crunchy topping. Mix crushed vanilla wafers with melted butter and brown sugar. Toast this mixture briefly in a pan over medium heat until it’s golden and fragrant. Let it cool completely to maintain the crunch.
- Garnish and serve. Before serving, sprinkle the cooled crunchy topping onto the set cheesecake. Arrange fresh banana slices on top and add optional whipped cream swirls or extra wafers for decoration. Slice and enjoy!
Notes
- For best results, chill the cheesecake overnight to ensure it sets firmly.
- Use ripe but firm bananas for the topping to avoid mushiness.
- Press the crust firmly and evenly for a sturdy base.
- You can replace vanilla wafers with gluten-free wafers to make the crust gluten-free.
- Ensure the heavy cream bowl and attachments are chilled for better whipping results.
- Store leftover cheesecake covered in the refrigerator for up to 3 days.


