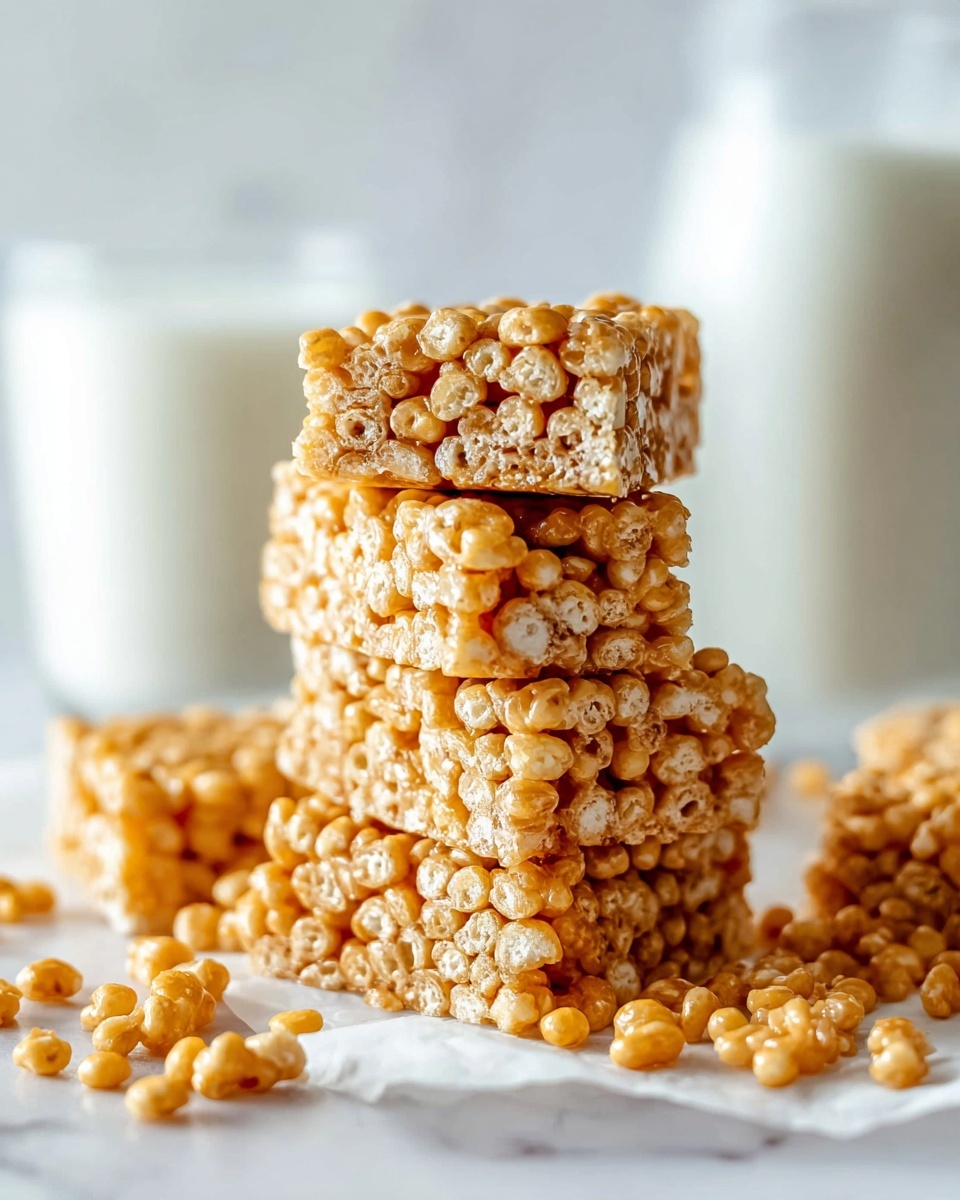
If you’re looking for a nostalgic treat that’s quick to whip up and irresistibly delicious, this Cereal Bars Recipe is exactly what you need. These bars are a perfect blend of crispy corn pops cereal enveloped in a rich, gooey marshmallow and butter mixture, creating a sweet bite that’s wonderfully crunchy yet chewy at the same time. Whether you want a fun snack for the kids, a party treat, or something easy to take on the go, these cereal bars hit the spot with their perfect balance of texture and flavor.
Ingredients You’ll Need
This recipe keeps things simple but relies on ingredients that each add something special. The sweet, buttery marshmallow base binds the crispy cereal perfectly, while the corn pops bring in that delightfully light crunch and a touch of caramelized flavor.
- Unsalted butter (6 tablespoons/84g): Adds richness and helps everything melt together smoothly.
- Large marshmallows (10 ounces/284g): Provide the gooey, sweet binding that holds the cereal bars together.
- Corn pops cereal (7 cups/196g): Gives the bars their signature crunch and a slightly toasted sweet flavor that’s simply addictive.
How to Make Cereal Bars Recipe
Step 1: Prepare Your Pan
Start by lining the bottom of a 9×13-inch baking pan with parchment paper. This makes it effortless to lift the bars out later and ensures they don’t stick. Setting the pan aside now means you’re ready to move quickly when the mixture is ready.
Step 2: Melt Butter and Marshmallows
In a large pot over medium-high heat, melt the butter until it’s fully liquid. Then add the marshmallows. Keep stirring continuously to prevent burning — this gentle action turns the marshmallows into a silky, shiny, and smooth mixture that’s key to the perfect texture of the bars.
Step 3: Combine Cereal with Marshmallow Mixture
Once the marshmallows are fully melted and combined with the butter, remove the pot from heat immediately. Pour in the corn pops cereal and stir thoroughly until every piece is coated with the luscious marshmallow mix. If you prefer a slightly less sticky, more crunchy bar, feel free to add a bit more cereal in small increments.
Step 4: Transfer and Press
Pour the sticky mixture into your prepared baking pan. Using the back of a silicone spatula, gently press and spread the mixture, making sure it’s evenly distributed. Be careful not to press too firmly, since compressing it too much can lead to dense bars, while a lighter touch keeps things airy and enjoyable.
Step 5: Cool and Cut
Let the bars cool for about 2 hours until they’re completely set. Then, with the parchment paper edges, lift the entire slab out of the pan and place it on a cutting board. Cut into squares or rectangles, depending on how big you want each bar to be.
How to Serve Cereal Bars Recipe
Garnishes
While these bars are incredible as-is, adding a sprinkle of mini chocolate chips or a drizzle of melted peanut butter on top can elevate the flavor and add a fun twist. You might even toast some shaved coconut or sprinkle chopped nuts for a delightful crunch and extra texture.
Side Dishes
Cereal bars pair exceptionally well with a cold glass of milk for dipping or alongside a cup of hot cocoa or coffee to balance their sweetness. For a breakfast idea, serve them with fresh fruit or yogurt for a well-rounded morning pick-me-up.
Creative Ways to Present
Cut the cereal bars into fun shapes using cookie cutters to make them festive for parties or holidays. Wrap individual bars in parchment or wax paper tied with colorful twine for a charming homemade gift or lunchbox treat that’s sure to bring smiles.
Make Ahead and Storage
Storing Leftovers
Store your cereal bars in an airtight container at room temperature for up to 5 days. Placing parchment sheets between layers keeps them from sticking together and helps maintain their crisp texture.
Freezing
If you want to make these bars ahead of time, you can freeze them for up to 2 months. Wrap each bar individually in plastic wrap and place them in a freezer-safe bag, so they stay fresh and ready whenever a sweet craving hits.
Reheating
To enjoy frozen bars, just let them thaw at room temperature for 15 to 20 minutes. If you’d like them a bit warm and gooey, a quick 10-second zap in the microwave works wonders without melting them too much.
FAQs
Can I use a different cereal for this Cereal Bars Recipe?
Absolutely! While corn pops give a great texture and flavor here, you can experiment with other crispy cereals like Rice Krispies or Cheerios for a fun twist. Just keep the cereal quantity the same so the bars hold together well.
Is it necessary to use unsalted butter?
Using unsalted butter allows you to control the saltiness of the bars. Salted butter can work too, but we recommend cutting back on any additional salt in the recipe to keep the flavors balanced.
How can I make these bars less sticky?
You can add a little extra cereal after mixing the initial batch to achieve a less sticky and more crunchy bar. Just add half a cup at a time, gently folding it in, until you reach the desired texture.
Are these cereal bars gluten-free?
That depends on the cereal you choose. Corn pops are typically gluten-free, but always check the packaging to ensure no gluten-containing ingredients are included if you need a gluten-free option.
Can I add extras like chocolate or nuts to the bars?
Yes! Feel free to mix in extras like chocolate chips, chopped nuts, or dried fruit when adding the cereal in Step 3. This can make your Cereal Bars Recipe more personalized and exciting.
Final Thoughts
This Cereal Bars Recipe is truly a crowd-pleaser that’s quick, easy, and versatile. Whether you want a nostalgic snack or a sweet treat to brighten your day, these bars deliver every single time. Give them a try—you’ll find yourself reaching for seconds in no time!
Print
Cereal Bars Recipe
- Prep Time: 5 minutes
- Cook Time: 10 minutes
- Total Time: 15 minutes plus 2 hours cooling
- Yield: 12 bars
- Category: Snack
- Method: Stovetop
- Cuisine: American
Description
These homemade cereal bars are a quick and easy treat made with melted butter, gooey marshmallows, and crispy corn pops cereal. Ready in just 15 minutes plus cooling time, they’re perfect for a sweet snack or lunchbox addition.
Ingredients
Ingredients
- 6 tablespoons (84 g) unsalted butter
- 10 ounces (284 g) large marshmallows
- 7 cups (196 g) corn pops cereal
Instructions
- Prepare the Pan: Line the bottom of a 9×13 inch baking pan with parchment paper to prevent sticking and set it aside, ready for the cereal mixture.
- Melt Butter and Marshmallows: In a large pot over medium-high heat, melt the butter. Add the marshmallows and stir constantly to melt them evenly and prevent burning, creating a smooth, gooey mixture.
- Combine with Cereal: Remove the pot from heat once marshmallows are fully melted and mixed with butter. Immediately stir in the corn pops cereal until all pieces are thoroughly coated. For a less sticky texture, optionally add extra cereal 1/2 cup at a time.
- Press Mixture into Pan: Pour the cereal mixture into your prepared pan. Using the back of a silicone spatula, gently press it down evenly without compressing too much to keep the bars light and airy.
- Cool and Cut: Let the mixture cool and set in the pan for about 2 hours. Once firm, lift the mixture out using the parchment paper and cut into 12 bars for serving.
Notes
- Do not over-compress the mixture in the pan or the bars will become dense.
- Stir marshmallows constantly while melting to avoid burning and ensure a smooth texture.
- Add extra cereal gradually if you prefer less gooey bars.
- Store cereal bars in an airtight container at room temperature for up to 3 days.


