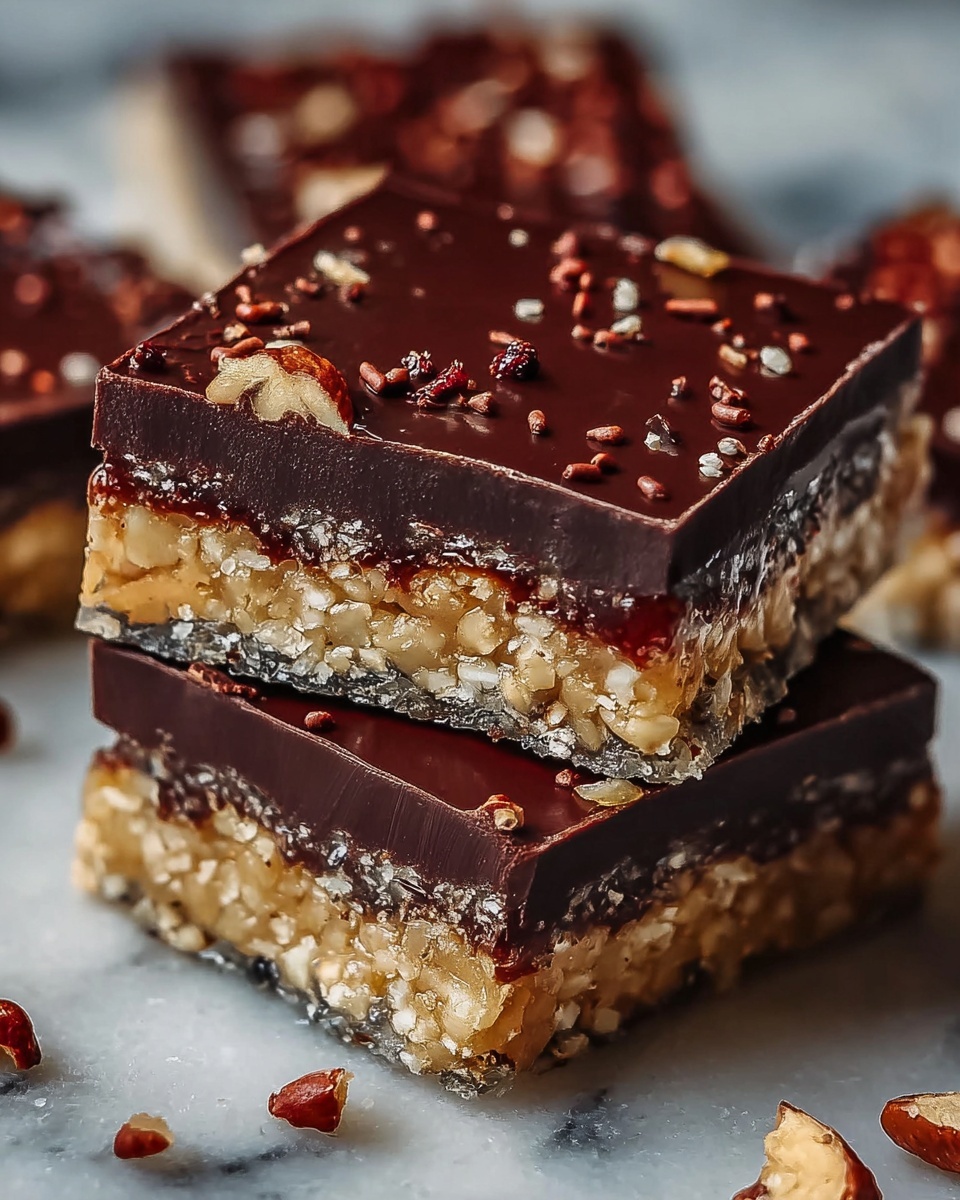
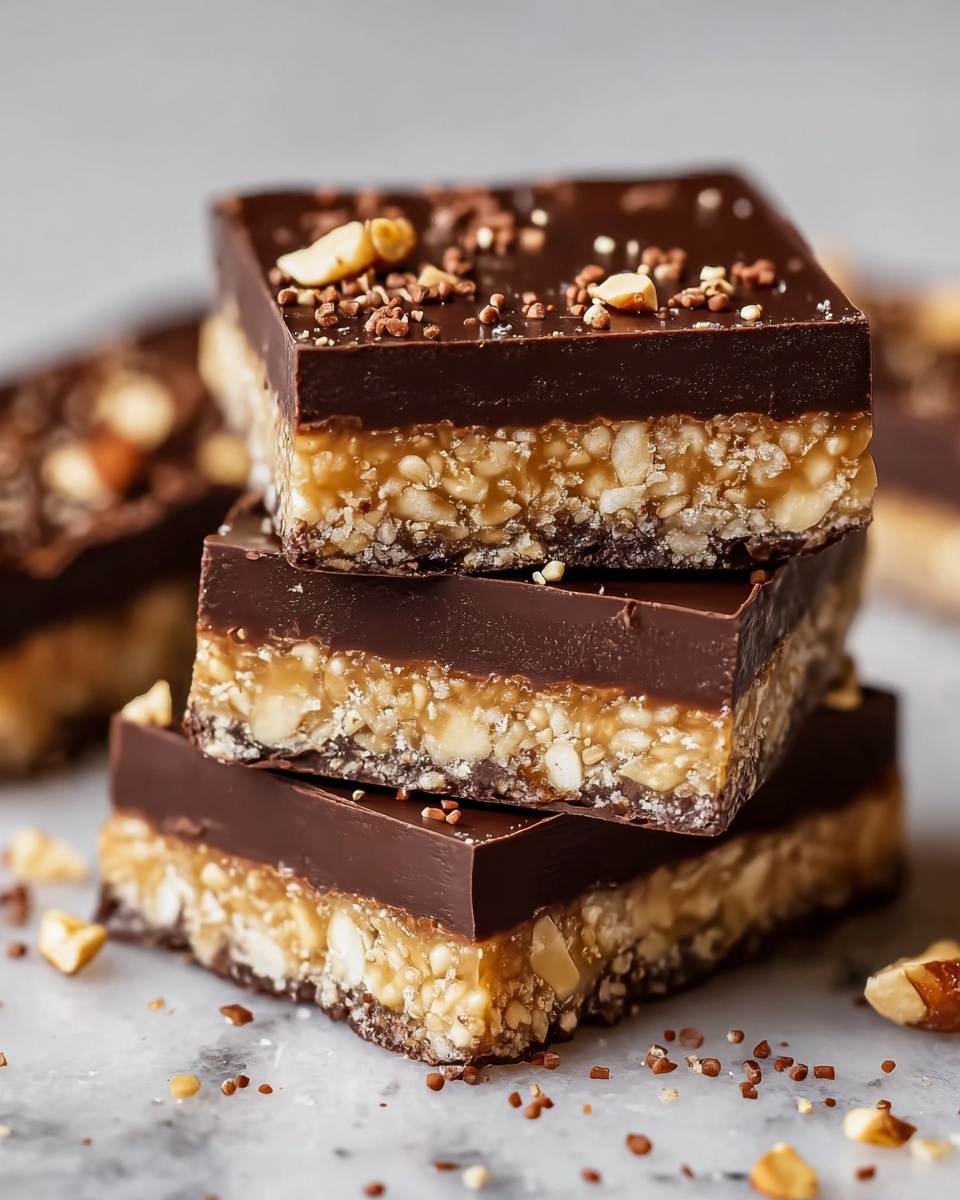
If you’re craving a treat that captures the nostalgic crunch of candy bars with a homemade twist, you’re going to fall head over heels for this recipe. Homemade Butterfingers: A Spooky Halloween Sweet Treat Recipe combines the perfect balance of crispy corn flakes and luscious peanut butter, all wrapped in a shiny coat of dark chocolate. It’s delightfully simple to make, incredibly satisfying to eat, and just right for spicing up your Halloween celebrations with a spooky touch. Ready to create a snack that’s as fun to make as it is to share? Let’s dive in!
Ingredients You’ll Need
The magic of Homemade Butterfingers: A Spooky Halloween Sweet Treat Recipe lies in its straightforward ingredients, each chosen to build layers of texture, flavor, and that unmistakable buttery sweetness. From crispy cereal to rich chocolate, every element plays a crucial role.
- Corn flakes or corn chex cereal: These provide a crunchy base texture that mimics classic Butterfingers perfectly.
- Peanut butter: Adds creaminess and a nutty depth that’s the heart of the treat.
- Pure maple syrup: Offers a gentle natural sweetness while helping bind ingredients.
- Blackstrap molasses (or regular molasses): Brings a rich, slightly smoky undertone that enhances the caramel-like flavor.
- Pinch of salt: Balances sweetness and intensifies peanut butter flavor, especially important if your peanut butter isn’t salted.
- Dark chocolate chips: For an indulgent, bittersweet coating that contrasts beautifully with the sweet, crunchy center.
- Butter: Adds shine and smoothness to the melted chocolate, helping it coat the bars flawlessly.
How to Make Homemade Butterfingers: A Spooky Halloween Sweet Treat Recipe
Step 1: Crush the Corn Flakes with Care
Start by gently crushing your corn flakes or corn chex cereal until you have fine, bite-sized pieces—not powder! This step is critical because it keeps the essential crunch you’ll want in every bite while making sure the bars bind well with the peanut butter mixture. Use a sturdy ziplock or bowl and your hands or a rolling pin to lightly crush them.
Step 2: Melt the Peanut Butter Mixture
Next, combine the peanut butter, maple syrup, and molasses in a small pot over medium-low heat. Stir constantly to ensure the mixture melts evenly without burning. Adding a pinch of salt (or more if unsalted peanut butter is used) brings out all the rich flavors. This sweet, sticky blend is what holds your butterfingers together, making each bite irresistibly chewy yet crunchy.
Step 3: Mix the Cereal with the Peanut Butter Blend
Pour the melted peanut butter mixture over your crushed cereal in a large bowl. Stir thoroughly to coat every piece evenly. This step is where your dry and wet ingredients unite, creating the signature texture of Homemade Butterfingers: A Spooky Halloween Sweet Treat Recipe.
Step 4: Press and Chill the Mixture
Transfer the mixture into a parchment-lined loaf pan, pressing firmly and evenly to pack it down well. This ensures your bars hold their shape and cut cleanly after chilling. Pop the pan into the freezer for 45-60 minutes (or even overnight if you want to prepare ahead), allowing the flavors to meld and firm up perfectly.
Step 5: Prepare the Chocolate Coating
While your base is chilling, melt together the dark chocolate chips and butter in short bursts in the microwave. Stir frequently to keep the chocolate silky and prevent scorching. This glossy coating will give your bars that classic candy-bar finish that’s simply irresistible.
Step 6: Slice, Dip, and Chill Again
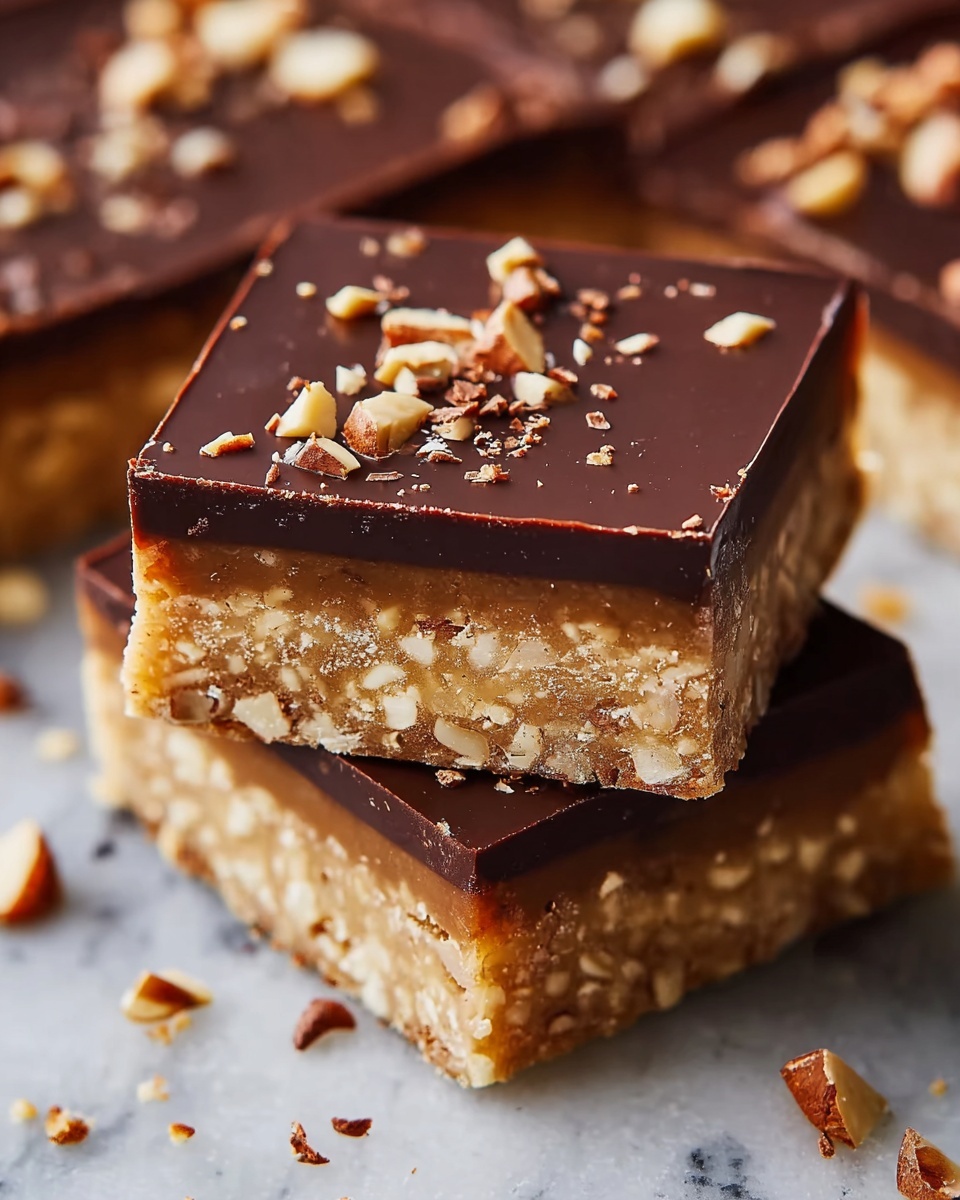
Remove the chilled peanut butter base from the loaf pan and cut it into bars. Dip each bar into the warm chocolate, fully covering each one, then set them on parchment-lined trays. Put them in the fridge for 30-60 minutes until the chocolate hardens, locking in flavors and textures for a perfect snap when bitten into.
How to Serve Homemade Butterfingers: A Spooky Halloween Sweet Treat Recipe
Garnishes
For a festive Halloween twist, sprinkle the chocolate coating with a pinch of crushed nuts, edible glitter, or even some mini candy eyeballs before chilling. These small touches add visual flair and create excitement for guests, especially kids.
Side Dishes
Pair your Homemade Butterfingers with warm apple cider or a creamy pumpkin spice latte to complement the nutty sweetness and add a cozy seasonal vibe to your treat time. They work wonderfully alongside salty snacks too, balancing flavors beautifully during a fall gathering.
Creative Ways to Present
Wrap individual bars in parchment paper tied with black and orange ribbons for party favors or spooky gift baskets. You can also stack them in a clear jar dotted with Halloween confetti for a colorful display that invites everyone to dig in and enjoy the fun.
Make Ahead and Storage
Storing Leftovers
Keep your Homemade Butterfingers in an airtight container in the refrigerator. They stay fresh for about one week, maintaining their crunch and flavor perfectly. Avoid leaving them at room temperature too long as the chocolate coating can soften and lose its snap.
Freezing
If you want to make a batch well in advance, these bars freeze beautifully. Place them in a single layer on parchment-lined trays to freeze, then transfer to a sealed freezer bag. Frozen bars can last up to 3 months—thaw in the fridge before serving to keep texture intact.
Reheating
Since these bars are best eaten cold or at room temperature, reheating is not recommended. If the chocolate becomes too hard from the fridge or freezer, leaving the bars out for 10-15 minutes will gently soften the coating for optimal taste and texture.
FAQs
Can I use a different type of peanut butter?
Absolutely! Natural, creamy, or even crunchy peanut butter works. Just note that unsalted peanut butter will require a little extra salt to balance the flavors.
Is there a substitute for corn flakes?
Yes, corn chex cereal is a great alternative and offers a similar crunch. Avoid cereals that are too sweet or heavily flavored, as they can overpower the peanut butter mixture.
Can I make these bars vegan?
You sure can by choosing a plant-based butter substitute and ensuring you use dairy-free chocolate chips. Also, double-check that your peanut butter is vegan-friendly.
What’s the best way to crush the cereal without pulverizing it?
Using a ziplock bag and pressing gently with your hands or a rolling pin is ideal. The goal is to break the flakes into smaller pieces while maintaining some texture so the bars have that delightful crunch.
How long will these bars last at room temperature?
For best taste and texture, consume them within a few hours if left out. Beyond that, refrigeration helps preserve their shape and flavor.
Final Thoughts
Making Homemade Butterfingers: A Spooky Halloween Sweet Treat Recipe is such a rewarding experience. You get to create a nostalgic candy bar that’s customizable, delicious, and festive all at once. Whether you’re sharing with friends, surprising trick-or-treaters, or just indulging your own sweet tooth, this recipe is a fantastic way to celebrate Halloween with love and crunch. Give it a try — I promise you’ll be reaching for seconds and already planning your next batch!
Print
Homemade Butterfingers: A Spooky Halloween Sweet Treat Recipe
- Prep Time: 15 minutes
- Cook Time: 10 minutes
- Total Time: 1 hour 25 minutes
- Yield: 12 servings
- Category: Snack
- Method: No-Cook
- Cuisine: American
Description
These Homemade Butterfingers are a delightfully crunchy and sweet treat perfect for Halloween. Combining crushed corn flakes with a melted blend of peanut butter, maple syrup, and molasses, then coated in rich dark chocolate, these bars offer a nostalgic candy flavor with a homemade twist. They’re easy to prepare without baking, making them a perfect spooky snack or party favor for fall festivities.
Ingredients
Crunchy Base
- 2 cups corn flakes (or corn chex cereal)
Binding Mixture
- 3/4 cup peanut butter
- 1/4 cup pure maple syrup
- 1 tsp blackstrap molasses (or regular molasses)
- Pinch of salt (more if your peanut butter isn’t salted)
Chocolate Coating
- 1 cup dark chocolate chips
- 2 tsp butter
Instructions
- Crush the Corn Flakes: Place corn flakes in a ziplock bag or bowl and crush them until you get fine, small pieces with some texture remaining. Avoid pulverizing them into powder to maintain a crunchy bite.
- Make the Binding Mixture: In a small pot over medium-low heat, combine peanut butter, maple syrup, and molasses. Stir continuously until melted and smooth, taking care not to burn the mixture. Add a pinch of salt, more if the peanut butter is unsalted, and stir to combine. Alternatively, melt these ingredients in the microwave in 20-30 second increments, stirring between each.
- Combine Ingredients: In a large bowl, add the crushed corn flakes. Pour the warm peanut butter mixture over the corn flakes and stir well until all pieces are evenly coated and combined.
- Press into Pan and Chill: Line a loaf pan with parchment paper. Transfer the mixture into the pan and press down firmly and evenly to compact the base. Place in the freezer for 45-60 minutes or overnight to set.
- Melt the Chocolate Coating: When ready to coat, combine the dark chocolate chips and butter in a microwave-safe bowl. Microwave in 30-second increments, stirring after each, until smooth and fully melted without burning.
- Slice and Dip: Remove the set bars from the pan and cut into 12 bars. Dip each bar into the melted chocolate to coat thoroughly. Place coated bars on a parchment-lined surface and refrigerate until the chocolate hardens, about 30-60 minutes.
- Serve: Once chilled and chocolate is set, enjoy these spooky, crunchy homemade Butterfinger bars perfect for Halloween treats.
Notes
- For a crunchier texture, use corn flakes instead of corn chex.
- Blackstrap molasses adds depth and richness, but regular molasses works in a pinch.
- If peanut allergies are a concern, sunflower seed butter can be substituted.
- Pressing the mixture firmly helps maintain bar shape after chilling.
- Keep the bars refrigerated for best texture and freshness.

