
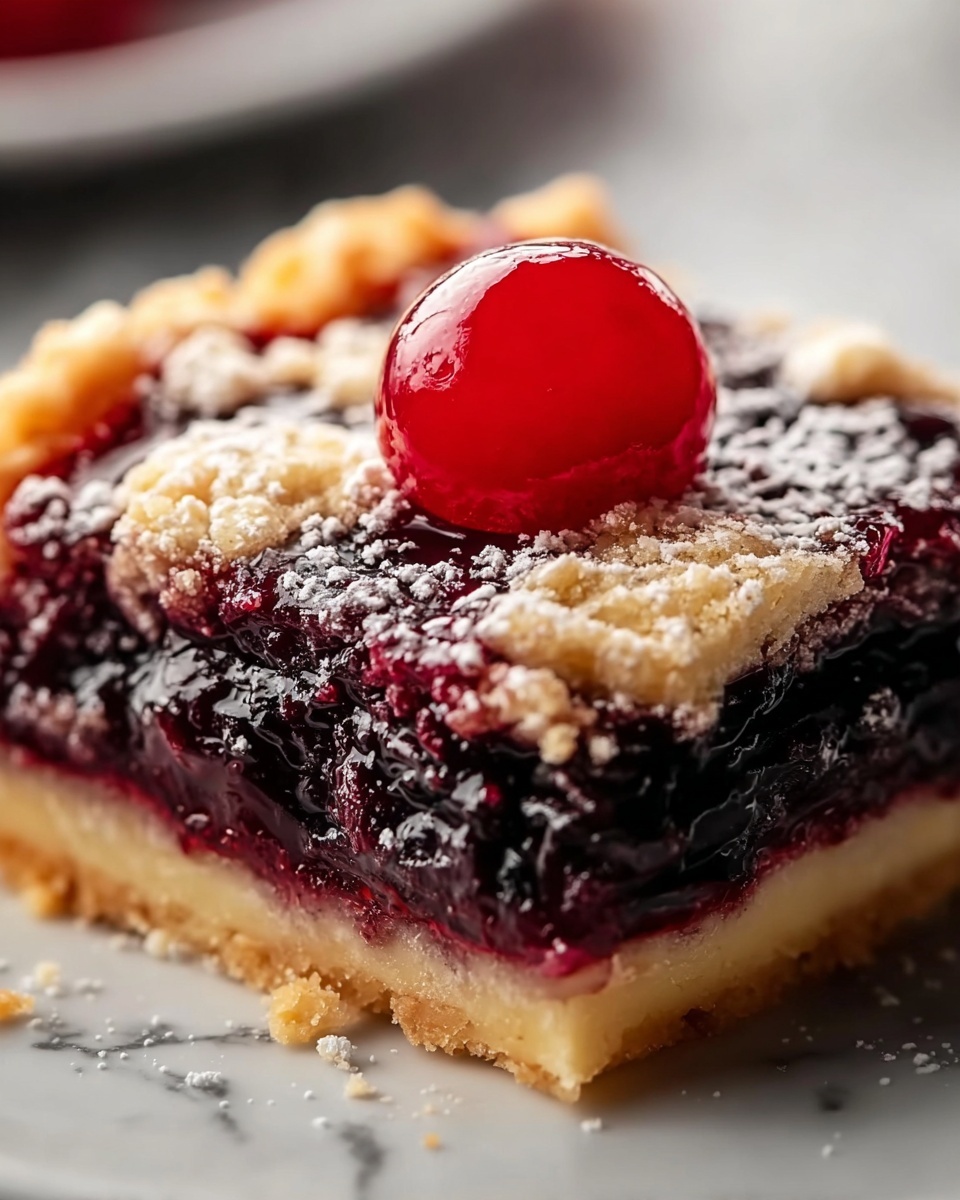
There’s something truly irresistible about a dessert that combines the warm, buttery crumb of a perfect crust with the juicy burst of fresh cherries. This Sweet Cherry Pie Bars Recipe captures all those delightful flavors in one convenient and shareable treat. Whether you’re whipping it up for a family gathering or a cozy night in, these bars blend sweetness, tartness, and a tender crumb into a slice of pure happiness that’s hard to put down.
Ingredients You’ll Need
The beauty of this recipe is how straightforward the ingredients are, yet each one plays an essential role in creating layers of flavor and texture. From the rich, cold butter that makes the crust flaky, to the juicy cherries that provide that vibrant pop of color and tang, every item is key in crafting these luscious bars.
- All-purpose flour: The sturdy foundation that holds the crust and topping together with just the right amount of tenderness.
- Granulated sugar: Adds sweetness both to the crust and filling, balancing the tartness of the cherries perfectly.
- Baking powder: Helps give the crust a gentle rise and tender crumb without weighing it down.
- Salt: Elevates the flavors and balances the sweetness for a well-rounded taste.
- Unsalted butter (cold and cubed): Critical for that buttery, flaky texture in the crust and crumbly topping.
- Large egg: Acts as a binder to bring the crust dough together just enough while keeping it tender.
- Vanilla extract: Adds a warm, aromatic note to both the dough and the cherry filling.
- Fresh or frozen cherries, pitted and halved: The star of the show, providing juicy bursts of flavor and vibrant color.
- Cornstarch: Thickens the cherry filling, ensuring it’s perfectly luscious but not runny.
- Lemon juice: Introduces a subtle tang that brightens the cherry filling and balances the sweetness.
How to Make Sweet Cherry Pie Bars Recipe
Step 1: Preheat Oven and Prepare Your Pan
Start by setting your oven to 375°F (190°C). Grease a 9×13-inch baking dish or line it with parchment paper—this makes lifting the bars out a breeze and saves you from any stickiness later on.
Step 2: Prepare the Crust and Topping Mixture
In a large bowl, whisk together the flour, sugar, baking powder, and salt. Next, add the cold, cubed butter and work it into the dry ingredients using a pastry cutter or your fingertips until it looks like coarse crumbs. This step is important to create that wonderfully crumbly texture.
Step 3: Add Egg and Vanilla
Stir in the egg and vanilla extract gently. The dough should hold together if you press it but still remain crumbly—exactly the texture you want for both the base and topping.
Step 4: Press Dough into the Pan for the Base
Press about two-thirds of the dough mixture evenly into the bottom of your prepared pan. Use a spatula or your hands to create a smooth, even layer. This will bake into a crisp, golden crust that supports the filling beautifully.
Step 5: Cook the Cherry Filling
In a saucepan over medium heat, combine the cherries, sugar, cornstarch, lemon juice, and vanilla extract. Stir frequently as the mixture heats, then bring it to a boil. Let it cook for about 5 to 7 minutes until thickened and bubbly—this thick filling will keep your bars from getting soggy.
Step 6: Assemble the Bars
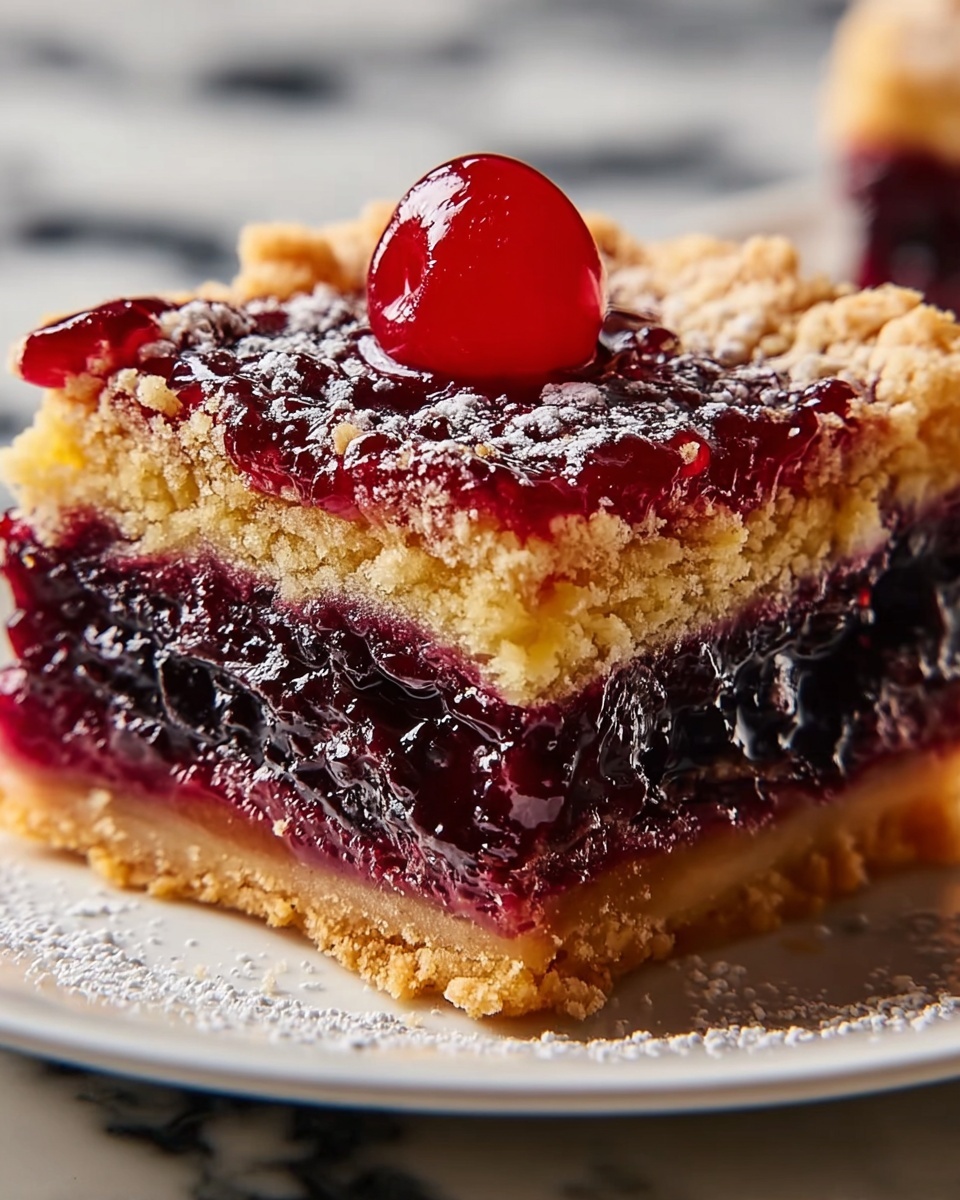
Spread the thickened cherry filling evenly over the crust in your baking dish. Then crumble the remaining dough mixture over the top, creating that signature crumbly topping that adds texture and richness.
Step 7: Bake Until Golden and Bubbling
Bake your cherry bars for 35 to 40 minutes. You’ll know they’re done when the crust and topping are a lovely golden brown and you can see the cherry filling bubbling delectably beneath the topping.
Step 8: Cool Completely Before Cutting
Patience pays off here! Allow the bars to cool fully in the pan before slicing. This resting period helps the filling set so your bars hold together perfectly when cut.
Step 9: Slice and Enjoy Your Sweet Cherry Pie Bars
Once cooled, slice into squares or rectangles. For an extra touch of charm and sweetness, dust with powdered sugar before serving—it’s a simple flourish that makes these bars feel like a special occasion dessert anytime.
How to Serve Sweet Cherry Pie Bars Recipe
Garnishes
A light dusting of powdered sugar is a classic choice that adds a delicate sweetness and pretty presentation. For a more decadent touch, try a dollop of whipped cream or a scoop of vanilla ice cream to complement the warm cherry flavors.
Side Dishes
These bars shine perfectly on their own but pair beautifully with a fresh cup of coffee or a chilled glass of milk. For a brunch spread, they can sit alongside creamy yogurt and fresh fruit for a balance of rich and refreshing flavors.
Creative Ways to Present
Try stacking the bars with layers of whipped cream and fresh cherries in a clear glass for a charming trifle-style dessert. Or serve smaller bite-sized pieces on a platter for parties, making them easy to grab and enjoy without any fuss.
Make Ahead and Storage
Storing Leftovers
If you find yourself lucky enough to have leftovers, store them in an airtight container at room temperature for up to two days to keep the crust crisp and filling fresh. After that, refrigeration is best for preserving the cherries’ juiciness.
Freezing
You can freeze these bars for up to three months. Wrap individual slices tightly in plastic wrap and place them in a freezer-safe container or bag. Thaw in the fridge overnight before serving to retain the best texture.
Reheating
To enjoy your bars warm, reheat them gently in a preheated oven at 325°F (160°C) for about 10-12 minutes. Avoid the microwave if you can, as it may make the crust soggy rather than crisp.
FAQs
Can I use frozen cherries in the Sweet Cherry Pie Bars Recipe?
Absolutely! Frozen cherries work just as well as fresh ones and are often more convenient. Just be sure to thaw and drain any excess liquid before cooking the filling to avoid a watery crust.
What if I don’t have cornstarch for the filling?
You can substitute with an equal amount of potato starch or arrowroot powder. These alternatives will thicken the cherry filling effectively while keeping it clear and glossy.
Is it possible to make this recipe gluten-free?
Yes! Swap the all-purpose flour for a gluten-free baking blend that includes xanthan gum. This way, you keep the right texture and crumb without gluten.
How long do these bars keep fresh?
Stored properly in an airtight container in the refrigerator, these bars stay fresh for up to four days. They tend to get better as the flavors meld, so they’re perfect for making ahead.
Can I use this recipe for other fruit fillings?
Definitely! This crust and crumb topping work wonderfully with many kinds of fruit fillings like blueberry, raspberry, or even peach. Just adjust the sweetening and thickening to suit the fruit’s natural flavor and moisture level.
Final Thoughts
There you have it—a Sweet Cherry Pie Bars Recipe that’s as joyful to make as it is to eat. I can’t wait for you to try this recipe and enjoy the perfect balance of buttery crust, luscious cherry filling, and crumbly topping. Whether for a special occasion or a sweet everyday treat, these bars are sure to bring smiles all around. Happy baking!
Print
Sweet Cherry Pie Bars Recipe
- Prep Time: 20 minutes
- Cook Time: 45 minutes
- Total Time: 1 hour 5 minutes
- Yield: 12 servings
- Category: Dessert
- Method: Baking
- Cuisine: American
Description
Sweet Cherry Pie Bars are a delightful twist on classic cherry pie, featuring a buttery crumbly crust and topping with a luscious cherry filling in the middle. These bars combine the ease of bar cookies with the delicious flavor of a traditional cherry pie, perfect for dessert or a sweet snack.
Ingredients
For the Crust and Topping:
- 2 1/2 cups all-purpose flour
- 1 1/2 cups granulated sugar
- 1 teaspoon baking powder
- 1/2 teaspoon salt
- 1 cup unsalted butter, cold and cut into cubes
- 1 large egg
- 1 teaspoon vanilla extract
For the Cherry Filling:
- 2 cups fresh or frozen cherries, pitted and halved
- 1/2 cup granulated sugar
- 1 tablespoon cornstarch
- 1 tablespoon lemon juice
- 1/2 teaspoon vanilla extract
Instructions
- Preheat oven and prepare pan: Preheat your oven to 375°F (190°C). Grease or line a 9×13-inch baking dish with parchment paper to ensure easy removal of the bars after baking.
- Prepare the crust and topping: In a large bowl, combine the all-purpose flour, granulated sugar, baking powder, and salt thoroughly to blend the dry ingredients.
- Cut in the butter: Add the cold, cubed unsalted butter to the dry ingredients and use a pastry cutter or your hands to cut the butter in until the mixture resembles coarse crumbs with pea-sized pieces.
- Add egg and vanilla: Mix in the large egg and vanilla extract just until combined. The dough will be crumbly but should hold together when pressed.
- Press the dough into the pan: Take about two-thirds of the crumbly dough and press it evenly into the bottom of the prepared baking pan to form the base crust. Use a spatula or your hands to smooth it out firmly.
- Make the cherry filling: In a medium saucepan over medium heat, combine the pitted cherries, granulated sugar, cornstarch, lemon juice, and vanilla extract. Stir occasionally as it heats.
- Cook filling: Continue cooking the mixture, stirring occasionally, until it boils and thickens, about 5 to 7 minutes. Remove from heat once thickened and bubbly, then let it cool slightly to room temperature.
- Assemble the bars: Evenly spread the cooled cherry filling over the pressed crust in the pan.
- Add crumbly topping: Crumble the remaining third of the dough over the cherry filling, distributing it evenly to create a crumbly topping layer.
- Bake: Place the baking dish in the preheated oven and bake the bars for 35 to 40 minutes or until the crust is golden brown and the cherry filling is bubbly.
- Cool completely: Remove the baking dish from the oven and allow the bars to cool completely in the pan, which helps the filling set and makes cutting easier.
- Serve and enjoy: Once cooled, slice the bars into squares or rectangles. Optionally, dust with powdered sugar for added sweetness before serving.
Notes
- Using cold butter is key to achieving the crumbly texture for the crust and topping.
- Frozen cherries can be substituted for fresh cherries; just thaw and drain excess liquid before cooking.
- Chilling the dough before baking is optional but can help maintain structure during baking.
- Make sure the cherry filling is not too runny before assembling to prevent sogginess in the crust.
- Store leftover bars in an airtight container at room temperature for up to 3 days or refrigerate for up to a week.

