
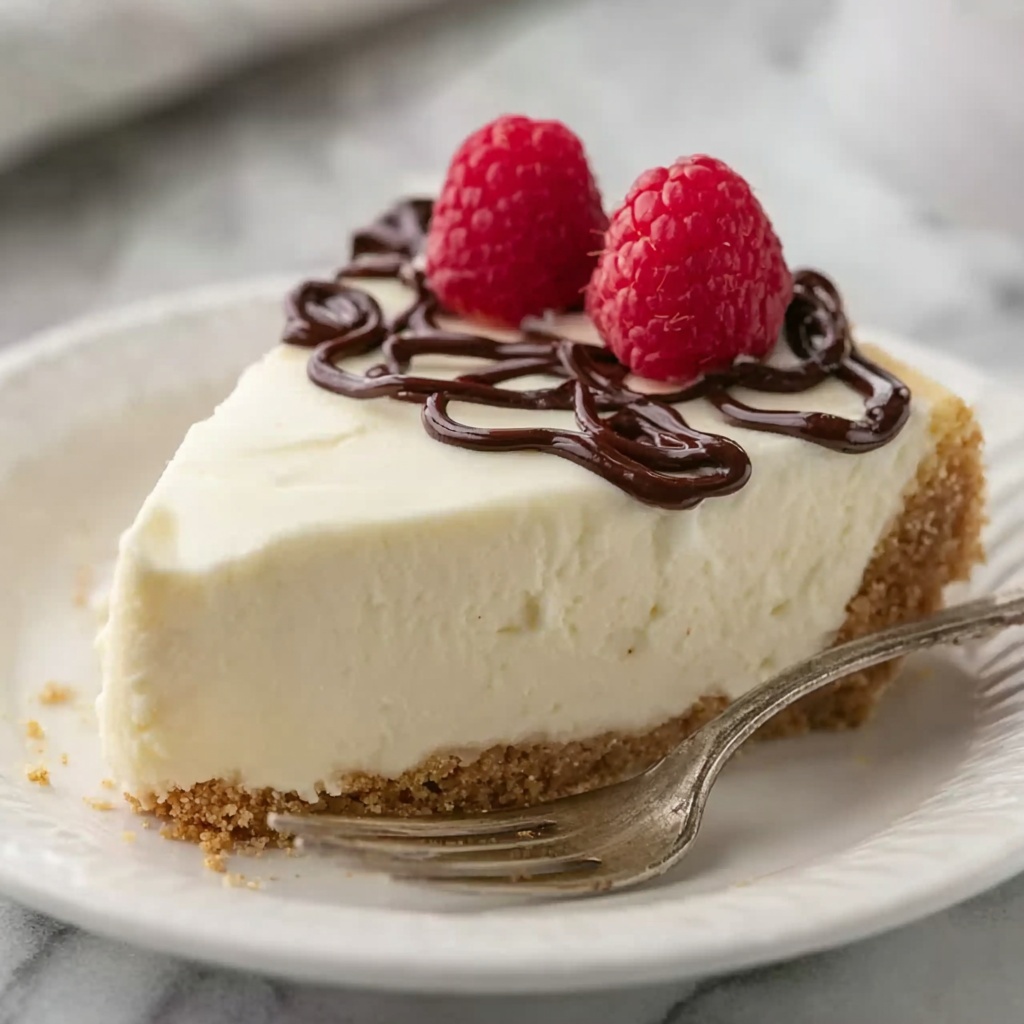
If you’ve ever craved a luscious dessert that feels indulgent yet refreshingly light, this Easy No-Bake Cheesecake Recipe will become your new go-to. It combines a buttery graham cracker crust with a silky, creamy filling that sets beautifully in the fridge without any oven fuss. The balance of sweetness and a hint of tang from lemon juice makes every bite unforgettable, perfect for impressing friends or treating yourself on a cozy night in.
Ingredients You’ll Need
These ingredients are simple pantry and fridge staples, yet each one plays an essential role in building the cheesecake’s irresistible texture and flavor. From the crunchy crust to the fluffy cream filling, everything comes together effortlessly.
- 2 cups graham cracker crumbs: This forms the crunchy, buttery base that provides the perfect contrast to the creamy filling.
- 1/2 cup unsalted butter, melted: Adds richness and helps bind the crust together firmly.
- 1/4 cup granulated sugar: Sweetens the crust slightly and balances the buttery flavor.
- 16 ounces cream cheese, softened: The heart of the filling, smooth and tangy, providing creaminess.
- 1 cup powdered sugar: Easily dissolves into the cream cheese, blending sweetness without graininess.
- 1 teaspoon vanilla extract: Enhances the overall flavor with warm, aromatic notes.
- 1 tablespoon lemon juice (optional): A subtle tanginess that brightens the cheesecake’s profile.
- 1 1/2 cups heavy whipping cream, cold: Whipped to fluffy perfection to lighten the dense cream cheese mixture.
- Fresh fruit (berries, kiwi, etc.): Adds freshness and vibrant color for serving and garnishing.
- Chocolate sauce: For drizzling, adding a decadent touch.
- Caramel drizzle: Creates a rich, sticky sweetness that pairs wonderfully with the cheesecake.
- Pie filling: Optional but delicious, for topping variations that keep things interesting.
How to Make Easy No-Bake Cheesecake Recipe
Step 1: Prepare the Crust
Start by combining the graham cracker crumbs, melted butter, and granulated sugar in a medium bowl. Stir until the crumbs are evenly moistened and resemble wet sand. Press this mixture firmly into the bottom of a 9-inch springform pan, smoothing it out into an even layer. Pop it into the fridge to chill while you focus on that velvety filling.
Step 2: Make the Filling
Beat the softened cream cheese and powdered sugar in a large bowl with an electric mixer until perfectly smooth and creamy, leaving no lumps behind. Add the vanilla extract and optional lemon juice, mixing them in so the flavors blend beautifully. Whip the cold heavy cream in a separate bowl until stiff peaks form, then carefully fold it into the cream cheese mixture. This gentle folding keeps the filling light and airy, creating that melt-in-your-mouth texture.
Step 3: Assemble and Chill
Spread the luscious cream cheese filling evenly over your chilled graham cracker crust. Cover the assembled cheesecake with plastic wrap or a lid and refrigerate for at least 4 hours—though overnight resting is best for a perfectly set and sliceable cheesecake.
Step 4: Serve and Enjoy
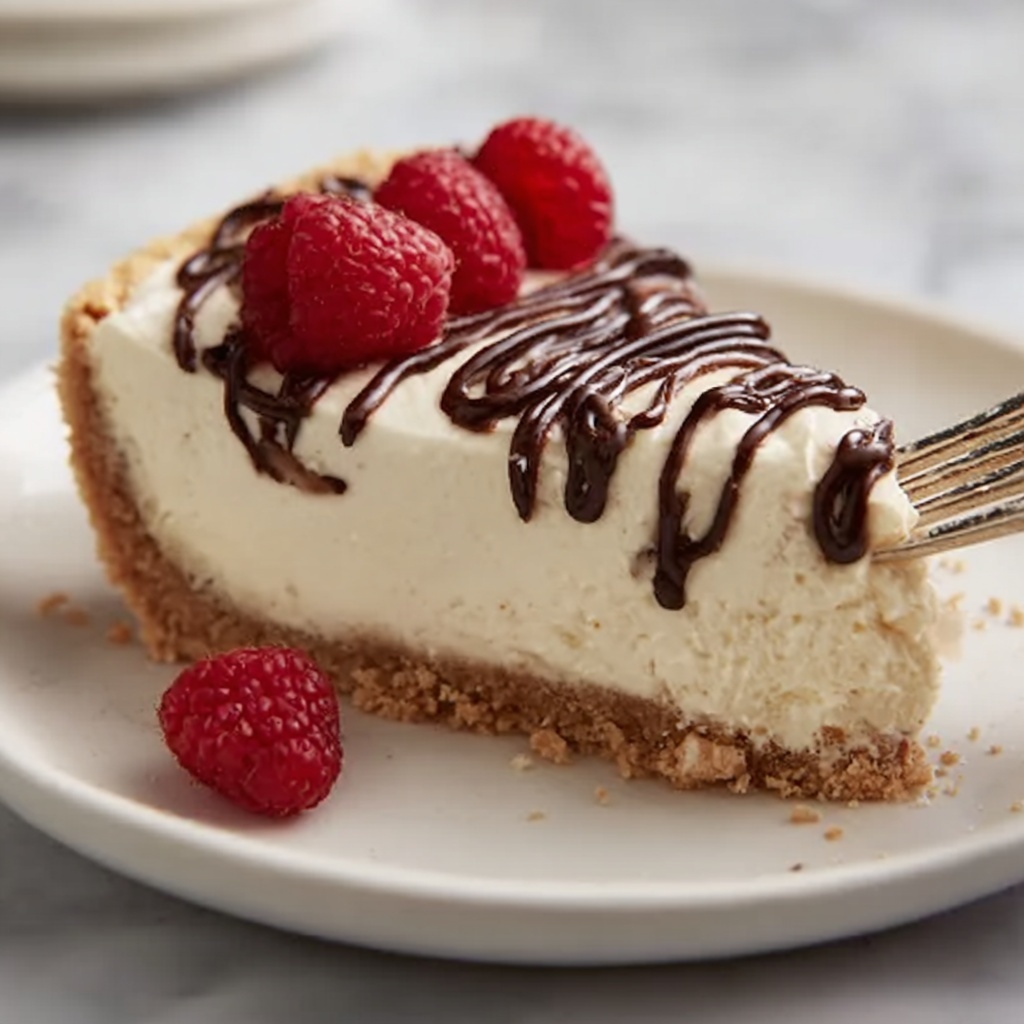
Once the cheesecake is set and firm to the touch, remove it from the springform pan with care. Now comes the fun part—decorating! Top with fresh, vibrant fruit, drizzle with chocolate or caramel sauce, or add spoonfuls of pie filling to personalize your dessert masterpiece. Slice into generous pieces and savor every creamy bite.
How to Serve Easy No-Bake Cheesecake Recipe
Garnishes
Fresh berries like strawberries, blueberries, and raspberries are classic choices for garnishing, adding a burst of color and natural sweetness. For an extra wow factor, sprinkle with chocolate shavings or a gentle drizzle of caramel to create an irresistible combo of flavors and textures that elevate this simple dessert to a crowd-pleaser.
Side Dishes
Pair your cheesecake slices with a dollop of whipped cream or alongside a bright fruit salad to balance the richness. A small scoop of sorbet can also be delightful, offering a cold, refreshing contrast that complements the creamy texture perfectly.
Creative Ways to Present
Transform your cheesecake into individual servings by spooning the filling into parfait glasses layered with crust crumbs and fruit, making a visually stunning and easy-to-serve dessert. Alternatively, decorate with edible flowers or a dusting of powdered sugar for an elegant touch that’s sure to impress.
Make Ahead and Storage
Storing Leftovers
Leftover cheesecake should be kept tightly covered in the fridge to preserve its freshness and prevent it from absorbing other odors. Stored properly, it will stay deliciously creamy for up to 3 days—perfect for enjoying seconds or sharing with friends the next day.
Freezing
This Easy No-Bake Cheesecake Recipe freezes beautifully. Wrap it securely in plastic wrap and then foil before placing it in the freezer. When you’re ready to enjoy it, thaw it overnight in the fridge for the best texture—still creamy and just as delightful as fresh.
Reheating
This cheesecake is best enjoyed cold, so reheating is not recommended. If you prefer a softer texture, simply let slices sit at room temperature for 10-15 minutes before serving to bring out the flavors without melting the filling.
FAQs
Can I use a different type of crust for this cheesecake?
Absolutely! While graham cracker crust is classic, you can substitute crushed digestive biscuits, Oreo crumbs, or even nut-based crusts for a unique twist. Just ensure your crust mixture holds together well after pressing it into the pan.
Is it necessary to use a springform pan?
A springform pan is ideal because it allows for easy removal of the cheesecake without damaging the crust or sides. If you don’t have one, any pan with removable sides or even a regular pie dish will work, but be extra careful when slicing and serving.
Can I make this cheesecake vegan or dairy-free?
For a dairy-free version, you can try vegan cream cheese alternatives and coconut-based whipped cream. Keep in mind that textures and flavors might vary slightly, but it’s definitely possible to enjoy a no-bake cheesecake with these swaps.
How long does the cheesecake need to set?
The cheesecake should chill for a minimum of 4 hours to firm up properly, but overnight refrigeration is recommended for the best sliceability and flavor development.
Can I add flavors to the filling?
Yes! Feel free to add ingredients like lemon zest, cocoa powder, or even a splash of coffee extract to customize the filling according to your taste. Just fold them in gently with the cream cheese mixture to keep the texture light.
Final Thoughts
This Easy No-Bake Cheesecake Recipe is one of those magical desserts that feels special yet fits perfectly into busy lives or last-minute celebrations. Its simple ingredients and straightforward steps produce a beautifully creamy, dreamy cheesecake that’s sure to become a beloved favorite. Give it a try—you’ll be amazed at how effortlessly you can create a dessert that tastes like it took hours of work to make!
Print
Easy No-Bake Cheesecake Recipe
- Prep Time: 20 minutes
- Cook Time: 0 minutes
- Total Time: 4 hours 20 minutes
- Yield: 8 servings
- Category: Dessert
- Method: No-Cook
- Cuisine: American
- Diet: Vegetarian
Description
This easy no-bake cheesecake is a creamy and delightful dessert featuring a buttery graham cracker crust and a smooth cream cheese filling. Perfect for beginners, it requires no oven time and is ready after chilling for a few hours. Top it with fresh fruit, chocolate sauce, or caramel for a customizable treat.
Ingredients
Crust
- 2 cups graham cracker crumbs
- 1/2 cup unsalted butter, melted
- 1/4 cup granulated sugar
Filling
- 16 ounces cream cheese, softened
- 1 cup powdered sugar
- 1 teaspoon vanilla extract
- 1 tablespoon lemon juice (optional, for tanginess)
- 1 1/2 cups heavy whipping cream, cold
Toppings
- Fresh fruit (berries, kiwi, etc.)
- Chocolate sauce
- Caramel drizzle
- Pie filling
Instructions
- Prepare the Crust: In a medium bowl, combine graham cracker crumbs, melted butter, and granulated sugar until the mixture resembles wet sand.
- Form the Crust: Press the crumb mixture firmly into the bottom of a 9-inch springform pan, spreading it into an even layer to form the base of the cheesecake.
- Chill the Crust: Place the crust in the refrigerator while you prepare the filling to allow it to set slightly.
- Make the Filling: In a large bowl, beat the softened cream cheese and powdered sugar together until smooth and creamy.
- Add Flavorings: Mix in the vanilla extract and lemon juice (if using) until fully incorporated into the cream cheese mixture.
- Whip the Cream: In a separate bowl, whip the cold heavy cream until stiff peaks form for a light, airy texture.
- Combine Filling: Gently fold the whipped cream into the cream cheese mixture until the filling is smooth and well combined.
- Assemble the Cheesecake: Spread the cream cheese filling evenly over the chilled graham cracker crust in the springform pan.
- Chill to Set: Cover and refrigerate the assembled cheesecake for at least 4 hours, or preferably overnight, to allow it to firm up fully.
- Serve and Garnish: Remove the cheesecake from the springform pan, top with your choice of fresh fruit, chocolate shavings, caramel drizzle, or pie filling. Slice and enjoy!
Notes
- For best results, chill the cheesecake overnight to ensure it sets properly and slices cleanly.
- Use room temperature cream cheese to avoid lumps in the filling.
- Optional lemon juice adds a subtle tang balancing the sweetness.
- Fresh fruit toppings add a refreshing contrast and visual appeal.
- Store any leftovers covered in the refrigerator for up to 3 days.
