
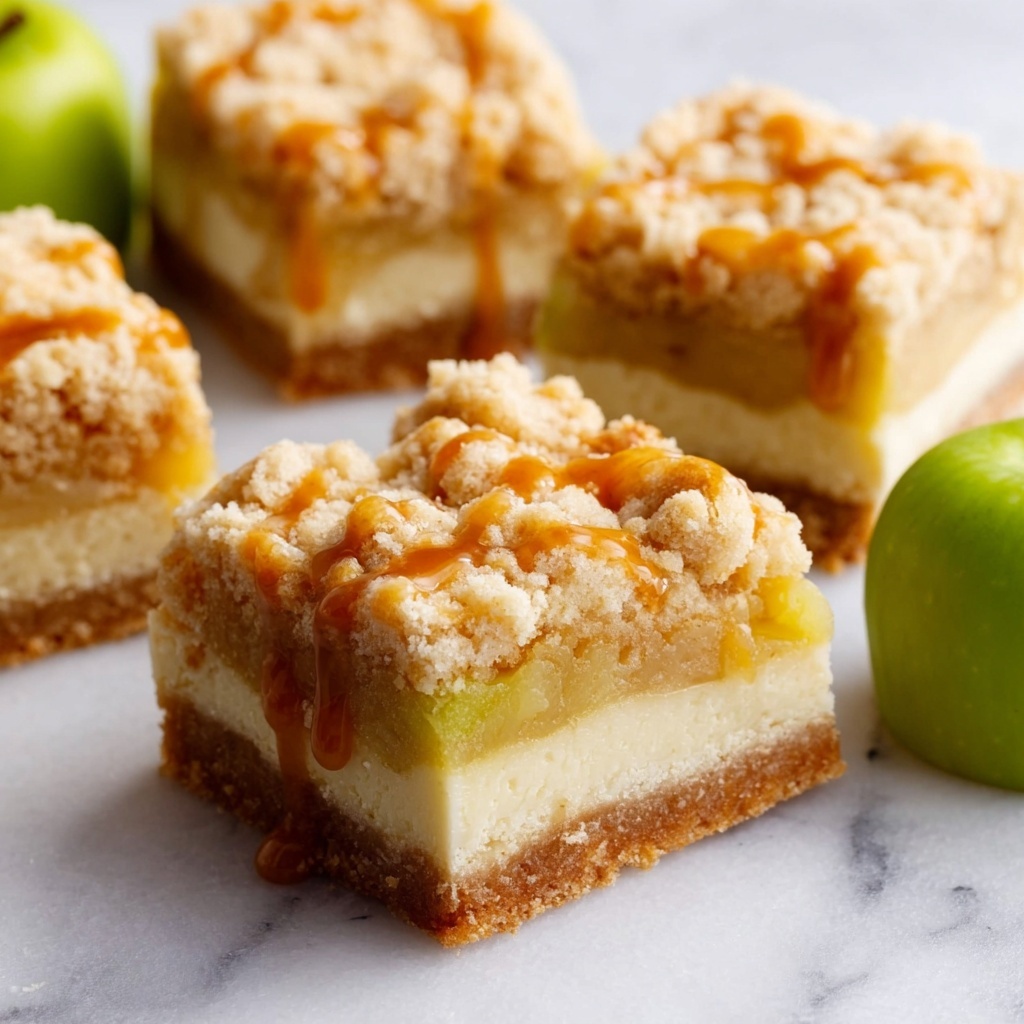
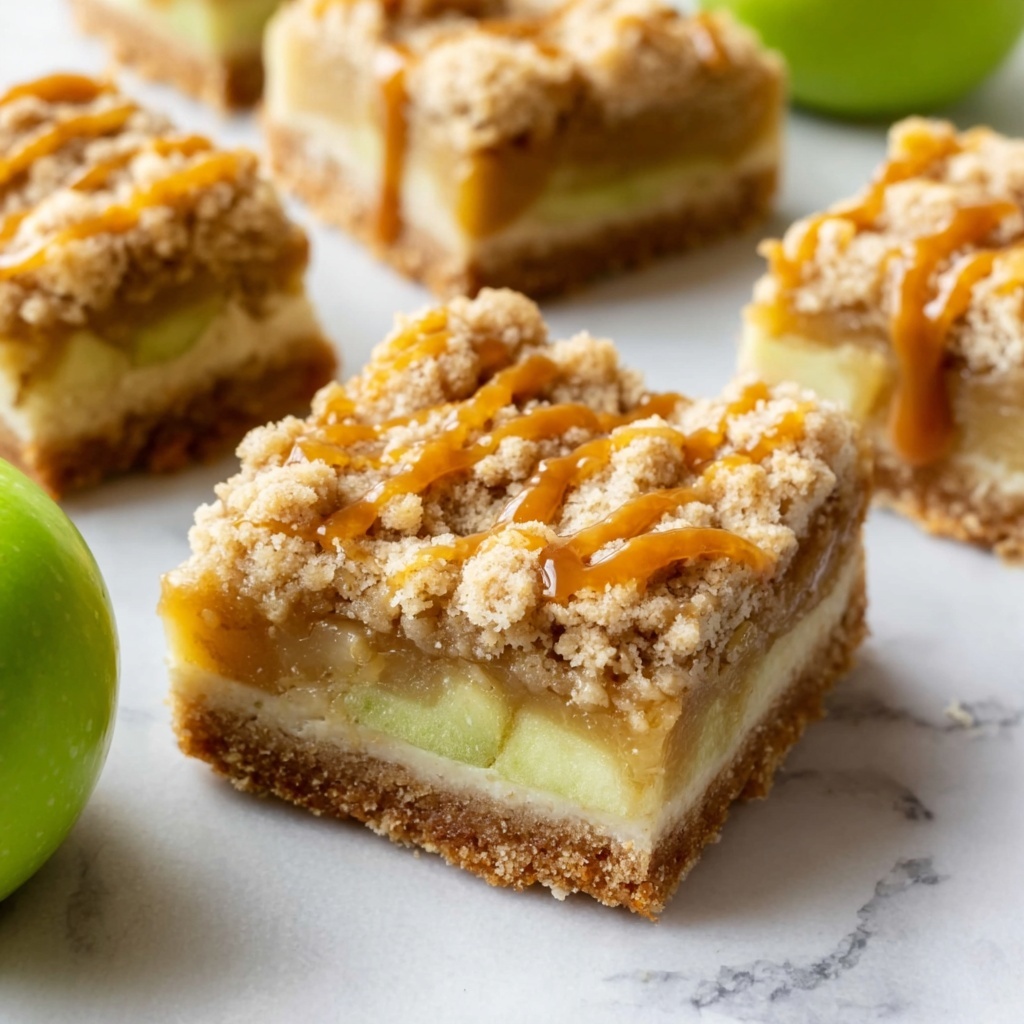
If you are craving a dessert that combines the perfect balance of sweet and salty with a delightful fruity twist, this Salted Caramel Apple Bars Recipe is exactly what you need. These bars bring together a buttery crust, luscious caramel infused with fresh tart apples, and a sprinkle of coarse sea salt to enhance every bite. The textures layer beautifully: soft, chewy, and slightly crisp, making them an irresistible treat for any occasion. Whether you bake them for a cozy family gathering or a festive celebration, these bars will quickly become a beloved favorite.
Ingredients You’ll Need
Getting these Salted Caramel Apple Bars Recipe just right is all about using simple, quality ingredients that each play a crucial role in creating texture, flavor, and that gorgeous golden color. Every item on this list is essential, from the creamy butter that forms the base to the sharpness of Granny Smith apples that lighten the rich caramel.
- Butter, 2 cups softened: Provides richness and a tender crumb to the dough base and topping.
- White sugar, 1 cup: Adds sweetness and helps with browning the crust.
- Powdered sugar, 1½ cups: Ensures smooth, velvety texture in the dough.
- Vanilla extract, 1 Tablespoon + ½ teaspoon: Enhances the overall aroma and depth of flavor.
- Flour, 4 cups: Forms the sturdy foundation of the bars.
- Chopped apples, 2 medium (preferably Granny Smith): Brings tartness and fresh juiciness that balances the sweetness.
- Caramels, 14-ounce bag unwrapped (or 11 oz Caramel Bits): The star ingredient, creating luscious, gooey layers of flavor.
- Whipping cream, ⅓ cup: Makes the caramel filling silky and smooth.
- Coarse sea salt, 2 teaspoons: Adds that perfect salty crunch to cut through the caramel richness.
How to Make Salted Caramel Apple Bars Recipe
Step 1: Preheat and Prepare the Pan
Start by heating your oven to 325 degrees Fahrenheit (163 degrees Celsius). Prepare a 9×13-inch baking pan by lining it with parchment paper or aluminum foil, then lightly spraying the surface with cooking spray to avoid sticking later on. A well-prepped pan sets the stage for easy removal and clean slicing of your bars.
Step 2: Make the Dough
In a large bowl, cream together the softened butter, white sugar, and powdered sugar until the mixture is smooth and fluffy. This step is key to achieving a light and tender texture. Beat in 1 tablespoon of vanilla extract for that warm, inviting flavor. Gradually add the flour and mix until a soft dough forms—don’t overmix to keep the final bars tender.
Step 3: Form the Base
Take half of the prepared dough and press it evenly into the bottom of your lined pan. This will become the sturdy crust that supports the filling. Pop the remaining dough into the refrigerator to chill while the base bakes. Bake the crust for 15 minutes until it begins to set and get slightly golden.
Step 4: Prepare the Caramel Apple Filling
While the crust is baking, melt the caramels with whipping cream and ½ teaspoon vanilla extract in the microwave for about one minute. Stir this mixture until smooth and creamy. Fold in the chopped apples so that every bite bursts with tart freshness. Pour this luscious filling evenly over the hot crust as soon as it comes out of the oven. Sprinkle the 2 teaspoons of coarse sea salt evenly but sparingly on top. This delicate touch of salt is what truly elevates the flavor.
Step 5: Add Crumble Topping and Bake
Take the chilled remaining dough and crumble it evenly over the caramel apple layer. This adds a delightful crumbly texture on top. Return the pan to the oven and bake for another 25 to 30 minutes. Look for a bubbly filling and a nicely browned, firm topping before pulling it out.
Step 6: Cool and Serve
Allow the bars plenty of time to cool completely in the pan. This cooling step is crucial so the bars set properly and hold their shape when sliced. Cut into 16 squares, serve, and savor the decadent experience of every bite.
How to Serve Salted Caramel Apple Bars Recipe
Garnishes
Enhance your Salted Caramel Apple Bars Recipe with a dusting of powdered sugar or a drizzle of extra caramel sauce on top. For a special touch, add a pinch of flaky sea salt to contrast even more beautifully with the sweetness. A dollop of freshly whipped cream can add an airy finish that melts in your mouth.
Side Dishes
These bars pair wonderfully with vanilla ice cream or a scoop of cinnamon-spiced frozen yogurt to add a creamy, cool element. A hot cup of coffee or chai tea complements the sweet and salty flavors perfectly, making for a cozy dessert experience.
Creative Ways to Present
For a festive gathering, serve the bars on a wooden board alongside sliced apples and caramel dipping sauce for a snack-style presentation. Alternatively, cut the bars into small bite-size pieces and arrange them on a tiered dessert tray for a party. Wrapping individual portions in parchment paper tied with twine makes a charming edible gift.
Make Ahead and Storage
Storing Leftovers
Once completely cooled, keep your Salted Caramel Apple Bars Recipe in an airtight container at room temperature for up to 3 days. If your home is warm, consider refrigerating them to maintain freshness and the caramel’s texture, which will keep well for about a week.
Freezing
You can freeze the bars for longer storage by first wrapping them tightly in plastic wrap and then placing them in a freezer-safe container or bag. They freeze beautifully for up to 3 months. When ready to enjoy, thaw overnight in the refrigerator for best texture.
Reheating
Warm individual bars gently in the microwave for about 15 to 20 seconds to revive that gooey caramel feel. Alternatively, reheat the bars in a 300-degree oven for 5 to 10 minutes. Avoid overheating to keep the crust from drying out.
FAQs
Can I use a different type of apple for this recipe?
You can substitute Granny Smith apples with other firm, slightly tart varieties like Honeycrisp or Braeburn. These apples hold their shape well and offer a nice balance to the sweet caramel, but avoid very soft or overly sweet apples to maintain the intended contrast.
Is it possible to make these bars gluten-free?
Yes! Simply replace the all-purpose flour with a gluten-free baking blend that measures one-to-one for flour. The texture might be a little different but still delicious. Be sure your baking blend contains xanthan gum for structure.
Can I prepare the dough in advance?
Absolutely. You can make the dough up to two days ahead and store it wrapped tightly in the refrigerator. This actually makes it easier to crumble evenly on top when you’re ready to bake the bars.
What other toppings would work on these bars?
Chopped nuts such as pecans or walnuts sprinkled on top of the crumble before baking add a wonderful crunch and nutty flavor that complements the salted caramel and apples really well.
Can I use homemade caramel instead of store-bought?
Yes, using homemade caramel adds that extra personal touch and rich flavor. Just be sure your caramel is thick, smooth, and can hold up well when layered with the apples so it doesn’t run too much during baking.
Final Thoughts
There is something so comforting and irresistible about the Salted Caramel Apple Bars Recipe that makes it a definite must-bake. From the tender buttery crust to the gooey caramel-apple filling and that perfect hint of salt, these bars are guaranteed to impress family and friends alike. I hope you enjoy making and sharing this recipe as much as I love it — once you try it, it will quickly become one of your favorite desserts to bake time and again.
Print
Salted Caramel Apple Bars Recipe
- Prep Time: 15 minutes
- Cook Time: 40 minutes
- Total Time: 55 minutes
- Yield: 16 servings
- Category: Dessert
- Method: Baking
- Cuisine: American
Description
These Salted Caramel Apple Bars feature a buttery crust topped with a luscious caramel apple filling and a golden crumble topping, perfectly balancing sweet and salty flavors for a delicious dessert that’s perfect for any occasion.
Ingredients
Crust & Topping
- 2 cups butter, softened
- 1 cup white sugar
- 1 and ½ cups powdered sugar
- 1 tablespoon vanilla extract
- 4 cups flour
Filling
- 2 medium apples, chopped (Granny Smith preferred)
- 1 14 ounce bag caramels, unwrapped (or 11 oz unwrapped Caramel Bits)
- ⅓ cup whipping cream
- ½ teaspoon vanilla extract
- 2 teaspoons coarse sea salt (adjust as desired)
Instructions
- Preheat and Prepare Pan: Preheat your oven to 325°F (163°C). Line a 9×13 inch pan with parchment paper or aluminum foil and lightly spray it with cooking spray to prevent sticking.
- Make Dough: In a large mixing bowl, cream together the softened butter, white sugar, and powdered sugar until smooth and fluffy. Add 1 tablespoon of vanilla extract and beat until fully combined. Gradually mix in the flour until a soft dough forms.
- Form the Base: Press half of the prepared dough evenly into the bottom of the lined 9×13 pan to create the crust layer. Place the remaining dough in the refrigerator to chill while the base bakes. Bake the base in the preheated oven for 15 minutes.
- Prepare Caramel Apple Filling: While the crust bakes, melt the caramels, whipping cream, and ½ teaspoon vanilla extract together in the microwave for 1 minute. Stir until smooth. Stir in the chopped apples evenly into the caramel mixture. Once the crust is out of the oven, pour this filling evenly over the hot crust. Lightly sprinkle 2 teaspoons of coarse sea salt over the filling to balance the sweetness.
- Add Crumble Topping and Bake: Remove the remaining chilled dough from the refrigerator and crumble it evenly over the caramel apple layer. Return the pan to the oven and bake for an additional 25 to 30 minutes, until the filling is bubbly and the top layer is firm and golden.
- Cool and Serve: Allow the bars to cool completely in the pan before cutting into 16 squares to ensure they hold together well. Serve and enjoy the decadent blend of salty caramel and tart apples.
Notes
- Use Granny Smith apples for a tart contrast to the sweet caramel.
- Adjust the sea salt amount to taste for a perfect balance of salty and sweet.
- Allow bars to cool completely before cutting to maintain clean slices.
- Store bars in an airtight container at room temperature for up to 3 days or refrigerate for up to a week.
- For easier slicing, chill the bars briefly before cutting.


