
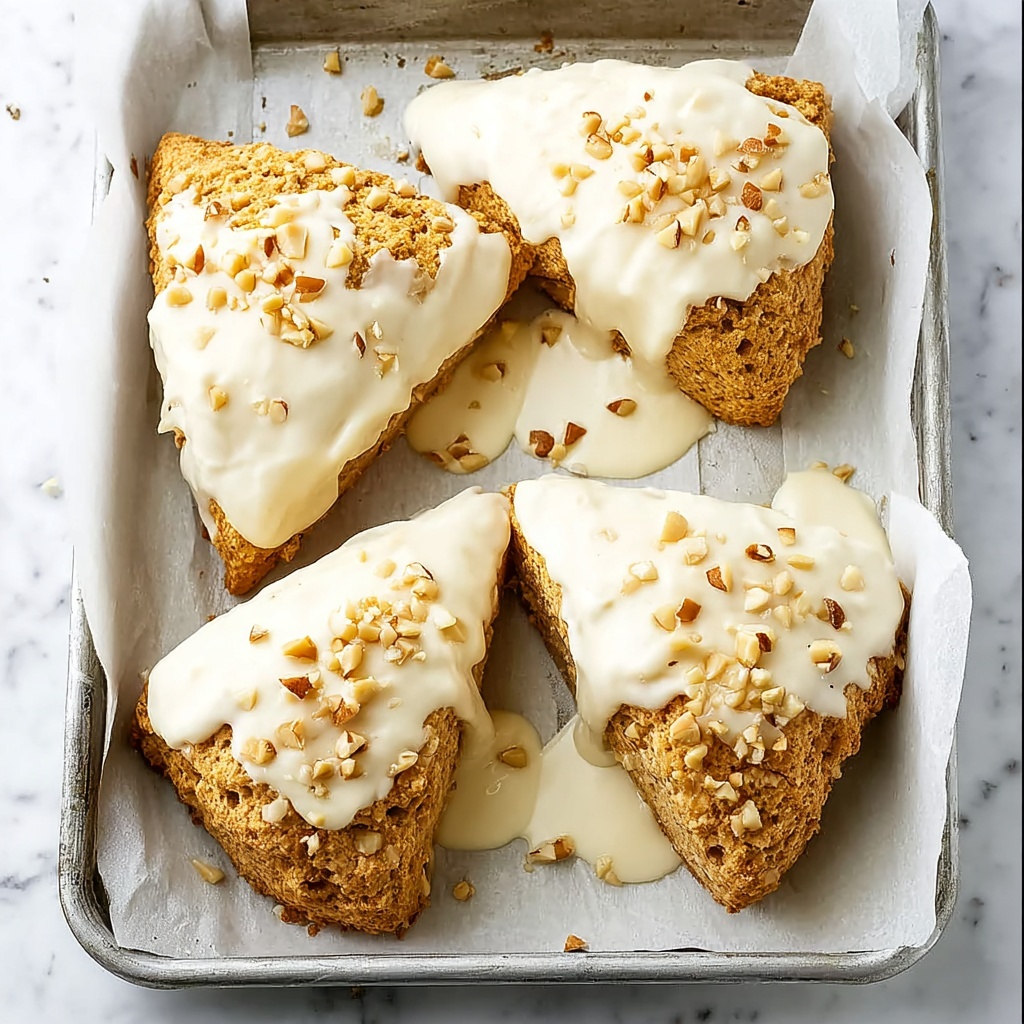
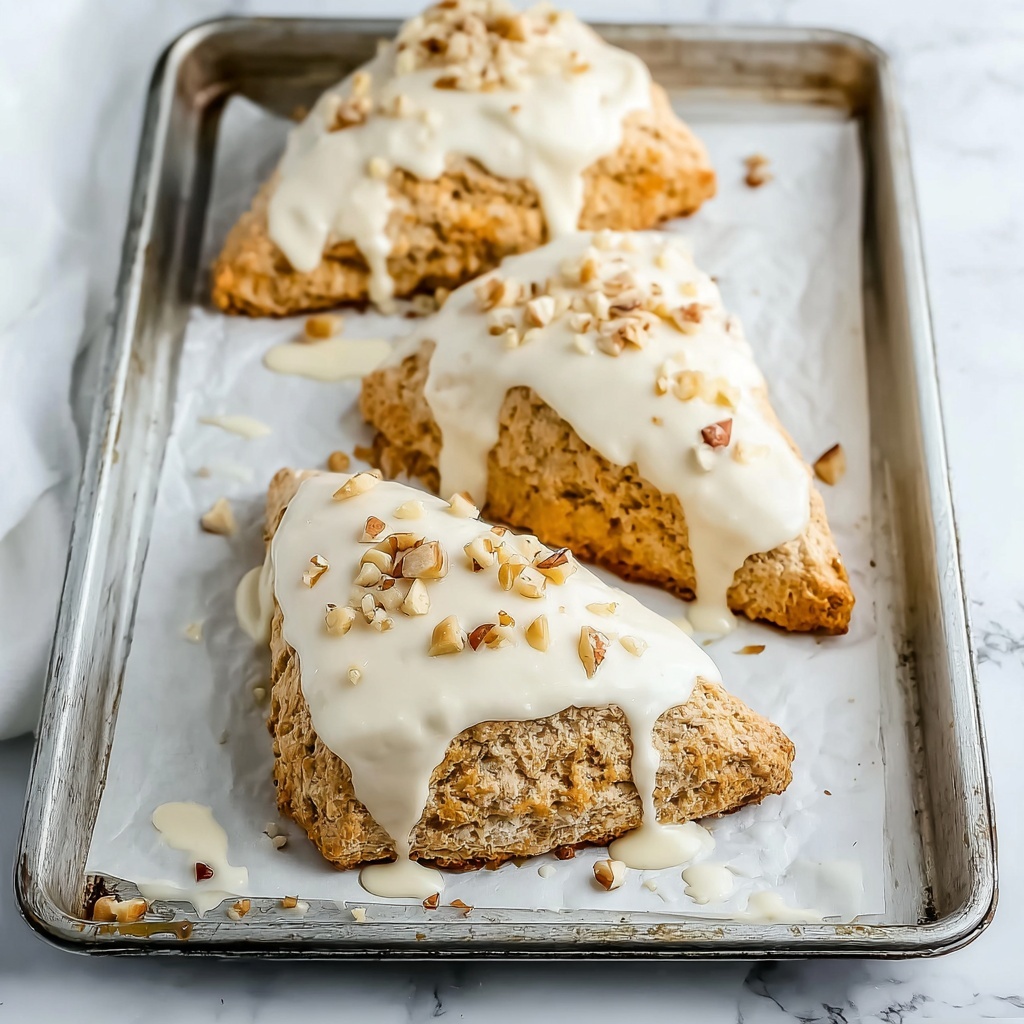
If you’re ready to cozy up with a treat that perfectly captures the essence of autumn, you’re in for a real delight. These Delicious Pumpkin Scones That Will Elevate Your Fall Baking Recipe are a beautiful balance of warming spices, tender pumpkin goodness, and a lightly sweet glaze that will make your kitchen smell like a fall dream. Whether you’re serving them for breakfast, a snack, or a comforting afternoon treat, this recipe brings a burst of seasonal joy that’s surprisingly easy to make and sure to impress anyone who tries them.
Ingredients You’ll Need
Gathering simple and thoughtfully selected ingredients is the foundation of creating these scrumptious pumpkin scones. Each component plays a vital role, from giving structure and texture to adding depth and warmth to every bite.
- 2 cups all-purpose flour: Essential for that classic scone texture with just the right amount of chew and crumb.
- 1/2 cup brown sugar: Adds a rich, molasses-like sweetness that’s perfect for the cozy flavors of fall.
- 3 teaspoons baking powder: Ensures your scones rise to fluffy perfection with a light, tender crumb.
- 1/2 teaspoon salt: Balances the sweetness and enhances the warmth of all the spices.
- 2 teaspoons cinnamon: Warms the flavor profile with a beloved and familiar autumn spice.
- 1/2 teaspoon nutmeg: Deepens the fall essence with its aromatic and comforting notes.
- 1/2 teaspoon ginger: Gives a lively, zesty kick that complements the pumpkin beautifully.
- 1/4 teaspoon allspice: Adds complexity with a hint of clove and nutmeg flavors.
- 1/4 teaspoon cloves: Introduces a bold, sweet-spicy note that rounds out the spice blend.
- 1/2 cup unsalted butter, cold and cubed: Creates that light, flaky texture every scone lover craves.
- 1/3 cup pumpkin puree: Brings moisture and that unmistakable pumpkin flavor to make these scones truly special.
- 5-7 tablespoons heavy cream: Helps bind the dough while keeping it tender and moist—add carefully for the perfect dough.
- 2 teaspoons vanilla extract: Infuses a warm sweetness that enhances the overall flavor profile wonderfully.
- 2 tablespoons maple syrup: Brings an earthy sweetness that’s perfectly aligned with fall flavors.
- 2 tablespoons heavy cream (for glaze): Adds richness and smoothness to the glaze that tops these scones beautifully.
- 1 cup powdered sugar: Sweetens the glaze and provides a lovely shine for a gorgeous finish.
- 1/2 teaspoon vanilla extract (for glaze): Adds an extra layer of sweetness and depth to the glaze.
- Pinch salt (for glaze): Balances the glaze’s sweetness to perfection.
How to Make Delicious Pumpkin Scones That Will Elevate Your Fall Baking Recipe
Step 1: Prepare Your Oven and Dry Ingredients
First, preheat your oven to 400°F and line a baking sheet with parchment paper to prevent sticking and ensure an easy release. Then, sift together all your dry ingredients—flour, brown sugar, baking powder, all the spices, and salt. Placing this mixture in the freezer for 10 minutes keeps everything cool, which is key to fluffy, flaky scones.
Step 2: Cut in the Butter
Next, incorporate the cold, cubed unsalted butter into your dry mixture. Use a pastry cutter or your fingers to get the mixture to resemble coarse sand with tiny pea-sized butter chunks. This step is crucial because those little butter pockets melt during baking, creating that dreamy flaky texture we all love.
Step 3: Add Pumpkin and Wet Ingredients
Now, gently mix in the pumpkin puree, 5 tablespoons of heavy cream, and vanilla extract. Stir just until combined—overmixing can result in tougher scones. If the dough is a bit crumbly, add more cream, one tablespoon at a time, until the dough holds together nicely but isn’t sticky.
Step 4: Shape and Cut the Dough
Turn the dough out onto a lightly floured surface and pat it into an 8-inch circle. Use a sharp knife to cut the round into 8 even wedges. This rustic approach adds to the scones’ charm and makes them perfectly shareable.
Step 5: Prepare for Baking
Place your wedges on the lined baking sheet with a little space between each. Brush the tops with a little heavy cream to help them brown beautifully and develop an inviting golden color during baking.
Step 6: Bake to Perfection
Bake your scones at 400°F for about 25 to 30 minutes until the edges are lightly browned and a knife inserted into the center comes out clean. The aroma filling your kitchen at this point will hint at the deliciousness to come.
Step 7: Create the Glaze and Finish
While your scones are cooling, whisk together maple syrup, the remaining 2 tablespoons of heavy cream, powdered sugar, vanilla extract, and a pinch of salt to make a smooth, glossy glaze. Generously drizzle it over the cooled scones to add a delicate sweetness and that irresistible shiny finish.
How to Serve Delicious Pumpkin Scones That Will Elevate Your Fall Baking Recipe
Garnishes
Enhance your scones by adding a few finishing touches before serving. A sprinkle of cinnamon or nutmeg on top adds extra warmth, while chopped toasted pecans or walnuts bring delightful crunch that complements the soft crumb perfectly.
Side Dishes
These scones shine alongside a warm cup of spiced chai tea or a frothy latte. For a fuller spread, offer a dollop of whipped cream or some cream cheese mixed with a touch of honey to balance the spices and add lush creaminess.
Creative Ways to Present
For a charming fall brunch, arrange these scones on a rustic wooden board alongside small bowls of pumpkin butter, honey, or apple butter. You could also wrap a few scones individually in parchment paper tied with twine for a lovely homemade gift to share.
Make Ahead and Storage
Storing Leftovers
Once cooled completely, store any leftover scones in an airtight container at room temperature for up to two days. This keeps them tender without drying out, so you can enjoy that fresh-baked feeling even later.
Freezing
You can freeze the scones before glazing by wrapping them individually in plastic wrap and placing them in a zipped freezer bag. They’ll keep well for up to a month. When ready to eat, thaw at room temperature and then glaze for a fresh taste.
Reheating
Reheat your scones gently in a 300°F oven for about 10 minutes to restore their flaky texture. Avoid microwaving, which can make them chewy. Add the glaze fresh after warming for best flavor and presentation.
FAQs
Can I use canned pumpkin for the pumpkin puree?
Absolutely! Canned pumpkin puree works perfectly for this recipe and keeps the scones moist and flavorful. Just be sure to use pure pumpkin, not pumpkin pie filling, which contains spices and sweeteners that might throw off the balance.
What if I don’t have all the spices listed?
While the spice blend really elevates these scones, you can adjust based on what you have. Cinnamon is the star, so keep that one, and feel free to reduce or omit the others like cloves or allspice if needed. The scones will still taste delicious!
Can I make these scones dairy-free?
Yes, you can substitute the butter for a dairy-free margarine and use a non-dairy milk such as almond or oat milk in place of heavy cream. The texture may be slightly different but still tasty and satisfying.
How do I know when scones are done baking?
Look for lightly browned edges and a firm feel when you gently press the top. Insert a knife or toothpick into the center—the utensil should come out clean. The scones should also spring back slightly when touched.
Can I double this recipe?
Definitely! This recipe scales up well. Just be sure to mix the dough gently and bake the scones in batches so they cook evenly. You might need an extra baking sheet or two to avoid overcrowding.
Final Thoughts
There’s something truly special about baking Delicious Pumpkin Scones That Will Elevate Your Fall Baking Recipe—they’re easy enough to whip up on a weekend morning but impressive enough to share with friends and family all season long. The cozy spices, tender crumb, and sweet glaze come together in a way that makes every bite feel like a warm hug. I promise once you try these, they’ll become a treasured staple in your autumn baking repertoire. So go ahead and give them a whirl—your fall mornings just got a whole lot tastier!
Print
Delicious Pumpkin Scones That Will Elevate Your Fall Baking Recipe
- Prep Time: 15 minutes
- Cook Time: 25-30 minutes
- Total Time: 40-45 minutes
- Yield: 8 servings
- Category: Breakfast, Snack, Dessert
- Method: Baking
- Cuisine: American
- Diet: Vegetarian
Description
These delicious pumpkin scones combine the warm, comforting flavors of fall spices with the moist earthiness of pumpkin puree. Lightly sweetened and topped with a smooth maple glaze, these flaky scones make an ideal treat for breakfast or an afternoon snack during the cooler months.
Ingredients
Dry Ingredients
- 2 cups all-purpose flour
- 1/2 cup brown sugar
- 3 teaspoons baking powder
- 1/2 teaspoon salt
- 2 teaspoons cinnamon
- 1/2 teaspoon nutmeg
- 1/2 teaspoon ginger
- 1/4 teaspoon allspice
- 1/4 teaspoon cloves
Wet Ingredients
- 1/2 cup unsalted butter, cold and cut into small cubes
- 1/3 cup pumpkin puree
- 5–7 tablespoons heavy cream
- 2 teaspoons vanilla extract
Glaze
- 2 tablespoons maple syrup
- 2 tablespoons heavy cream
- 1 cup powdered sugar
- 1/2 teaspoon vanilla extract
- Pinch salt
Instructions
- Preheat Oven and Prepare Baking Sheet: Preheat your oven to 400°F (204°C) and line a baking sheet with parchment paper to prevent the scones from sticking and help with easy cleanup.
- Sift Dry Ingredients and Chill: Sift together the flour, brown sugar, baking powder, spices, and salt in a large mixing bowl. Place this mixture in the freezer for 10 minutes to keep it cool, which helps achieve fluffy scones.
- Cut in Butter: Incorporate the cold, cubed unsalted butter into the dry ingredients using a pastry cutter or your fingers until the mixture resembles coarse sand. This step is crucial for a light, flaky texture.
- Add Wet Ingredients and Form Dough: Gently mix in the pumpkin puree, 5 tablespoons of heavy cream, and vanilla extract until just combined. If the dough seems dry, add additional cream one tablespoon at a time until a cohesive ball forms.
- Shape and Cut Dough: On a floured surface, shape the dough into an 8-inch circle. Use a sharp knife to cut the circle into 8 wedges, then arrange the wedges on the prepared baking sheet, spacing them slightly apart.
- Brush with Cream: Lightly brush the tops of the scones with a bit of extra heavy cream to promote a golden-brown finish during baking.
- Bake Scones: Bake in the preheated oven for 25 to 30 minutes, or until the edges are lightly browned and a knife inserted in the center comes out clean. Your kitchen will fill with warm, inviting aromas.
- Prepare Maple Glaze: While the scones bake and cool, whisk together the maple syrup, 2 tablespoons heavy cream, powdered sugar, vanilla extract, and a pinch of salt in a medium bowl until smooth and glossy.
- Glaze Scones: Drizzle the maple glaze generously over the completely cooled scones, letting it cascade down the sides for a sweet, shiny finish.
Notes
- For best flaky texture, keep butter cold throughout the preparation.
- Adjust heavy cream amount to ensure dough just comes together without being too wet.
- Allow scones to cool completely before glazing to prevent the glaze from melting off.
- Store leftover scones in an airtight container at room temperature for up to 2 days or freeze for longer storage.
- The spices can be adjusted to taste if you prefer a milder or stronger fall flavor.


