
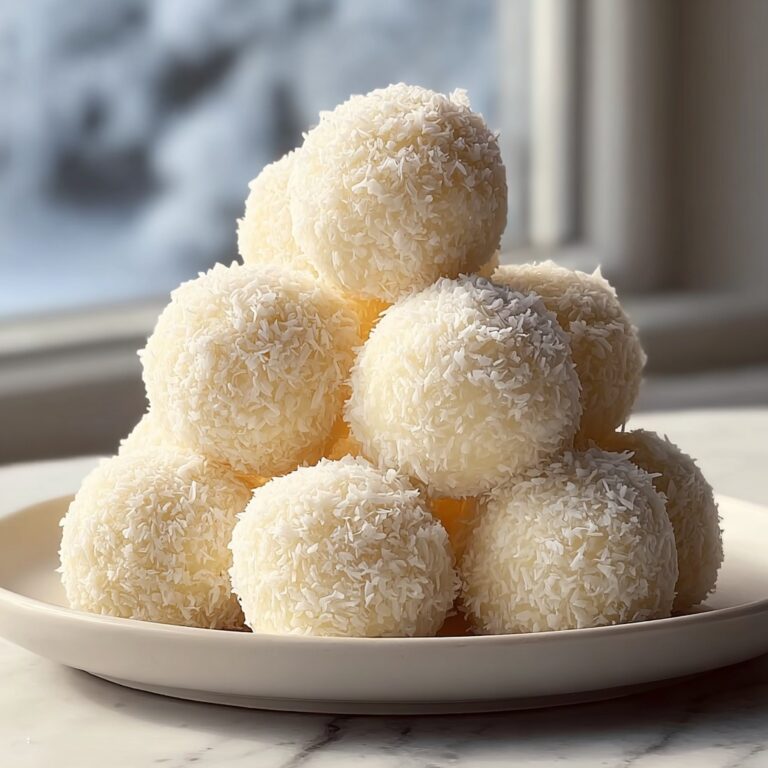
If you’re searching for a delightful treat to sweeten up your day or add that perfect refreshing bite after a meal, look no further than this Cream Cheese Peppermint Mints Recipe. These little gems boast a creamy, melt-in-your-mouth texture paired with the crisp, cool zing of peppermint that feels like a hug for your taste buds. Whether you’re preparing for a holiday gathering, a casual get-together, or simply craving a homemade candy that’s charmingly nostalgic yet incredibly simple, these mints are bound to become a treasured classic in your recipe collection.

Ingredients You’ll Need
Gathering the right ingredients is the first step toward creating these delightful Cream Cheese Peppermint Mints. Each component plays an essential role, creating the smooth texture, fresh minty flavor, and appealing look of the final treat.
- 8 oz cream cheese, softened: Provides a rich, creamy base that makes these mints irresistibly smooth.
- 2 Tbsp unsalted butter, softened: Adds softness and buttery flavor to balance the sharpness of the peppermint.
- 8 cups powdered sugar (about 2 lb), plus more for pressing: Sweetens and thickens the mixture, giving the mints their classic texture.
- 1/4 tsp fine sea salt: Enhances all the flavors, keeping the sweetness from becoming overpowering.
- 1 1/2 tsp peppermint extract (or to taste): Infuses the mints with that unmistakable refreshing peppermint punch.
- Gel food coloring (optional): A little drop adds beautiful pastel hues to make your mints as pretty as they taste.
How to Make Cream Cheese Peppermint Mints Recipe
Step 1: Cream the Cream Cheese and Butter
Start by beating the softened cream cheese and butter together in a stand mixer until the mixture is smooth and creamy. This step is crucial because it ensures your mints have that luscious, velvety texture without any lumps or unevenness.
Step 2: Incorporate Sugar and Peppermint
With the mixer running on medium-low speed, add the sea salt, then gradually introduce 2 cups of powdered sugar, mixing well to integrate. Stir in the peppermint extract, and then continue adding the remaining powdered sugar a tablespoon at a time. This process helps you achieve just the right sweetness and structure, allowing the mints to hold their shape nicely.
Step 3: Add Color if Desired
If you want to jazz up your mints with some color, divide the dough into separate bowls for different shades. Add gel food coloring a drop at a time, gently folding it in until you reach your perfect pastel tone. It’s such a fun way to personalize your creation and impress your guests.
Step 4: Shape the Mints
Working with small portions of the dough, roll teaspoon-sized balls between your palms until the surface is smooth and seams disappear. This helps prevent cracking later. Place them evenly spaced on a parchment-lined baking sheet so they have room to be pressed and dried without sticking.
Step 5: Flatten the Mints
Dip a fork in powdered sugar to stop it from sticking, then gently press down on each ball to flatten it into a disc. This technique creates the classic mint shape and adds a delicate texture to the surface. Remember to keep the remaining dough covered so it doesn’t dry out during this process.
Step 6: Let Them Dry and Firm Up
The final step is one of patience. Allow your mints to sit at room temperature for at least 2 hours, giving them time to firm up perfectly. Once dry, transfer them to an airtight container and refrigerate until you’re ready to enjoy or gift them.
How to Serve Cream Cheese Peppermint Mints Recipe
Garnishes
While these mints are lovely on their own, consider sprinkling a tiny pinch of crushed peppermint candy or edible glitter on top for a festive flair. A dusting of extra powdered sugar right before serving adds a snowy touch that’s especially charming during winter holidays.
Side Dishes
Cream Cheese Peppermint Mints make a fabulous palate cleanser after rich desserts or heavy meals. Pair them with a cup of hot cocoa, mint tea, or even coffee for a refreshing contrast. Their cool peppermint flavor complements chocolate desserts, pastries, and fruit plates beautifully.
Creative Ways to Present
Try arranging these mints in small glass jars tied with colorful ribbon as gifts or party favors. You can also display them on elegant trays or sprinkle them on dessert tables to brighten up the spread. Their pastel colors and classic shape add a charming homemade touch wherever they go.
Make Ahead and Storage
Storing Leftovers
Leftover Cream Cheese Peppermint Mints keep wonderfully in an airtight container in the refrigerator for up to one month. Just make sure they are separated with parchment paper if stacking to prevent sticking or breaking.
Freezing
If you want to keep your mints fresh for longer, freezing is a great option. Place them in a single layer on a baking sheet until frozen solid, then transfer them to a freezer-safe container or bag. They’ll hold their flavor and texture for up to six months.
Reheating
Since these mints are best enjoyed cool and firm, reheating is not recommended. Simply let them thaw in the fridge for a few hours or on the counter for 30 minutes before serving to enjoy their perfect texture.
FAQs
Can I use low-fat cream cheese for this recipe?
Using full-fat cream cheese is recommended for the best texture and flavor. Low-fat versions may result in a less creamy and slightly grainy mint, though you can try it if needed.
How long do the mints take to dry?
Allowing the mints to dry at room temperature for at least 2 hours is essential to let them firm up properly. Thicker mints might need a bit longer, but 2 hours is generally sufficient.
Can I adjust the peppermint extract amount?
Absolutely! The recipe calls for 1 1/2 teaspoons, but feel free to increase or decrease based on how strong you want that minty punch to be.
Is it necessary to use gel food coloring?
Gel food coloring is optional. It adds vibrant pastel colors without altering the consistency of the dough, but your mints will taste just as wonderful without it.
What’s the best way to shape the mints?
Rolling small balls about a teaspoon each and smoothing out any seams prevents cracking. Pressing them gently with a fork dipped in powdered sugar gives them that attractive flat disc shape typical of classic cream cheese mints.
Final Thoughts
There’s something truly special about making your own treats at home, especially when they’re as simple and wonderfully tasty as this Cream Cheese Peppermint Mints Recipe. Whether you’re gifting them to friends or enjoying a handful during a cozy evening, these mints are sure to bring smiles and fresh flavors to any occasion. Give it a try—you just might find your new favorite minty indulgence!
Print
Cream Cheese Peppermint Mints Recipe
- Prep Time: 15 minutes
- Cook Time: 0 minutes
- Total Time: 15 minutes plus 2 hours resting time
- Yield: Approximately 100 mints
- Category: Candy
- Method: No-Cook
- Cuisine: American
Description
Cream Cheese Mints are a delightful, creamy, and melt-in-your-mouth treat made from a smooth blend of cream cheese, butter, powdered sugar, and peppermint extract. These pastel-colored candies are easy to prepare without any cooking and are perfect for parties, holidays, or as a refreshing sweet bite.
Ingredients
Main Ingredients
- 8 oz cream cheese, softened (full fat)
- 2 Tbsp unsalted butter, softened
- 8 cups powdered sugar (about 2 lb), plus more for pressing
- 1/4 tsp fine sea salt
- 1 1/2 tsp peppermint extract (or to taste)
- Gel food coloring (optional)
Instructions
- Beat cream cheese and butter: In the bowl of a stand mixer fitted with the paddle or flat beater attachment, beat together the softened cream cheese and butter until the mixture is smooth and creamy.
- Add powdered sugar and extract: With the mixer running, add the salt, then gradually add 2 cups of powdered sugar, beating on medium/low speed until incorporated. Stir in peppermint extract, then add the remaining powdered sugar a heaping tablespoon at a time, mixing well after each addition until fully blended. Continue mixing for a couple more minutes, scraping down the bowl as needed.
- Add color (optional): Divide the dough into separate bowls if using different gel food colors. Stir in gel coloring a drop at a time until the desired pastel shade is achieved.
- Form balls: Working with about a quarter of the dough at a time, roll it into small balls approximately 1 teaspoon each or use a small cookie scoop. Roll until seams disappear to avoid cracking. Place the balls 2 inches apart on a parchment-lined baking sheet.
- Press into discs: Keep remaining dough covered to prevent drying. Dip a fork in powdered sugar to prevent sticking and press evenly over each ball to flatten them into mint discs. Repeat with remaining dough.
- Dry and store: Allow the mints to dry and rest at room temperature for at least 2 hours to firm up. Then transfer them to an airtight container. Store in the refrigerator for up to one month or freeze for up to six months.
Notes
- Use full fat cream cheese for best texture and flavor.
- Gel food coloring is optional but helps create pretty pastel colors without thinning the dough.
- If the dough is too sticky, add a little more powdered sugar gradually.
- Pressing the mints with a powdered sugar-dusted fork prevents sticking and creates a lovely texture.
- These mints do not require baking or refrigeration to set but refrigerating extends shelf life.
- Store in an airtight container to keep the mints fresh and prevent drying out.


