
If you’re looking for a festive and utterly delightful treat that combines the charm of classic red velvet with a snowy twist, the Red Velvet Snowballs Recipe is your new best friend. These soft, cocoa-infused cookies are coated in a sweet powdered sugar blanket, making every bite melt in your mouth with a perfect balance of rich flavor and tender texture. Whether you’re baking for a holiday party, gifting to friends, or simply craving something special, this recipe brings warmth and joy to any occasion.
Ingredients You’ll Need
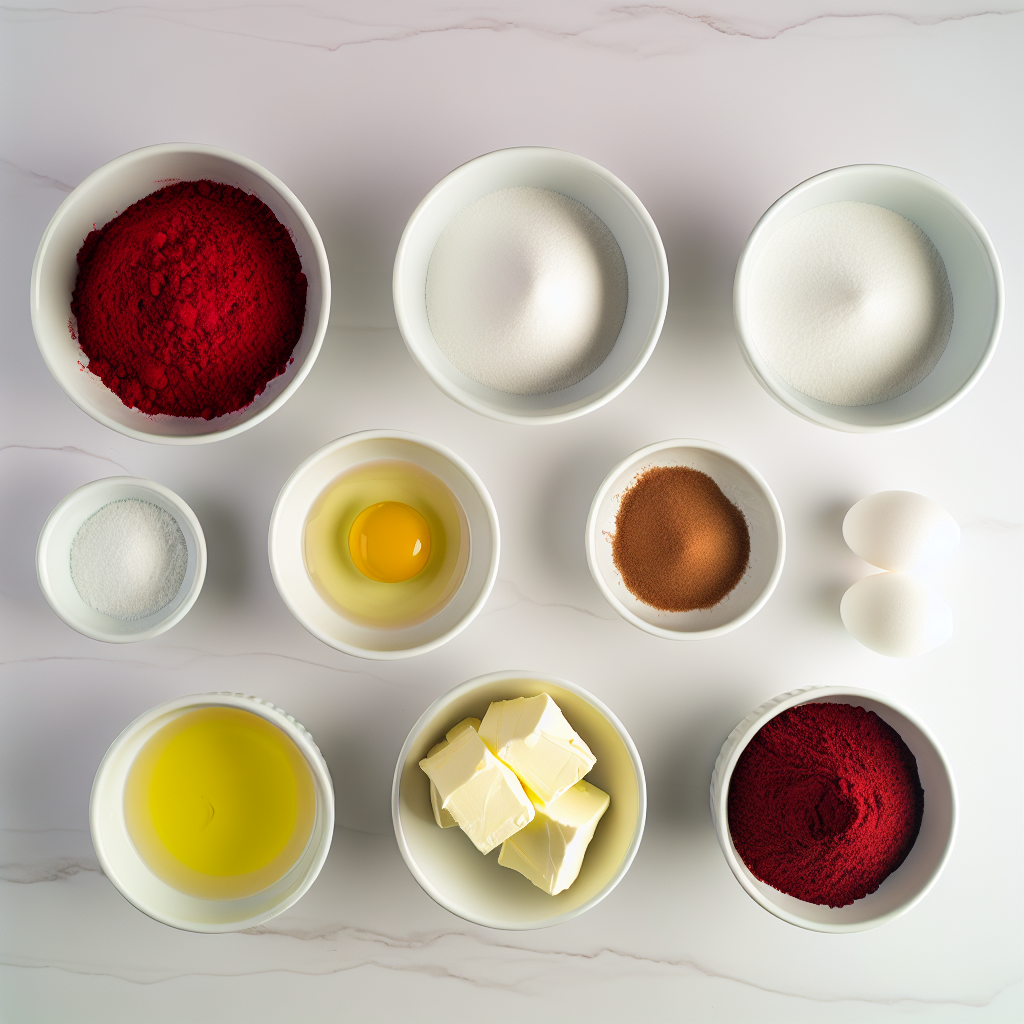
The beauty of this Red Velvet Snowballs Recipe lies in its simplicity and the careful selection of ingredients that create such a memorable taste and texture. Each component plays an essential role, from the cocoa powder giving that subtle chocolate depth to the red food coloring creating the signature vibrant hue.
- 1 1/2 cups all-purpose flour: The base of the dough providing the perfect structure and softness.
- 1/2 cup cocoa powder: Adds a gentle chocolate richness without overpowering the red velvet flavor.
- 1 teaspoon baking powder: Helps the cookies rise and become delightfully fluffy.
- 1/4 teaspoon salt: Balances sweetness and enhances all the other flavors.
- 1/2 cup unsalted butter, softened: Ensures easy mixing and adds a creamy richness.
- 1 cup granulated sugar: Sweetens the dough and helps with the cookies’ delicate texture.
- 1 large egg: Binds ingredients together and adds moisture for softness.
- 1 teaspoon vanilla extract: Brings a warm, comforting aroma that complements the cocoa.
- 1 tablespoon red food coloring: Delivers that iconic red velvet intensity and eye-catching color.
- 1 cup powdered sugar: For coating the warm cookies, giving them their snowy, festive look.
How to Make Red Velvet Snowballs Recipe
Step 1: Prepare the Dry Ingredients
Start by whisking together the all-purpose flour, cocoa powder, baking powder, and salt in a medium bowl. Doing this first ensures the dry ingredients are well combined and helps distribute the cocoa evenly throughout the dough, resulting in consistent flavor and a tender crumb in every cookie.
Step 2: Cream the Butter and Sugar
In a large bowl, beat the softened butter and granulated sugar together until light and fluffy. This process aerates the mixture to make the cookies soft and melt-in-your-mouth good. Don’t rush this step; a thorough creaming is key to the perfect texture.
Step 3: Add Egg, Vanilla, and Food Coloring
Next, beat in the egg, vanilla extract, and red food coloring to the butter-sugar mixture. The red food coloring is essential to achieve that vibrant hallmark red velvet look, while the egg and vanilla add moisture and depth.
Step 4: Combine Wet and Dry Ingredients
Slowly add the dry ingredients to the wet mixture, stirring just until combined. Over-mixing at this stage can develop gluten and lead to tougher cookies, so mix gently until the dough comes together.
Step 5: Chill the Dough (Optional but Recommended)
For best results, cover the dough and let it chill in the refrigerator for at least 30 minutes. Chilling controls spread during baking and intensifies the flavors, making your Red Velvet Snowballs cookie dough easier to handle and all the more delicious.
Step 6: Shape and Bake
Preheat your oven to 350°F (175°C). Scoop tablespoon-sized balls of dough and place them on a parchment-lined baking sheet about two inches apart. Bake for 10-12 minutes, just until the cookies are set but still soft. They will puff up beautifully and hold their shape.
Step 7: Coat in Powdered Sugar
While still warm, carefully roll each cookie in powdered sugar until fully coated. This final snowy dusting is what makes this the truly classic Red Velvet Snowballs Recipe, adding sweetness and a delightful contrast to the rich red velvet cookie beneath.
How to Serve Red Velvet Snowballs Recipe
Garnishes
To make your Red Velvet Snowballs presentation even more festive, consider sprinkling a few additional powdered sugar layers right before serving. You can also add edible silver or white sugar pearls for a winter wonderland effect that’s both elegant and fun.
Side Dishes
These cookies pair beautifully with a warm cup of hot chocolate or spiced tea, balancing the sugar with comforting warmth. You could also serve them alongside a scoop of vanilla ice cream or even a smooth cream cheese frosting dip to amplify the classic red velvet flavor.
Creative Ways to Present
For a charming holiday gift or party presentation, stack the cookies in clear jars or arrange them on a festive platter dusted with a little more powdered sugar. Wrapping a ribbon around a small bundle makes for an irresistible edible gift that friends and family will adore.
Make Ahead and Storage
Storing Leftovers
Keep your Red Velvet Snowballs in an airtight container at room temperature for up to 4 days to maintain their softness and flavor. If you live in a warmer climate, a cool, dry spot helps prevent melting of the powdered sugar coating and keeps the cookies fresh.
Freezing
If you want to enjoy these delightful snowballs later, freeze the baked and cooled cookies in a single layer on a baking sheet first, then transfer them to a freezer-safe container or bag. They’ll hold well for up to 3 months, making holiday prep a breeze.
Reheating
When you’re ready to enjoy frozen Red Velvet Snowballs, simply let them thaw at room temperature for about 30 minutes. For that freshly baked feel, warm them in a 300°F oven for 5 minutes — just enough to refresh their softness without melting the powdered sugar dusting.
FAQs
Can I use natural cocoa powder instead of Dutch-processed?
Yes, you can substitute natural cocoa powder, but it might slightly affect the color and acidity of the cookies. Dutch-processed cocoa tends to be smoother and better for this recipe’s rich flavor, but natural cocoa will still work perfectly well.
What if I don’t have red food coloring?
Without red food coloring, your cookies will be a muted chocolate color but still delicious. For a natural alternative, consider beet juice or powder, though it may change the flavor subtly.
How do I prevent the powdered sugar from melting off?
Rolling the cookies in powdered sugar while they’re warm (not hot) helps the coating adhere properly. Letting them cool completely on a wire rack before stacking or packaging will prevent the sugar from dissolving or melting away.
Can I make the cookies gluten-free?
Absolutely! Substitute the all-purpose flour with a gluten-free flour blend that’s meant to replace wheat flour cup-for-cup. You might need to add a binding agent like xanthan gum if it’s not already included in your blend.
How chewy or crispy are Red Velvet Snowballs?
The best Red Velvet Snowballs are delightfully soft with a slight crispness on the outside, thanks to the powdered sugar coating. They’re tender inside and just enough chew to feel homemade and comforting with every bite.
Final Thoughts
There’s nothing quite like the joy of biting into a soft, sweet, and beautifully vibrant Red Velvet Snowballs Recipe cookie, whether you’re sharing them with loved ones or indulging in a quiet moment of bliss. This recipe is simple, crowd-pleasing, and endlessly charming — so grab your ingredients and start baking. You’ll quickly see why it’s a cherished favorite that shines at any celebration.
Print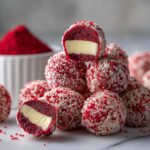
Red Velvet Snowballs Recipe
- Prep Time: 20 minutes
- Cook Time: 12 minutes
- Total Time: 32 minutes
- Yield: 24 cookies
- Category: Dessert
- Method: Baking
- Cuisine: American
Description
Delight in these festive Red Velvet Snowballs, a soft and tender cookie coated in powdered sugar for a beautiful snowy effect. Perfect for holiday gatherings or any celebration, these cookies combine the rich flavor of cocoa and the classic charm of red velvet in a bite-sized treat.
Ingredients
Dry Ingredients
- 1 1/2 cups all-purpose flour
- 1/2 cup cocoa powder
- 1 teaspoon baking powder
- 1/4 teaspoon salt
Wet Ingredients
- 1/2 cup unsalted butter, softened
- 1 cup granulated sugar
- 1 large egg
- 1 teaspoon vanilla extract
- 1 tablespoon red food coloring
Coating
- 1 cup powdered sugar
Instructions
- Preheat and Prepare: Preheat your oven to 350°F (175°C). Line a baking sheet with parchment paper or a silicone baking mat to prevent sticking and for easy cleanup.
- Mix Dry Ingredients: In a medium bowl, sift together the all-purpose flour, cocoa powder, baking powder, and salt. Mixing these ensures even distribution of leavening and chocolate flavor in the dough.
- Cream Butter and Sugar: In a large bowl, use a hand mixer or stand mixer to beat the softened unsalted butter and granulated sugar until light and fluffy, about 2-3 minutes. This creates a smooth base for your cookie dough.
- Add Egg, Vanilla, and Food Coloring: Beat in the egg until fully incorporated. Then stir in the vanilla extract and red food coloring until the mixture reaches a consistent, vibrant red hue.
- Combine Wet and Dry Mixtures: Gradually add the dry ingredients to the wet mixture, mixing on low speed until just combined. Avoid overmixing to keep the cookies tender.
- Form the Snowballs: Scoop the dough by tablespoonfuls and roll into smooth balls. Place them evenly spaced on the prepared baking sheet.
- Bake Cookies: Bake in the preheated oven for 10-12 minutes, or until the cookies are set and slightly firm to the touch but still soft inside.
- Coat with Powdered Sugar: Remove the cookies from the oven and while still warm, roll each cookie in powdered sugar to coat completely. This step creates the classic snowball appearance.
- Cool and Serve: Place the coated cookies on a wire rack to cool completely. Once cool, they’re ready to enjoy or store in an airtight container.
Notes
- Softened butter is essential to ensure smooth mixing and a tender cookie texture.
- Use good quality red food coloring for a vibrant red color without affecting taste.
- Rolling the cookies in powdered sugar while warm helps the sugar stick better and creates a beautiful snowy effect.
- Store cookies in an airtight container at room temperature for up to one week.
- For an extra festive touch, you can add a pinch of cinnamon or a drop of almond extract to the dough.


