
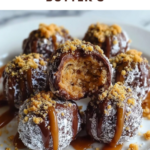
If you have a sweet tooth and love that perfect blend of creamy peanut butter and rich chocolate, you are absolutely going to adore this Chocolate Peanut Butter Snowballs Recipe. These little bites of bliss combine velvety peanut butter centers with a crisp chocolate shell, crowned with a touch of caramel and fun decorations. They’re not only a treat for the taste buds but also a joy to make and share with friends and family. Whether for a cozy night in, a festive gathering, or a simple snack, these snowballs bring warmth and delight with every bite.

Ingredients You’ll Need
Gathering the ingredients for this recipe is such a joy because each one plays a vital role in building the overall texture and flavor. The blend of creamy and crunchy, sweet and slightly salty, all come together to form these irresistible snowballs.
- 1 cup creamy peanut butter: The heart of the recipe, offering rich creaminess and that classic flavor everyone loves.
- 2 tablespoons unsalted butter, melted: Adds smoothness and helps bind the mixture perfectly.
- 1 1/2 to 2 cups powdered sugar, sifted: Provides the sweet backbone and helps create the dough’s perfect consistency.
- 1/4 teaspoon vanilla extract: Brings a subtle warmth and depth to every bite.
- Pinch fine salt (optional): Enhances the sweetness and balances the peanut butter’s richness.
- 1/2 cup finely crushed graham crackers (optional): Adds a lovely slight crunch and complements the chocolate beautifully.
- 1/2 cup crushed vanilla wafers (optional): Introduces a delicate sweetness and texture variation.
- 1/4 cup powdered milk (optional): Creates a slightly denser texture and adds flavor complexity.
- 12 ounces semi-sweet or milk chocolate melting wafers or chips: For the luscious outer coating that makes these snowballs irresistible.
- 1 teaspoon vegetable or coconut oil (optional): Helps smooth out the chocolate for a perfect dip.
- 1/4 cup soft caramel candies or caramel sauce: Adds a delightful gooey touch on top of the chocolate shell.
- 1 teaspoon heavy cream or milk: Makes the caramel silky and easy to drizzle.
- Sea salt flakes (for decoration): A sprinkle of salty crunch to contrast the sweetness.
- Crushed peanuts (for decoration): Adds texture and peanutty flair.
- Sprinkles (for decoration): Makes every bite festive and fun.
- White chocolate drizzle (for decoration): Adds a pretty, sweet finishing touch.
How to Make Chocolate Peanut Butter Snowballs Recipe
Step 1: Mix the Peanut Butter Base
Start by blending the creamy peanut butter, melted butter, vanilla extract, and a pinch of salt in a medium bowl until you get a deliciously smooth mix. This step sets the tone for your snowballs, ensuring each bite has that perfect melting texture.
Step 2: Add the Sweetness and Texture
Gradually stir in the sifted powdered sugar to form a thick, pliable dough. The sugar’s fine texture is essential to get a non-sticky consistency, so add it slowly until the dough is firm enough to hold its shape. If you want to add even more texture and flavor, this is the ideal moment to gently fold in your crushed graham crackers, vanilla wafers, or powdered milk.
Step 3: Shape the Snowballs
Prepare a baking sheet with parchment paper. Using a teaspoon or a small scoop, portion out the dough and roll it between your palms into smooth balls about 1 inch in diameter. Lay them on the tray with some space to spare.
Step 4: Chill for Firmness
Pop the tray into the refrigerator for at least 25 minutes or place it in the freezer for 10 to 15 minutes. This chilling step is the secret to making sure your centers stay firm and intact during the chocolate coating process.
Step 5: Melt the Chocolate
In short bursts of 20 to 30 seconds in the microwave, melt your chocolate wafers or chips, stirring thoroughly between intervals until silky smooth. Add a teaspoon of vegetable or coconut oil if you prefer a thinner, glossier coating that’s easier to work with.
Step 6: Coat the Snowballs
Remove the chilled centers from the fridge. Using a fork or a dipping tool, submerge each snowball into the melted chocolate, gently shaking off any excess. Place the chocolate-coated balls back on the parchment-lined tray to set.
Step 7: Add the Caramel and Decorations
Now, melt your soft caramel candies with the heavy cream or milk in the microwave, stirring frequently until smooth. Drizzle or pipe this gorgeous caramel over the chocolate snowballs. While the caramel is still wet, sprinkle on sea salt flakes, crushed peanuts, sprinkles, or add a pretty white chocolate drizzle for a stunning finish.
Step 8: Final Chill
Return the tray to the refrigerator for 15 to 20 minutes to let the chocolate and caramel harden completely before serving or storing.
How to Serve Chocolate Peanut Butter Snowballs Recipe
Garnishes
For serving, these snowballs are delightful on their own but can also shine with extra touches like a sprinkle of sea salt flakes to highlight the sweetness or a shower of crushed peanuts for added crunch. You can even drizzle more melted white chocolate on top for that elegant café-style feel.
Side Dishes
This recipe pairs beautifully with a chilled glass of milk or a hot cup of coffee. For parties, serve them alongside fresh fruit platters or soft vanilla ice cream to create a fun and balanced dessert spread everyone will love.
Creative Ways to Present
Presentation can turn these snowballs from cozy treats into show-stopping bites. Consider placing them in cupcake liners or arranging them artfully on a festive platter. Wrapping each in cellophane with a ribbon also makes a thoughtful homemade gift that showcases your care and creativity.
Make Ahead and Storage
Storing Leftovers
Leftover Chocolate Peanut Butter Snowballs keep wonderfully in an airtight container stored in the refrigerator for up to one week. This helps maintain their firmness and freshness while allowing the flavors to meld beautifully.
Freezing
You can freeze these snowballs for longer storage by placing them in a single layer on a tray until frozen solid, then transferring to a freezer-safe container or bag. When ready to enjoy, thaw overnight in the fridge to preserve their luscious texture.
Reheating
No need to heat these treats— they’re best served cool or at room temperature to keep that irresistible melt-in-your-mouth peanut butter center and the crisp chocolate shell intact. If you prefer a softer texture, let them sit out for a few minutes before indulging.
FAQs
Can I use crunchy peanut butter instead of creamy?
Absolutely! Crunchy peanut butter will add a bit more texture inside your snowballs, giving a delightful nutty bite that complements the smooth chocolate. Just be sure to mix well to keep the dough manageable.
What type of chocolate works best for coating?
Semi-sweet or milk chocolate melting wafers or chips are perfect because they melt smoothly and harden with a beautiful shine. You can also use high-quality baking chocolate if that’s what you have on hand.
Are these snowballs gluten-free?
They can be, if you skip the optional graham crackers and vanilla wafers or use gluten-free versions. The rest of the ingredients are naturally gluten-free, making it easy to adapt for dietary needs.
Can I make these snowballs vegan?
With a few swaps, yes! Use a plant-based peanut butter, dairy-free butter alternative, vegan chocolate, and avoid adding milk powder or caramel candies that contain dairy. There are great vegan caramel sauces available that work beautifully as well.
How long does it take to prepare these treats?
From start to finish, expect about 45 minutes, including chilling time. The rewarding flavors and textures are well worth the hands-on time, and they come together quickly once you get going!
Final Thoughts
There is something truly special about the way this Chocolate Peanut Butter Snowballs Recipe brings together simple ingredients into a magical, crowd-pleasing treat. Whether you’re making them to celebrate a special occasion or just to enjoy a cozy sweet moment, these snowballs never fail to impress. Trust me, once you try them, they’ll become a staple in your dessert repertoire. So grab your ingredients, have fun with the process, and prepare for some serious snack time happiness!
Print
Chocolate Peanut Butter Snowballs Recipe
- Prep Time: 15 minutes
- Cook Time: 30 minutes (includes melting and chilling time)
- Total Time: 45 minutes
- Yield: 24 servings
- Category: Dessert
- Method: No-Cook
- Cuisine: American
Description
Delightfully rich and creamy Chocolate Peanut Butter Snowballs combine smooth peanut butter, melted chocolate, and optional crunchy mix-ins to create bite-sized treats perfect for any occasion. Coated with luscious chocolate and a drizzle of caramel, these no-bake delights are easy to make and sure to satisfy your sweet tooth.
Ingredients
Snowball Dough
- 1 cup creamy peanut butter
- 2 tablespoons unsalted butter, melted
- 1 1/2 to 2 cups powdered sugar, sifted
- 1/4 teaspoon vanilla extract
- Pinch fine salt (optional)
- 1/2 cup finely crushed graham crackers (optional)
- 1/2 cup crushed vanilla wafers (optional)
- 1/4 cup powdered milk (optional)
Chocolate Coating
- 12 ounces semi-sweet or milk chocolate melting wafers or chips
- 1 teaspoon vegetable or coconut oil (optional)
Caramel Topping
- 1/4 cup soft caramel candies or caramel sauce
- 1 teaspoon heavy cream or milk
Decorations
- Sea salt flakes
- Crushed peanuts
- Sprinkles
- White chocolate drizzle
Instructions
- Prepare the Dough: In a medium mixing bowl, blend peanut butter, melted butter, vanilla extract, and a pinch of salt until smooth.
- Add Powdered Sugar: Gradually incorporate sifted powdered sugar until a thick, pliable dough forms, adjusting the quantity to achieve a firm, non-sticky texture.
- Incorporate Optional Mix-ins: If desired, mix in crushed graham crackers, vanilla wafers, or powdered milk for added structure and flavor.
- Prepare Baking Sheet: Line a baking sheet with parchment paper to prevent sticking during chilling and coating.
- Shape Snowballs: Portion dough using a teaspoon or small scoop and roll between palms to form smooth balls approximately 1 inch in diameter. Arrange on the lined tray.
- Chill Centers: Place tray in the refrigerator for at least 25 minutes or freeze for 10 to 15 minutes to firm up centers before coating.
- Melt Chocolate: In a microwave-safe bowl, melt chocolate in 20 to 30 second intervals, stirring after each until smooth. Optionally, blend in vegetable or coconut oil to thin the chocolate.
- Coat Snowballs: Remove centers from refrigeration and submerge each ball in melted chocolate using a fork or dipping tool, allowing excess chocolate to drip off. Place coated snowballs back on the parchment-lined tray.
- Prepare Caramel Drizzle: Melt caramels with heavy cream or milk in a microwave-safe bowl in 10 to 15 second intervals, stirring until fluid and smooth.
- Decorate: Pipe or spoon melted caramel in thin lines over the chocolate-coated snowballs. Immediately garnish with sea salt flakes, crushed peanuts, sprinkles, or white chocolate drizzle before toppings set.
- Final Chill: Return the tray to the refrigerator for 15 to 20 minutes until chocolate and caramel are fully firm.
- Store: Transfer finished snowballs to an airtight container for storage and enjoy chilled or at room temperature.
Notes
- Adjust powdered sugar amount to achieve desired dough firmness and sweetness.
- Optional mix-ins like crushed crackers add texture and flavor but can be omitted for a smoother bite.
- Use a small cookie scoop or teaspoon for uniform snowballs.
- Adding oil to chocolate helps thin it for easier coating and smoother finish.
- Be sure to chill the centers well before dipping to prevent melting.
- Store snowballs in an airtight container in the refrigerator to maintain freshness.
- Decorations are fully customizable to your preference.
