If you have ever wanted to capture the warm, cozy essence of fall in a jar, this Homemade Apple Butter Recipe is an absolute treasure to make and enjoy. This deeply fragrant, spiced apple spread is the perfect blend of tart and sweet, slowly cooked down to a luscious, velvety texture that feels like a hug from the inside. Whether you slather it on toast, swirl it into oatmeal, or gift it to friends, this recipe will quickly become one of your favorite go-tos for seasonal comfort in a jar.
Ingredients You’ll Need
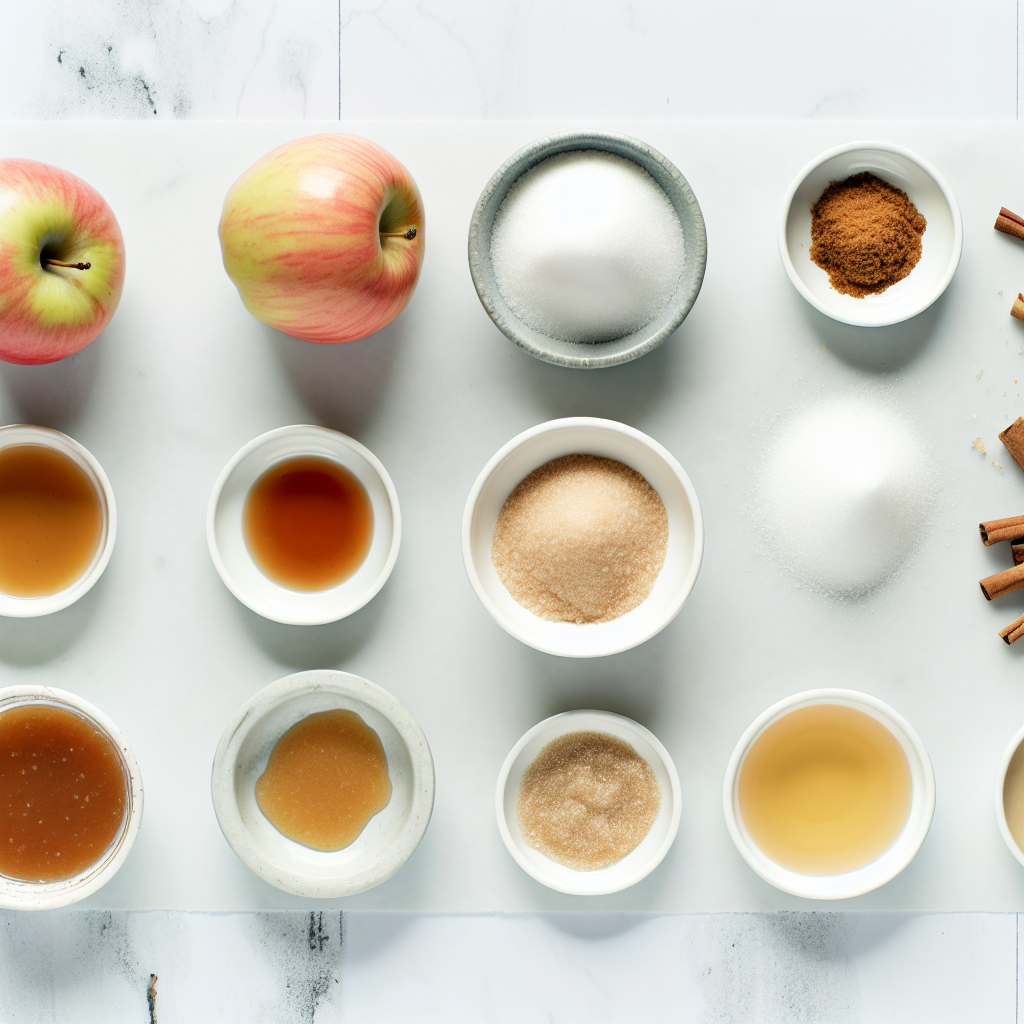
Good apple butter starts with simple, natural ingredients that each add their magic—the apples provide the body and character, the spices bring warmth and depth, and the sweeteners balance everything into a harmonious spread.
- 5 pounds apples (mix of sweet + tart, such as Honeycrisp, Fuji, and Granny Smith): Using a combination of apples gives your apple butter a perfectly balanced flavor and complexity.
- 3/4 cup water: Just enough to get the cooking started and help soften the apples.
- 1 1/4 cups cane sugar or brown sugar (adjust to taste): Adds sweetness and a gentle molasses note—brown sugar enriches the flavor even more.
- 2 teaspoons ground cinnamon: Essential aromatic warmth that makes apple butter so comforting.
- 1/2 teaspoon ground nutmeg: A pinch of this nutty spice adds subtle depth.
- 1/2 teaspoon ground cloves: Intensifies the cozy, spiced profile without overpowering.
- 1/8 teaspoon fine sea salt: Enhances all the natural flavors in the mix.
- 1 tablespoon freshly squeezed lemon juice (plus more to taste at the end): Brightens and balances the sweetness to keep the flavor fresh.
- 2 teaspoons vanilla extract: A final touch that rounds out the warm spices with sweet complexity.
How to Make Homemade Apple Butter Recipe
Step 1: Prep the Apples
Start by coring and chopping your apples into chunks—no need to peel them as the skins will break down during cooking and help thicken the butter naturally. This prep ensures every bite has all the tender, flavorful goodness packed inside.
Step 2: Combine Ingredients
Place the chopped apples into a pot or your chosen cooker along with water, sugar, cinnamon, nutmeg, cloves, salt, and the first tablespoon of lemon juice. Give everything a good stir so the spices and sweetness are evenly distributed, setting the stage for that delicious meld of flavors.
Step 3: Cook the Apples
The cooking method depends on your preference and timing:
- Instant Pot: Lock the lid and cook on Manual/Pressure Cook at high pressure for 15 minutes. Let the pressure release naturally for 10 minutes before releasing any remaining steam.
- Crock-Pot: Cover and cook on Low for 8 to 10 hours or on High for 4 to 5 hours, until the apples are totally tender and soft.
- Stovetop: Bring the mixture to a gentle simmer over medium heat, then reduce to low and partially cover. Stir occasionally and cook for 1½ to 2 hours until the apples are very soft and fragrant.
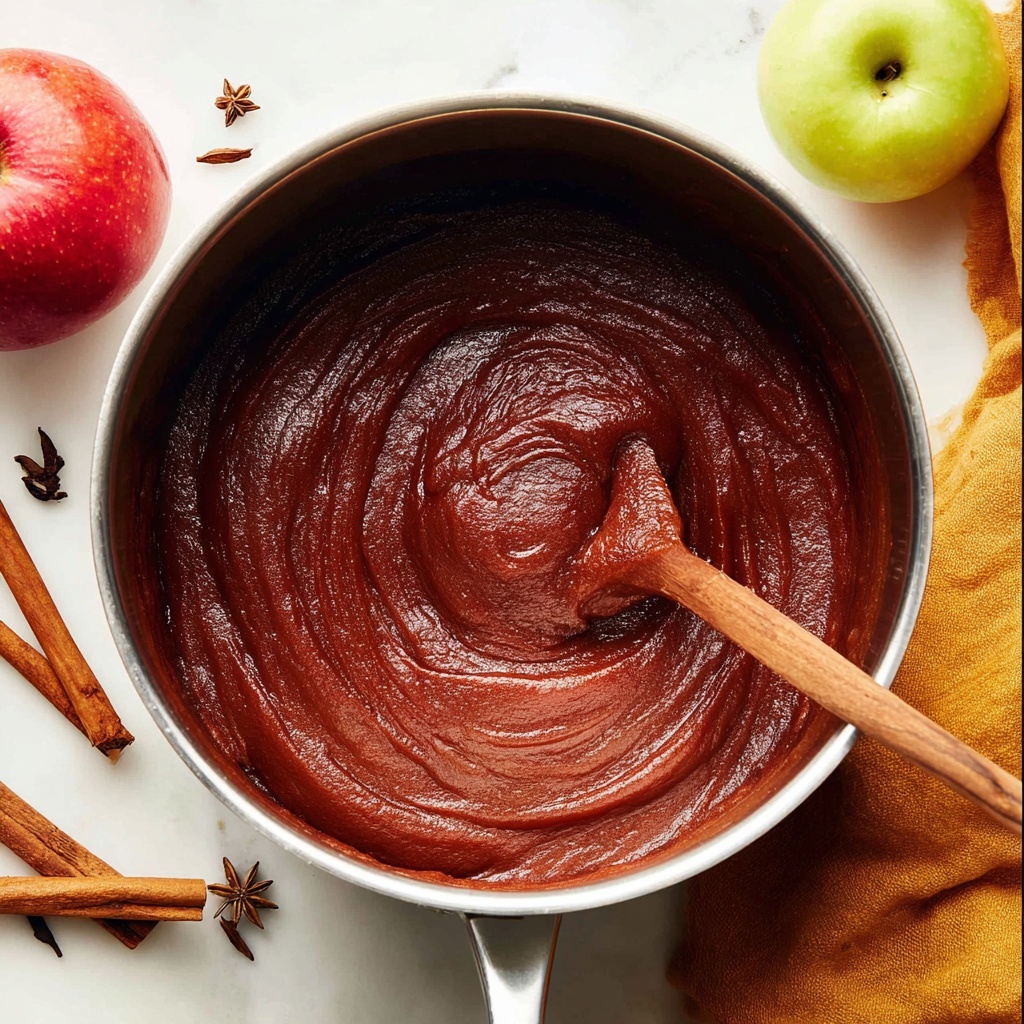
Step 4: Blend Until Smooth
Once your apples are cooked down, it’s time for the magic moment: blend the mixture until completely smooth. An immersion blender works wonderfully right in the pot, or you can transfer batches to a blender carefully. This process transforms the chunky apple mixture into that thick, spreadable butter you dream about.
Step 5: Thicken the Apple Butter
If you’re using an Instant Pot, switch to the Sauté function on low and cook uncovered for 10 to 20 minutes, stirring frequently, until the butter is thick and glossy. For the Crock-Pot or stovetop methods, continue cooking uncovered, stirring occasionally for 30 to 60 minutes to deepen the color and thicken to your desired consistency.
Step 6: Finish and Store
Stir in the vanilla extract for a last layer of warmth, then taste. Adjust with additional lemon juice or sugar if you want a brighter tang or a sweeter finish. Let the apple butter cool slightly before transferring it to clean jars for storage. This step locks in all that homemade goodness, ready to enjoy now or down the road.
How to Serve Homemade Apple Butter Recipe
Garnishes
A simple sprinkle of finely chopped nuts like walnuts or pecans can add a delightful crunch on top of your apple butter spread. Fresh apple slices or a dusting of cinnamon on the surface can also elevate the experience — simple touches that make each bite feel a bit more special.
Side Dishes
This homemade apple butter pairs beautifully with warm, crusty bread, creamy cheese like brie or sharp cheddar, and even roasted meats. Spread it on biscuits or swirl it into plain yogurt for an unexpectedly delicious sidekick to your meals.
Creative Ways to Present
Why not use your apple butter in layered desserts like parfaits, spoon it over pancakes or waffles, or dollop it onto ice cream? It’s also divine stirred into oatmeal or porridge for a naturally sweet breakfast boost. The possibilities with this versatile condiment are endless and always delightful.
Make Ahead and Storage
Storing Leftovers
Leftover apple butter keeps wonderfully in the refrigerator for up to two weeks when stored in an airtight container or jar. The flavors continue to mature, making each day’s spread taste even better than the last.
Freezing
For longer storage, freeze your homemade apple butter in freezer-safe containers or bags. It will maintain its rich flavor and smooth texture for up to six months, so you can enjoy a touch of fall anytime you like.
Reheating
When you’re ready to use frozen apple butter, thaw it overnight in the fridge. Warm it gently on the stovetop or in the microwave to bring back that fresh-from-the-kitchen softness and fragrant aroma.
FAQs
Can I use only one type of apple for the apple butter?
Yes, but using a mix of sweet and tart apples adds complexity and depth to the flavor. Feel free to experiment, but a blend usually yields the best balance.
How sweet should homemade apple butter be?
The sweetness is personal preference. Start with less sugar and taste as you go, since the natural sugars in the apples provide much of the sweetness already.
Do I have to peel the apples?
No peeling is necessary. The apple skins break down during cooking and contribute to the thickness and beautiful color of the apple butter.
Can I make this apple butter without any special equipment?
Absolutely. While an Instant Pot or Crock-Pot can speed things up, a simple stovetop pot works perfectly well—just requires a bit more watchful stirring and time.
How long does homemade apple butter keep?
Refrigerated, it lasts about two weeks. Frozen, it can keep for up to six months without losing its delicious flavor.
Final Thoughts
There’s nothing quite like the joy of making your own spread from scratch, especially when it’s this cozy, spiced Homemade Apple Butter Recipe. It’s a versatile staple that brings a touch of warmth to breakfasts, snacks, and gifts alike. Once you try it, you’ll see why this apple butter holds a special place in my kitchen, and I’m sure it will in yours too. So gather those apples and dive in—you’re about to create a jar full of pure, homemade comfort.
Print
Homemade Apple Butter Recipe
- Prep Time: 15 minutes
- Cook Time: 1 hour
- Total Time: 1 hour 15 minutes
- Yield: 6 servings
- Category: Spread
- Method: Stovetop
- Cuisine: American
Description
A rich and flavorful homemade apple butter recipe featuring a blend of sweet and tart apples cooked low and slow with warm spices, then pureed to a smooth, thick spread. Perfect for toast, baking, or as a cozy fall condiment.
Ingredients
Apples
- 5 pounds apples (mix of sweet + tart, such as Honeycrisp, Fuji, and Granny Smith)
Liquids
- 3/4 cup water
- 1 tablespoon freshly squeezed lemon juice (plus more to taste at the end)
- 2 teaspoons vanilla extract
Sweeteners and Spices
- 1 1/4 cups cane sugar or brown sugar (adjust to taste — start with less if you prefer it less sweet)
- 2 teaspoons ground cinnamon
- 1/2 teaspoon ground nutmeg
- 1/2 teaspoon ground cloves
- 1/8 teaspoon fine sea salt
Instructions
- Prep the apples: Core and chop the apples into pieces; peeling is not necessary as the skins will soften during cooking.
- Combine ingredients: In your chosen cooking vessel, add the chopped apples, water, cane or brown sugar, cinnamon, nutmeg, cloves, salt, and 1 tablespoon of freshly squeezed lemon juice. Stir well to ensure all ingredients are mixed evenly.
- Cook the apples: Choose your cooking method: For Instant Pot, secure the lid and set to Manual or Pressure Cook on high for 15 minutes, then let the pressure release naturally for 10 minutes before quick releasing any remaining steam. For Crock-Pot, cover and cook on low for 8–10 hours or high for 4–5 hours until apples are thoroughly tender. For Stovetop, bring the mixture to a simmer over medium heat, then reduce to low, cover partially, and cook for 1½ to 2 hours, stirring occasionally until the apples are very soft and fragrant.
- Blend until smooth: Use an immersion blender directly in the pot or transfer in batches to a blender and purée the cooked apple mixture until completely smooth.
- Thicken the apple butter: If using the Instant Pot, switch to the Sauté function on low and cook uncovered while stirring frequently for 10 to 20 minutes until the mixture thickens and becomes glossy. For Crock-Pot or Stovetop, continue cooking uncovered and stirring occasionally for 30 to 60 minutes until the apple butter darkens and reaches your preferred consistency.
- Finish and store: Stir in the vanilla extract. Taste and adjust the flavor by adding extra lemon juice or sugar if desired. Allow the apple butter to cool slightly before transferring to sterilized jars for storage.
Notes
- Peeling apples is optional as cooking softens the skins and blending will create a smooth texture.
- The sweetness level can be adjusted by using less or more sugar according to taste.
- If you prefer a chunkier apple butter, blend for a shorter time or mash instead of fully pureeing.
- Store apple butter in the refrigerator for up to two weeks or freeze for longer storage.
- Use sterilized jars and seal properly if you plan to preserve for months.


