
If you’re craving a snack that combines the irresistible flavors of crispy bacon, sharp cheddar, and a hint of garlicky goodness, you’re in for a treat with this Cheesy Thumbprint Bacon Jam Recipe. It’s a crowd-pleaser that marries savory, cheesy dough with a sweet and smoky bacon jam filling, perfect for parties, cozy nights in, or whenever you need a bite of pure comfort. These little gems are as fun to make as they are delicious to devour, and I guarantee they’ll become one of your favorite go-to appetizers.
Ingredients You’ll Need
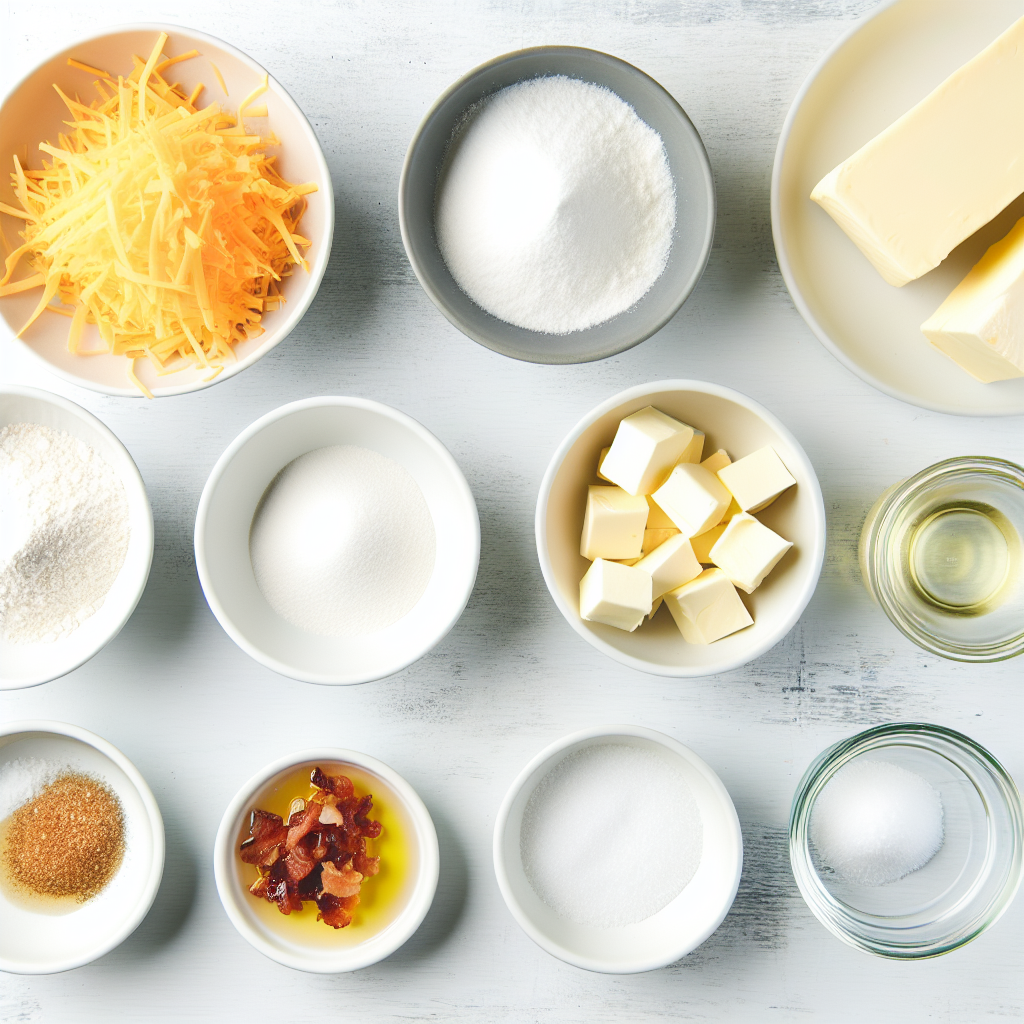
The beauty of this Cheesy Thumbprint Bacon Jam Recipe is that its ingredients are straightforward and totally accessible, yet each one plays an essential role in crafting the perfect balance of texture, flavor, and richness. From sharp cheddar that brings that comforting tang, to chilled butter that ensures a flaky, tender bite, every ingredient counts.
- Sharp cheddar cheese, shredded (2 cups): Provides a punch of bold flavor and melty richness that is the backbone of the dough.
- All-purpose flour (1 cup): Gives structure to the dough while keeping it tender and soft.
- Unsalted butter, chilled and cubed (6 tablespoons): Adds flakiness and a buttery depth essential for that melt-in-your-mouth texture.
- Kosher salt (1/2 teaspoon): Enhances all the savory flavors without overpowering.
- Garlic powder (1/4 teaspoon): Lends subtle aromatic warmth that complements the bacon jam beautifully.
- Homemade onion bacon jam (1 cup): The star filling that blends sweet caramelized onions with smoky bacon for unforgettable savory-sweet bites.
- Chopped parsley (for garnish): Adds a pop of fresh color and a mild herbal note to finish.
How to Make Cheesy Thumbprint Bacon Jam Recipe
Step 1: Prepare the Dough
Start by pulsing the shredded sharp cheddar, all-purpose flour, chilled butter cubes, kosher salt, and garlic powder in a food processor. The goal is to get a coarse meal-like mixture. Once it’s the right consistency, gather the crumbs with your hands and form a rough dough ball. This step is crucial because it sets the base for that tender, cheesy crust you’re falling in love with.
Step 2: Chill the Dough
Wrap the dough ball in plastic wrap, flatten it into a disk, and pop it into the fridge for about 30 minutes. Chilling firms up the butter and dough, which helps prevent spreading and keeps the texture beautifully crumbly yet rich when baked.
Step 3: Preheat and Prepare the Baking Sheet
Preheat your oven to 400°F and line a baking sheet with parchment paper. This little step ensures your cheesy thumbprints bake evenly and don’t stick, making cleanup a breeze and keeping every bite perfect.
Step 4: Shape the Dough Balls
Once chilled, take the dough out and portion it into balls about 1 1/2 inches in diameter. Arrange them on the prepared baking sheet, leaving an inch between each to allow for just a bit of rise and browning.
Step 5: First Bake and Indent
Bake the dough balls for 7 to 8 minutes until they’re just set and starting to turn a lovely golden color. Then, gently press a teaspoon into the center of each to create that iconic thumbprint indentation — the perfect little pocket for our luscious bacon jam.
Step 6: Fill with Bacon Jam and Finish Baking
Spoon about a teaspoon of your homemade onion bacon jam into each indentation. Return to the oven for another 7 to 8 minutes. During this bake, the jam bubbles slightly, melding with the cheese dough and creating that savory-sweet magic we love so much.
Step 7: Cool and Garnish
Transfer your freshly baked cheesy thumbprints to a cooling rack and let them come to room temperature. Before serving, sprinkle with chopped parsley for a fresh, vibrant touch that brightens each bite.
How to Serve Cheesy Thumbprint Bacon Jam Recipe
Garnishes
Besides parsley, feel free to add freshly cracked black pepper or a tiny drizzle of honey for a sweet contrast. A sprinkling of smoked paprika can amp up the smoky notes if you’re feeling adventurous.
Side Dishes
Pair these cheesy thumbprints with a crisp green salad or roasted vegetables to balance out the richness. They also work wonderfully alongside hearty soups or stews, turning a simple meal into something special.
Creative Ways to Present
Try serving the Cheesy Thumbprint Bacon Jam Recipe on a charming wooden board surrounded by assorted cured meats and cheeses for an impressive appetizer platter. Or pop them into mini muffin liners for easy grab-and-go party snacks that guests will love.
Make Ahead and Storage
Storing Leftovers
Keep any leftovers in an airtight container in the refrigerator for up to 3 days. They maintain their flavor and texture beautifully when chilled properly, making them a perfect snack to enjoy the next day.
Freezing
You can freeze unbaked dough balls arranged on a parchment-lined tray for up to 1 month. Once frozen solid, transfer them to a resealable bag. When you want a quick treat, bake them straight from frozen, adding a couple of extra minutes to the bake time.
Reheating
Reheat leftover thumbprints in a 350°F oven for about 5 to 7 minutes until warmed through and slightly crisp on the edges. Avoid microwaving as it can make them chewy rather than delightfully tender.
FAQs
Can I use a different type of cheese for this recipe?
Absolutely! While sharp cheddar is classic for that tangy bite, you can substitute with gouda, fontina, or even a pepper jack for a little kick. Just make sure it’s a cheese that melts well to preserve the texture.
Is homemade onion bacon jam difficult to make?
Not at all! Onion bacon jam is simply slow-cooked onions and bacon with a touch of sweetness and savory seasoning. Making it yourself allows you to control flavors, but you can also find great quality versions at specialty stores if short on time.
Can I make this recipe vegetarian?
You can skip the bacon jam and use a savory vegetarian jam or spread instead, like caramelized onion marmalade or roasted red pepper jam. That said, the bacon jam is really the star here, so the flavor profile will be different but still delicious.
What’s the best way to shape the thumbprints evenly?
Using a small cookie scoop or a tablespoon measure helps keep the dough balls uniform in size, which means even baking and consistent results every time.
How long can I keep the prepared dough in the fridge before baking?
You can refrigerate the dough wrapped tightly for up to 24 hours before shaping and baking. Just let it sit at room temperature for a few minutes if it feels too firm to shape easily.
Final Thoughts
This Cheesy Thumbprint Bacon Jam Recipe is one of those feel-good dishes that brings people together with every bite. It’s simple to make, packed with layered flavors, and endlessly adaptable to whatever you have on hand. Give it a try next time you need a savory snack that’ll disappear fast — you’re going to love how much joy these little bites bring to your table!
Print
Cheesy Thumbprint Bacon Jam Recipe
- Prep Time: 10 minutes
- Cook Time: 15 minutes
- Total Time: 45 minutes
- Yield: 24 servings
- Category: Appetizer
- Method: Baking
- Cuisine: American
Description
Cheesy Thumbprint Bacon Jam are delicious bite-sized appetizers featuring a crisp, cheddar cheese-based dough filled with savory homemade onion bacon jam. Perfectly baked until golden and garnished with fresh parsley, these cheesy thumbprint bites are ideal for parties, gatherings, or savory snacking, balancing the sharpness of cheddar with the rich, smoky flavors of bacon jam.
Ingredients
Dough Ingredients
- 2 cups sharp cheddar cheese, shredded
- 1 cup all-purpose flour
- 6 tablespoons unsalted butter, chilled and cubed
- 1/2 teaspoon kosher salt
- 1/4 teaspoon garlic powder
Filling
- 1 cup homemade onion bacon jam
Garnish
- Chopped parsley, for serving
Instructions
- Prepare the dough: Combine shredded sharp cheddar cheese, all-purpose flour, chilled cubed unsalted butter, kosher salt, and garlic powder in a food processor. Pulse the mixture until it resembles a coarse meal. Then, gather the crumbs with your hands and form a cohesive dough ball.
- Chill the dough: Transfer the dough ball onto plastic wrap, flatten it into a disk shape, and wrap it securely. Refrigerate for approximately 30 minutes to firm up the dough, which will make it easier to shape.
- Preheat the oven: Set your oven to 400°F (204°C) and line a baking sheet with parchment paper to prevent sticking and promote even baking.
- Shape the dough balls: Remove the dough from the refrigerator and portion it into balls about 1 1/2 inches in diameter. Arrange the balls about 1 inch apart on the prepared baking sheet.
- Initial bake: Bake the dough balls in the preheated oven for 7 to 8 minutes until they start to firm up but are not fully cooked. Remove the baking sheet from the oven.
- Create thumbprints: Using the back of a teaspoon, gently press into the center of each dough ball to create an indentation for the filling.
- Add bacon jam and bake again: Spoon about 1 teaspoon of homemade onion bacon jam into each indentation. Return the baking sheet to the oven and bake for another 7 to 8 minutes, until the appetizers are golden brown and the dough appears fully set.
- Cool and garnish: Transfer the baked thumbprint bites to a wire rack and let them cool to room temperature. Before serving, sprinkle with chopped parsley for a fresh and colorful finish. Enjoy warm, at room temperature, or cold.
Notes
- Ensure the butter is well-chilled before pulsing with the cheese and flour to achieve the perfect crumbly dough texture.
- The homemade onion bacon jam adds a flavorful and smoky component; store-bought bacon jam can be used as a substitute if desired.
- These appetizers can be made ahead of time and stored chilled; reheat briefly before serving if preferred warm.
- Adjust the size of the thumbprints for larger or smaller bites according to your preference, adjusting baking times slightly.
- For a gluten-free version, substitute the all-purpose flour with a gluten-free flour blend suitable for baking.


