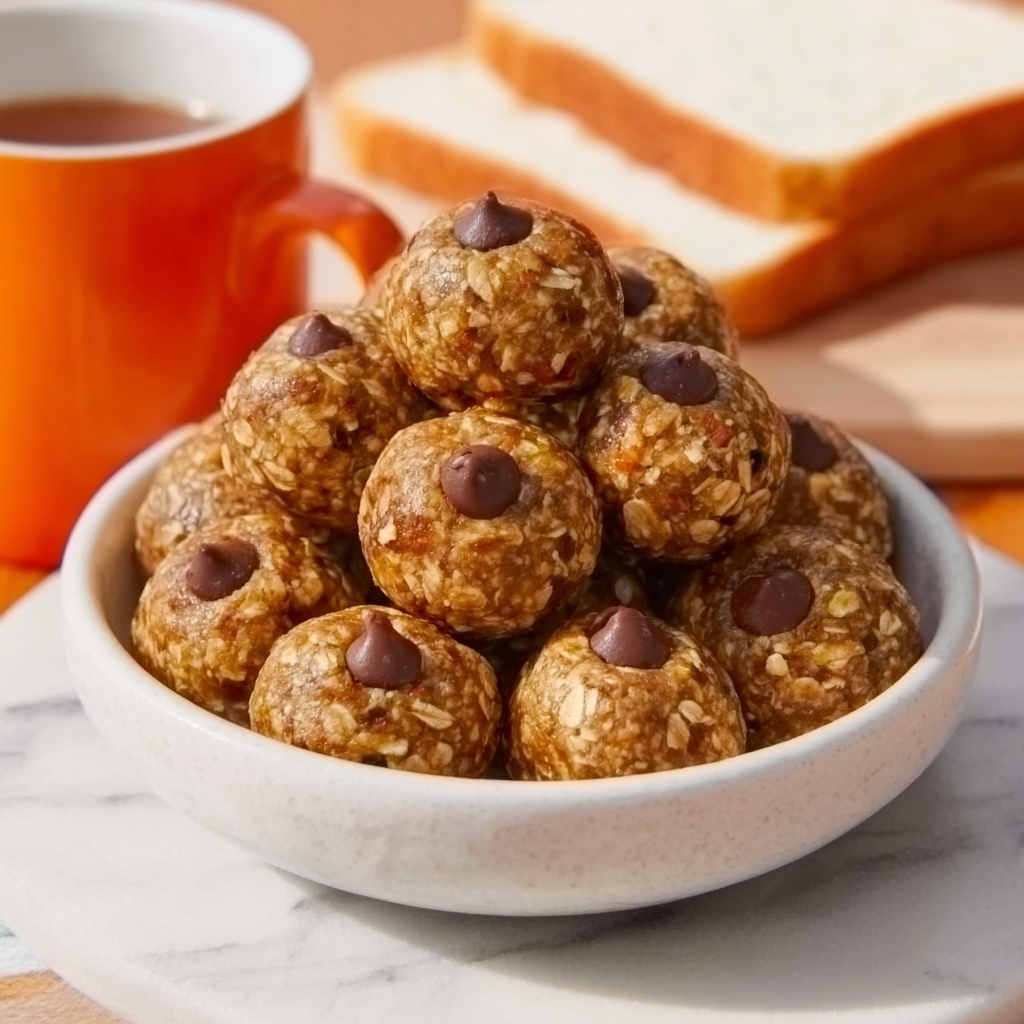
If you’ve ever found yourself craving a snack that’s both satisfying and nourishing, let me introduce you to this delightful secret weapon: Protein Balls for Healthy Snacking Delight – Easy No-Bake Treat Recipe. These little bites pack a punch with wholesome oats, creamy nut butter, and a touch of sweetness, creating a treat that feels indulgent but fuels your body beautifully. Plus, they come together in no time without heating up your kitchen – making them the perfect companion for busy days or whenever you want a quick, guilt-free boost.

Ingredients You’ll Need
Getting ready to whip up these Protein Balls for Healthy Snacking Delight – Easy No-Bake Treat Recipe is a breeze because the ingredients are simple, readily available, and each plays a key role in flavor and texture. From the oats’ wholesome chewiness to the nut butter’s creamy richness, every component makes this snack truly special.
- 1 cup rolled oats: Provides a hearty base and wonderful chewiness that helps bind the mixture.
- 1/2 cup nut butter (peanut or almond): Adds creamy texture and keeps these balls moist and flavorful.
- 1/3 cup honey or maple syrup: Natural sweetness that also acts as a sticky binder holding everything together.
- 1/2 cup protein powder (any flavor): The star ingredient boosting protein content to keep you energized and full longer.
- 1/2 cup mini chocolate chips (optional): Little bursts of melty chocolate for that extra touch of indulgence.
How to Make Protein Balls for Healthy Snacking Delight – Easy No-Bake Treat Recipe
Step 1: Gather and Prep Your Ingredients
First things first – get all your ingredients together in one mixing bowl. It’s fantastic how these wholesome components come together so effortlessly, setting the stage for a quick, no-fuss snack that you’re going to love.
Step 2: Mix the Oats, Nut Butter, Sweetener, and Protein Powder
Now, stir the rolled oats, nut butter, your choice of honey or maple syrup, and protein powder until everything is combined into a sticky, uniform mixture. This step is crucial because the right consistency ensures your protein balls hold together perfectly without crumbling.
Step 3: Fold in the Chocolate Chips
Gently folding in the mini chocolate chips brings a delightful pop of sweetness and texture. You can skip this if you prefer a nutty, straightforward bite or swap in dried fruit or nuts to customize your flavor profile.
Step 4: Chill to Firm Up
Place the mixture in the fridge for about 30 minutes. This little pause is magic – it firms up the mix so rolling becomes a snap and your protein balls keep their shape beautifully.
Step 5: Roll into Perfect Bites
Using your hands, roll the firm mixture into tablespoon-sized balls. This part is fun and allows you to personalize each ball’s size for your snacking needs, whether bite-sized or a bit bigger for more filling satisfaction.
Step 6: Store and Enjoy
Finally, store your tasty protein balls in an airtight container in the fridge. This simple step keeps them fresh and ready to fuel your day, whether for a quick breakfast nibble, an afternoon pick-me-up, or a post-workout snack.
How to Serve Protein Balls for Healthy Snacking Delight – Easy No-Bake Treat Recipe
Garnishes
To elevate these protein balls even further, try rolling them in shredded coconut, crushed nuts, or a light dusting of cocoa powder right after chilling. These garnishes add visual appeal and an extra layer of flavor that makes snack time feel like a mini celebration.
Side Dishes
Pair your protein balls with a small bowl of fresh fruit, a cup of Greek yogurt, or a smoothie for a balanced, nutrient-packed snack experience. This combination keeps hunger at bay while treating your taste buds.
Creative Ways to Present
Looking to impress friends or family? Arrange your protein balls on a decorative platter with colorful paper cups or stack them in a jar layered with chia pudding for a grab-and-go parfait. Presentation makes these treats feel special and adds to the enjoyment.
Make Ahead and Storage
Storing Leftovers
You can keep these protein balls fresh for up to a week when stored in an airtight container in the refrigerator. The cool temperature helps maintain their texture and flavor, making it easy to snack smart all week long.
Freezing
Want to extend their life? Pop your protein balls in the freezer for up to three months. Just thaw them in the fridge overnight before enjoying, and they’ll taste just as delicious as the day you made them.
Reheating
Since these are no-bake treats, reheating isn’t necessary. If you prefer a softer texture, let them come to room temperature for 10-15 minutes before eating or enjoy them straight from the fridge for a refreshing, chewy snack.
FAQs
Can I use a different nut butter?
Absolutely! Feel free to swap peanut butter or almond butter for cashew, sunflower seed butter, or even tahini for a unique flavor twist. Each nut butter brings its own personality and richness to the protein balls.
Is it okay to omit the chocolate chips?
Yes, chocolate chips are entirely optional. Omitting them results in a more straightforward, wholesome snack, but you can add dried fruits, seeds, or nuts instead to keep things interesting.
What kind of protein powder works best?
Any protein powder will do — whey, plant-based, or collagen peptides. Choose the flavor you enjoy most; vanilla, chocolate, or unflavored often work well in this recipe without overpowering the other ingredients.
Can these protein balls be made vegan?
Definitely! Use maple syrup instead of honey and choose a plant-based protein powder to keep the recipe vegan-friendly. The texture and taste will still shine through beautifully.
How long do these protein balls stay fresh?
Stored properly in the fridge, they stay fresh for up to one week. If you want to keep them longer, freezing is a great option that doesn’t compromise flavor or texture.
Final Thoughts
There’s something incredibly satisfying about making your own snacks, especially when they’re as delicious and nourishing as these Protein Balls for Healthy Snacking Delight – Easy No-Bake Treat Recipe. They’re straightforward, adaptable, and perfect whether you’re fueling a busy day or just craving a sweet pick-me-up. Give this recipe a try – your taste buds and your body will thank you!
Print
Protein Balls for Healthy Snacking Delight – Easy No-Bake Treat Recipe
- Prep Time: 10 minutes
- Cook Time: 0 minutes
- Total Time: 40 minutes
- Yield: 12 servings
- Category: Snack
- Method: No-Cook
- Cuisine: American
- Diet: Gluten Free
Description
Delicious and nutritious no-bake protein balls that make for a perfect healthy snack. Made with oats, nut butter, protein powder, and optionally chocolate chips, these protein balls are quick to prepare, energizing, and ideal for on-the-go fueling or a guilt-free treat.
Ingredients
Dry Ingredients
- 1 cup rolled oats
- 1/2 cup protein powder (any flavor)
- 1/2 cup mini chocolate chips (optional)
Wet Ingredients
- 1/2 cup nut butter (peanut or almond)
- 1/3 cup honey or maple syrup
Instructions
- Gather Ingredients: Collect all the ingredients into a mixing bowl to have everything ready for combining.
- Mix Ingredients: In the bowl, thoroughly combine the rolled oats, nut butter, honey or maple syrup, and protein powder. Stir until the mixture is evenly blended and sticky enough to hold together.
- Add Chocolate Chips: Gently fold in the mini chocolate chips, if using, to distribute them without breaking the texture.
- Chill the Mixture: Place the mixture in the refrigerator and chill for about 30 minutes. This step firms up the mixture, making it easier to shape.
- Shape into Balls: Using your hands, roll the chilled mixture into tablespoon-sized balls, ensuring they are compact and hold their shape.
- Store Properly: Transfer the protein balls into an airtight container and refrigerate. They can be stored for up to one week for freshness.
Notes
- Use your preferred nut butter for flavor variations, such as peanut or almond butter.
- Maple syrup is a vegan alternative to honey.
- Protein powder flavor can be vanilla, chocolate, or any type you like to customize taste.
- Chilling the mixture is essential for easy rolling and better texture.
- Store in the refrigerator to maintain freshness and prevent spoilage.
- These protein balls are perfect as pre- or post-workout snacks or anytime you need a quick energy boost.
