
“`html
If you’re craving a festive treat that embodies the spirit of the season, this Homemade Christmas Peppermint Patties Recipe is an absolute must-try. These delightful little candies boast a creamy, minty filling wrapped in cheerful red, green, and white hues, making them as pleasing to the eye as they are to the palate. With a luscious blend of cream cheese, butter, powdered sugar, and peppermint extract, each bite melts softly while delivering that classic peppermint zing. Whether you’re gifting them, serving at holiday parties, or just indulging yourself, these peppermint patties bring a nostalgic holiday charm right into your kitchen.
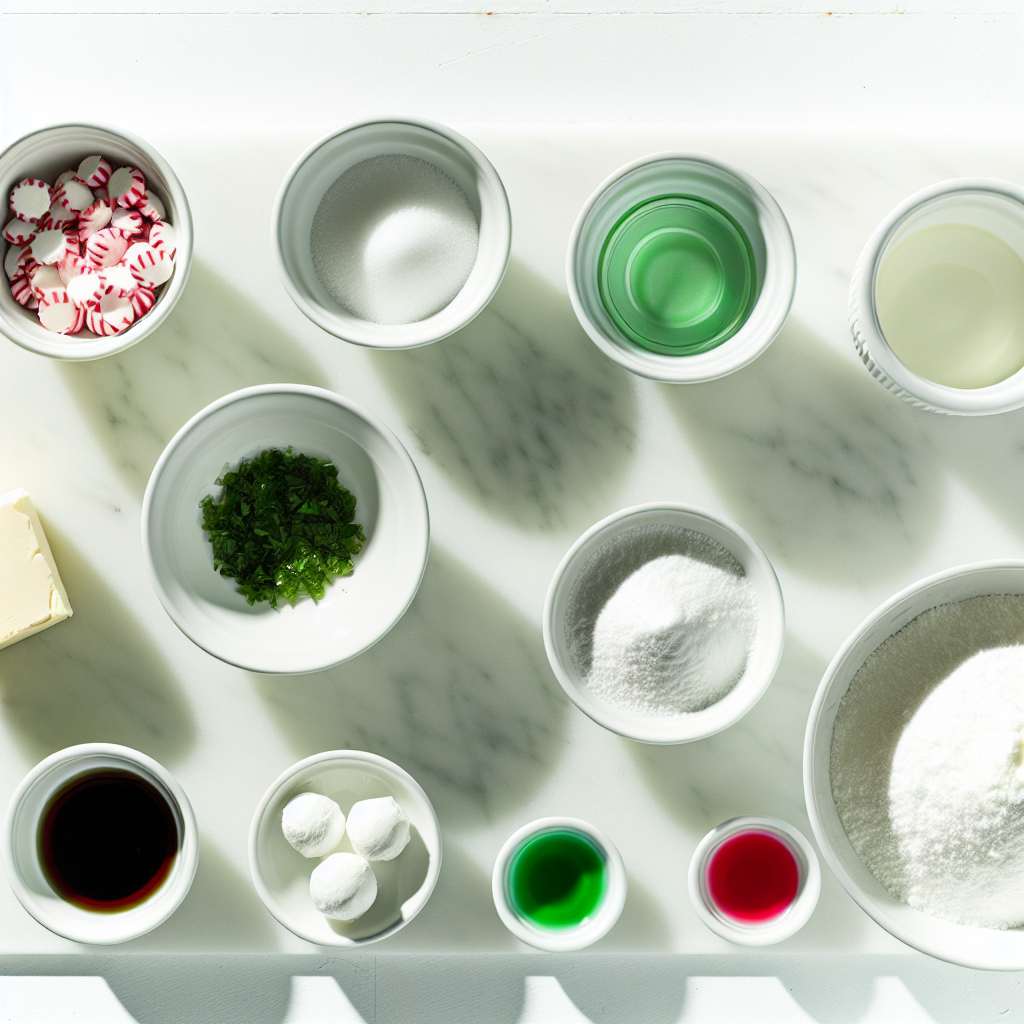
Ingredients You’ll Need
Creating the perfect batch of Homemade Christmas Peppermint Patties Recipe calls for a handful of simple yet essential ingredients. Each adds its own magic — from the creamy richness of cream cheese and butter to the sparkling sugar coating and festive colors that brighten up this holiday treat.
- Granulated sugar: Used for coating the finished patties, it adds a delightful crunch and a festive sparkle with every bite.
- Cream cheese: Make sure it’s at room temperature to blend smoothly, lending the patties their signature creamy texture.
- Unsalted butter: Also softened to room temperature, it enriches the dough without overpowering, keeping the flavor balanced.
- Light or clear corn syrup: This ingredient ensures the dough stays soft and pliable, giving the patties their classic chewy bite.
- Peppermint extract: The star player that delivers a refreshing minty punch essential to these holiday treats.
- Powdered sugar: The base that sweetens and binds the dough, making it easy to shape and roll.
- Green and red liquid food coloring: Add a few drops to give your patties that cheerful Christmas look that delights family and friends alike.
How to Make Homemade Christmas Peppermint Patties Recipe
Step 1: Prepare Your Workspace
Start by lining a large rimmed baking tray with parchment paper — this will be the perfect resting place for your peppermint patties as they set. Also, pour the granulated sugar into a small bowl to coat the candies later. Having these ready upfront makes the process smooth and joyful.
Step 2: Mix the Creamy Base
Using a handheld mixer on low speed, beat together the room temperature cream cheese, unsalted butter, light corn syrup, and peppermint extract until smooth and combined, about one minute. This soft, mint-scented base is what gives your patties their irresistible creaminess and flavor.
Step 3: Add Powdered Sugar Gradually
Slowly incorporate 4¼ cups of powdered sugar, adding about half a cup at a time while mixing on low. As the dough thickens and becomes harder to mix with the mixer, switch to a spatula or wooden spoon and finish combining by hand. You’re looking for a firm but pliable dough that’s not sticky, so feel free to add a little more powdered sugar if needed.
Step 4: Prepare Dough for Coloring
Sprinkle the remaining ¼ cup powdered sugar over a piece of parchment paper laid on a clean surface to keep things from sticking. Turn the dough out onto that parchment and divide it evenly into three portions — this is where the festive fun begins!
Step 5: Color and Knead the Dough
Make a shallow well in two of the portions. Add red food coloring to one, green to the other, and leave the third white. Knead each colored dough ball gently to spread the color evenly. If the dough gets too sticky from the liquid coloring, add powdered sugar a little at a time to reach the perfect consistency. Be careful not to overdo it — you want it just right to roll smoothly.
Step 6: Roll into Ropes and Slice
Roll each dough ball into an 18-inch-long rope about 1 inch thick. Slice these ropes into ½-inch pieces to form the perfect size for festive mints. This step feels almost like crafting tiny edible ornaments!
Step 7: Shape and Coat Your Patties
Roll each slice gently between your palms into smooth little balls. Then, toss 2-3 at a time in the granulated sugar bowl to coat evenly. Place the sugar-covered balls carefully on your prepared tray.
Step 8: Flatten and Decorate
Press each coated ball lightly with the tip of a fork to flatten it into a disc shape. The fork’s tines create charming striped patterns, adding that iconic peppermint patty look with minimal effort.
Step 9: Let Your Peppermint Patties Set
Allow the patties to sit at room temperature for up to 24 hours. This resting period is essential to let them dry properly, resulting in a delightful texture that holds together beautifully when you bite into them.
How to Serve Homemade Christmas Peppermint Patties Recipe
Garnishes
To elevate your serving presentation, sprinkle crushed candy canes or a dusting of edible glitter over the peppermint patties. This adds sparkle and extra festive flair, making your treats the star of any holiday table or party platter.
Side Dishes
These minty delights pair wonderfully with warm beverages like hot cocoa or freshly brewed coffee, complementing their refreshing flavor. For a unique combo, serve alongside a cheese board featuring mild cheeses and nuts—the peppermint patties act as a delightful palate cleanser between savory bites.
Creative Ways to Present
Wrap each patty individually in wax paper or place them in festive mini cupcake liners for a professional yet charming look. For gifts, arrange them neatly in a decorative box lined with tissue paper and tied with a seasonal ribbon — perfect for spreading holiday cheer.
Make Ahead and Storage
Storing Leftovers
Keep any leftover peppermint patties in an airtight container at room temperature. They stay fresh and tasty for up to two weeks if kept away from direct sunlight and heat, making it easy to enjoy your homemade treats over time.
Freezing
To freeze, layer the patties between sheets of wax paper in a freezer-safe container. Once thawed at room temperature, they retain their wonderful texture, so you can prepare them ahead without losing any of that homemade magic.
Reheating
Since these mint patties are no-bake confections, reheating is unnecessary. If they become firm from cold storage, simply leave them at room temperature for a little while to soften naturally, preserving that creamy, melt-in-your-mouth feel.
FAQs
Can I use gel food coloring instead of liquid in this Homemade Christmas Peppermint Patties Recipe?
Yes! Gel food coloring works beautifully since it gives vibrant colors without adding extra moisture to the dough, helping you avoid stickiness while achieving eye-catching festive hues.
Do I have to let the peppermint patties set before eating?
Definitely. Allowing them to rest at room temperature for up to 24 hours lets the patties firm up properly, giving you the perfect texture and making them less sticky and easy to enjoy.
Can I make the dough ahead of time?
Absolutely. Preparing the dough a day in advance and wrapping it tightly for refrigeration is a great way to save time. Just bring it back to room temperature before shaping for the best handling.
What’s the best peppermint extract to use?
Pure peppermint extract is the best choice for a natural and refreshing flavor. It delivers a bright, clean mint taste that’s far superior to imitation versions and really shines in this recipe.
Is it okay if my dough feels sticky?
It’s normal to need a bit of adjustment. Gradually adding more powdered sugar while kneading helps achieve a smooth, workable dough that isn’t sticky or dry. Just go slowly to avoid making the dough too crumbly.
Final Thoughts
This Homemade Christmas Peppermint Patties Recipe has become a treasured holiday tradition, filling homes with festive scent and sweet memories. Its simple ingredients come together to create a classic treat that’s as fun to make as it is delicious to share. I’m excited for you to bring these charming mints into your own celebrations — once you try them, you’ll understand why they’re a seasonal favorite that keeps everyone coming back for more!
“`
Print
Homemade Christmas Peppermint Patties Recipe
- Prep Time: 15 minutes
- Cook Time: 0 minutes
- Total Time: 15 minutes
- Yield: Approximately 100 peppermint candies
- Category: Candy
- Method: No-Cook
- Cuisine: American
Description
These Christmas Mints are festive, colorful peppermint candies made with cream cheese, butter, powdered sugar, and peppermint extract. They are easy to prepare, requiring no cooking, and perfect for holiday celebrations. The dough is divided and colored red, green, and white, shaped into small discs with a charming striped fork pattern, and left to set at room temperature to achieve the ideal texture.
Ingredients
Base Ingredients
- ⅓ cup granulated sugar
- 4 ounces cream cheese, room temperature
- 2 tablespoons unsalted butter, room temperature
- 2 tablespoons light/clear corn syrup (e.g., Karo brand)
- 1 teaspoon peppermint extract
- 4¼ – 5 cups powdered sugar, divided
Food Coloring
- 6 drops green liquid food coloring
- 6 drops red liquid food coloring
Instructions
- Prepare the baking tray: Line a large rimmed baking tray with parchment paper. Place the granulated sugar in a small bowl and set aside for coating the mints later.
- Mix the dough base: In a large mixing bowl, use a handheld mixer on low speed to beat together the cream cheese, unsalted butter, light corn syrup, and peppermint extract for about 1 minute until the mixture is smooth and well combined.
- Incorporate powdered sugar: Gradually add 4¼ cups of powdered sugar, half a cup at a time, into the bowl while mixing on low. As the dough thickens and becomes difficult to mix, switch to a spatula or wooden spoon and finish mixing by hand to fully combine the dough.
- Prepare dough for coloring: Lay a piece of parchment paper on a clean surface and sprinkle the remaining ¼ cup of powdered sugar over it. Turn the dough out onto this parchment paper to prevent sticking.
- Divide and color the dough: Divide the dough into three equal portions. Make a shallow well in the center of two portions. Add red food coloring to one portion and green food coloring to the other; leave the third portion white.
- Knead the colored dough: Knead each colored dough ball to evenly distribute the food coloring. Add up to an additional ¼ cup powdered sugar as needed while kneading to prevent stickiness caused by the liquid coloring. Knead the white dough lightly if sticky, adding small amounts of powdered sugar as necessary. Be cautious to add powdered sugar gradually to avoid making the dough too dry.
- Roll the dough into ropes: Roll each dough ball into an approximately 18-inch-long rope about 1 inch thick on a clean, flat surface.
- Slice into pieces: Slice each rope into ½-inch thick pieces by cutting from one end to the other, resulting in small individual pieces for mints.
- Shape into balls: Roll each slice gently between your palms to form little balls and set them aside.
- Coat with granulated sugar: Drop 2-3 dough balls at a time into the bowl of granulated sugar and toss to coat evenly. Then place the sugar-coated balls onto the prepared baking tray. Repeat this process until all dough balls are coated and arranged on the tray.
- Flatten and decorate: Using the tip of a fork, lightly press each sugar-coated ball to flatten it into a small disc. The fork tines will create a decorative striped pattern on top of each peppermint patty.
- Allow to set: Let the Christmas peppermint patties sit at room temperature on the tray for up to 24 hours before serving. This resting period helps the mints dry and set properly for the best texture.
Notes
- Yields approximately 100 peppermint candies.
- Store in an airtight container at room temperature for up to 2 weeks.
- For deeper color, you can add up to ½ teaspoon of liquid food coloring.
- If the dough is too sticky, gradually add more powdered sugar until it reaches the right consistency—not too stiff, but not sticky.
- Gel food coloring works well as it produces vibrant colors without adding extra moisture and is safe for those with nut allergies.


