
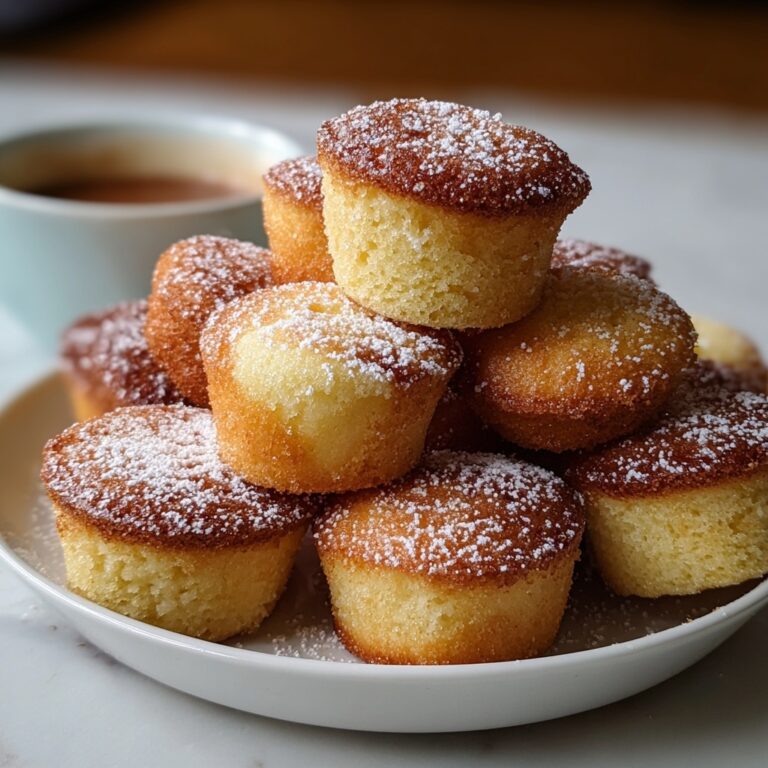
If you’re on the lookout for a dessert that brings both rich chocolate and zesty citrus together in perfect harmony, this Chocolate Orange Layer Cake with Orange Curd – Easy & Delicious Recipe is exactly what you need. Imagine moist, tender chocolate cake layers infused with bright orange zest, layered generously with a luscious homemade orange curd, and enveloped in a velvety chocolate frosting. This cake is a delightful celebration of flavors and textures that will brighten any special occasion or simply satisfy a craving for something both comforting and refreshingly vibrant. Get ready to have your taste buds dancing with joy!
Ingredients You’ll Need
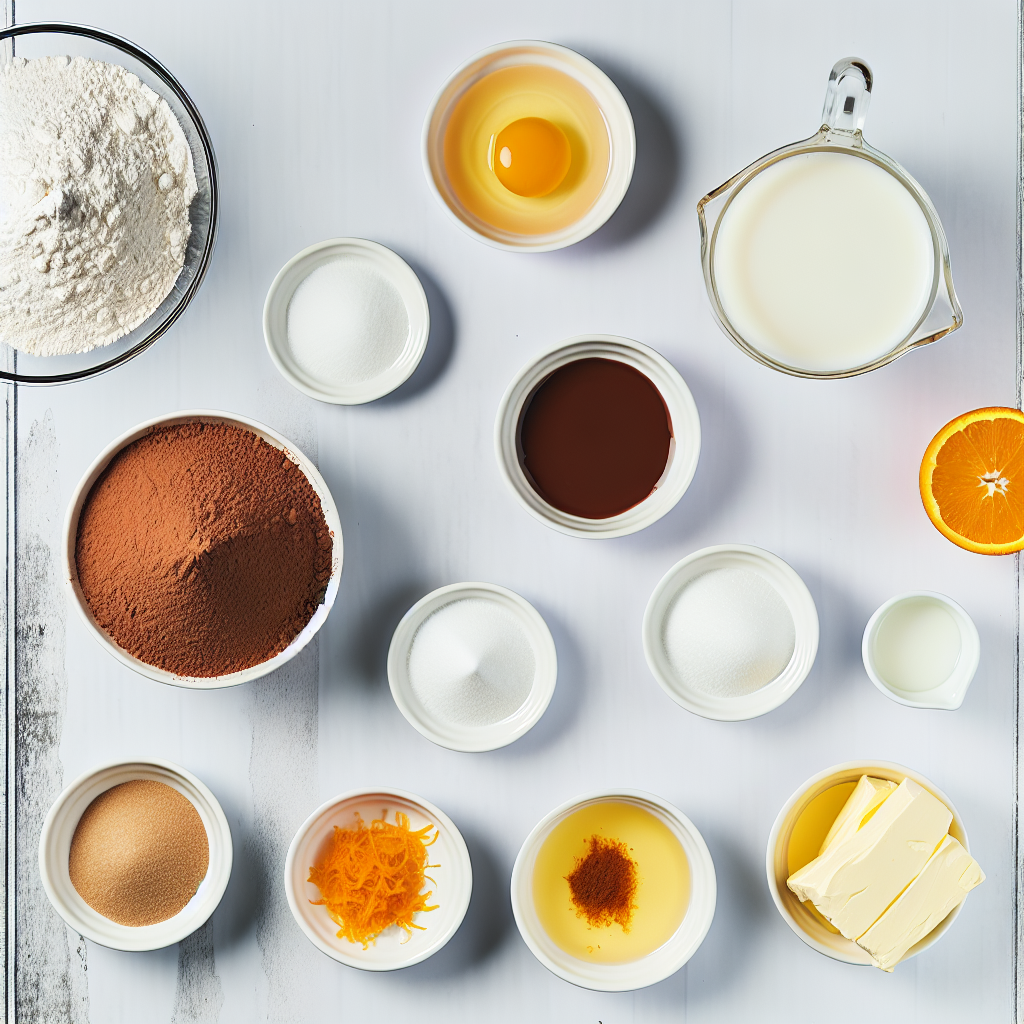
Every ingredient in this recipe plays a critical role in creating the magic of this cake. From the chocolatey depth to the fresh brightness of the orange curd, these simple yet essential components work together to bring out the best in each bite.
- All-purpose flour: The foundation for our cake’s tender yet sturdy crumb.
- Unsweetened cocoa powder: Adds rich, deep chocolate flavor without sweetness.
- Granulated sugar: Sweetens the cake and balances the citrus tang.
- Baking powder and baking soda: These leavening agents ensure a light and fluffy texture.
- Salt: Enhances all the flavors and keeps the sweetness in check.
- Eggs: Bind the ingredients and contribute to the cake’s structure.
- Whole milk: Adds moisture and helps create a tender crumb.
- Vegetable oil: Keeps the cake moist and tender.
- Vanilla extract: Provides a sweet, aromatic background note.
- Boiling water: Intensifies the cocoa flavor and makes the batter super smooth.
- Orange zest: Delivers fresh citrus brightness in every bite.
- Fresh orange juice and zest (for curd): The heart of the orange curd, infusing it with pure, tangy flavor.
- Granulated sugar (for curd): Sweetens the curd just enough without overwhelming the citrus.
- Egg yolks: Give the curd its creamy, rich texture.
- Unsalted butter: Adds silkiness to the curd and the frosting.
- Powdered sugar: Essential for the smooth, fluffy chocolate frosting.
- Milk (for frosting): Adjusts the consistency for easy spreading.
- Pinch of salt (for frosting): Balances the sweetness and enhances chocolate flavor.
How to Make Chocolate Orange Layer Cake with Orange Curd – Easy & Delicious Recipe
Step 1: Make the Orange Curd
Start with the star of the show – the orange curd. In a saucepan, whisk together fresh orange juice, zest, sugar, and egg yolks. Cook over medium heat while stirring constantly until the mixture thickens enough to coat the back of a spoon – this typically takes around 6 to 8 minutes. The moment it thickens, remove it from the heat and stir in cubed butter until completely smooth and glossy. Transfer to a bowl to cool, then refrigerate until it sets. Preparing this ahead of time lets those citrus flavors develop beautifully.
Step 2: Prepare the Chocolate Cake Batter
Preheat your oven to 350 degrees Fahrenheit (175 degrees Celsius) and grease two 8-inch cake pans, lining the bottoms with parchment paper for easy removal. In a large mixing bowl, whisk together the flour, cocoa powder, sugar, baking powder, baking soda, and salt to evenly distribute all the dry ingredients. Add the eggs, whole milk, vegetable oil, vanilla extract, and orange zest. Mix until everything is just combined, then carefully stir in the boiling water – this thins the batter but brings out a rich, moist crumb. Divide the batter evenly into the pans.
Step 3: Bake the Cake Layers
Bake the cake layers for 30 to 35 minutes. The test is simple: insert a toothpick into the center of each cake, and if it comes out clean, they’re ready. Allow them to cool in the pans for about 10 minutes before transferring to a wire rack to cool completely. Cooling is key so the frosting doesn’t melt and the flavors settle perfectly.
Step 4: Make the Chocolate Frosting
While the layers cool, cream the unsalted butter in a large bowl until smooth and fluffy. Gradually add the powdered sugar and cocoa powder, alternating with milk, and mix in the vanilla and a pinch of salt. Beat until you achieve a glossy, spreadable frosting that’s neither too stiff nor too runny. Add additional milk in small amounts if needed for easy spreading.
Step 5: Assemble the Cake
Place one cooled cake layer on your serving plate. Spread a generous layer of the chilled orange curd across the top, leaving about a half-inch border to prevent overflow. Carefully set the second cake layer on top, then coat the entire cake with smooth chocolate frosting. For a final flourish, garnish with bright orange zest or delicate chocolate curls to make it truly irresistible.
How to Serve Chocolate Orange Layer Cake with Orange Curd – Easy & Delicious Recipe
Garnishes
Serving this cake with a sprinkle of fresh orange zest or a handful of chocolate curls adds a gorgeous finishing touch that hints at the flavors inside. You can also dust a light coating of powdered sugar or add edible gold leaf for special occasions, making each slice feel like a celebration.
Side Dishes
This cake pairs beautifully with a scoop of vanilla bean ice cream or a dollop of whipped cream, offering creamy contrast to the richness. For a refreshing balance, serve alongside fresh berries or a simple fruit salad that echoes the citrus notes.
Creative Ways to Present
Slice the cake into petite squares for a buffet or party spread, or serve individual mini versions layered with orange curd in clear glasses for an elegant twist. Wrapping a slice with a decorative ribbon and a sprig of mint also makes a charming gift for friends and family.
Make Ahead and Storage
Storing Leftovers
Wrap any leftover cake tightly with plastic wrap or store in an airtight container and refrigerate. It will stay fresh and moist for up to three days, allowing you to enjoy its wonderful flavors well beyond the day you bake it.
Freezing
This cake freezes beautifully. For best results, wrap each layer tightly in plastic wrap and place inside a freezer bag or container. Freeze for up to two months. When ready to enjoy, thaw overnight in the refrigerator before frosting and assembling.
Reheating
You typically don’t need to reheat this cake, but if you prefer a slightly warm slice, place a portion on a microwave-safe plate and heat for 10 to 15 seconds. This will soften the frosting slightly and let those chocolate and orange aromas bloom even more.
FAQs
Can I use store-bought orange curd instead of making my own?
Absolutely! Store-bought orange curd can save time and still lend fantastic flavor, though homemade curd offers a fresher, brighter taste that really elevates the cake.
What type of cocoa powder is best for this recipe?
A good-quality unsweetened cocoa powder works best, as it provides rich chocolate flavor without bitterness. Dutch-processed cocoa offers a smoother taste, but natural cocoa powder will work fine as well.
Is this recipe suitable for vegetarians?
Yes, the recipe contains no meat products and is perfect for vegetarians. Just be sure your chosen ingredients like butter and eggs fit your dietary preferences.
Can I make this cake dairy-free?
To make it dairy-free, substitute whole milk with a plant-based milk, and use dairy-free butter alternatives for the curd and frosting. The texture might vary slightly, but the flavors will still shine.
What is the best way to slice this layered cake?
For clean slices, chill the cake briefly to firm up the frosting, then use a sharp knife wiped between cuts. This prevents frosting smears and keeps layers distinct.
Final Thoughts
This Chocolate Orange Layer Cake with Orange Curd – Easy & Delicious Recipe is an absolute joy to make and even more fun to share. Its beautiful layers, vibrant citrus notes, and decadent chocolate join together to create a dessert that’s both timeless and exciting. Whether for a holiday feast or a weekend treat, I wholeheartedly encourage you to try this recipe and make some wonderful memories in your kitchen. Trust me, it will become a favorite you come back to again and again!
Print
Chocolate Orange Layer Cake with Orange Curd – Easy & Delicious Recipe
- Prep Time: 40 minutes
- Cook Time: 35 minutes
- Total Time: 1 hour 15 minutes (plus cooling time)
- Yield: 12 servings
- Category: Dessert
- Method: Baking
- Cuisine: American
- Diet: Vegetarian
Description
This Chocolate Orange Layer Cake with Orange Curd is an irresistibly moist and rich dessert perfect for any occasion. The cake layers combine deep cocoa flavor with bright citrus notes from fresh orange zest and juice. Paired with a luscious homemade orange curd filling and topped with a creamy chocolate frosting, this layered cake offers a delightful balance of chocolatey indulgence and fruity freshness. It’s easy to make and sure to impress.
Ingredients
For the Chocolate Cake
- 1 3/4 cups all-purpose flour
- 3/4 cup unsweetened cocoa powder
- 2 cups granulated sugar
- 1 1/2 teaspoons baking powder
- 1 1/2 teaspoons baking soda
- 1 teaspoon salt
- 2 large eggs
- 1 cup whole milk
- 1/2 cup vegetable oil
- 2 teaspoons vanilla extract
- 1 cup boiling water
- Zest of 1 orange
For the Orange Curd
- 1/2 cup fresh orange juice
- 1 tablespoon orange zest
- 1/2 cup granulated sugar
- 3 large egg yolks
- 1/4 cup unsalted butter, cubed
For the Chocolate Frosting
- 1 cup unsalted butter, softened
- 3 1/2 cups powdered sugar
- 3/4 cup unsweetened cocoa powder
- 1/4 cup milk (more if needed)
- 1 teaspoon vanilla extract
- Pinch of salt
Instructions
- Make the Orange Curd: In a saucepan, whisk together the fresh orange juice, orange zest, sugar, and egg yolks over medium heat. Stir constantly until the mixture thickens enough to coat the back of a spoon, about 6 to 8 minutes. Remove from heat and stir in the cubed unsalted butter until the curd is smooth. Let it cool, then refrigerate until set, preferably while you prepare the cake.
- Prepare the Cake Batter: Preheat your oven to 350°F (175°C). Grease and line two 8-inch round cake pans with parchment paper to prevent sticking. In a large bowl, whisk together all-purpose flour, unsweetened cocoa powder, sugar, baking powder, baking soda, and salt. Add the eggs, whole milk, vegetable oil, vanilla extract, and orange zest. Mix thoroughly until combined. Carefully stir in the boiling water—the batter will be thin.
- Bake the Cake Layers: Divide the batter evenly between the two prepared cake pans. Place in the preheated oven and bake for 30 to 35 minutes, or until a toothpick inserted into the center comes out clean. Remove from the oven and let the cakes cool in the pans for 10 minutes, then transfer them onto wire racks to cool completely.
- Make the Chocolate Frosting: Beat the softened unsalted butter in a large bowl until creamy. Gradually add powdered sugar and unsweetened cocoa powder, mixing on low speed initially. Add milk, vanilla extract, and a pinch of salt, then beat on higher speed until the frosting becomes smooth and fluffy. Adjust consistency by adding more milk if needed for easy spreading.
- Assemble the Cake: Place one cooled cake layer on your serving plate. Spread a generous layer of the chilled orange curd on top, leaving about a half-inch border around the edges to prevent overflow. Carefully place the second cake layer on top. Use the chocolate frosting to cover the top and sides of the cake evenly. Optionally, garnish with additional orange zest or chocolate curls for an elegant finish.
Notes
- Make the orange curd a day ahead to allow maximum flavor development and to save time on assembly day.
- For a richer, more complex flavor, add a splash of orange liqueur such as Grand Marnier to the chocolate frosting.
- Store the finished cake covered in the refrigerator for up to 3 days to maintain freshness.


