
If you love festive flavors and delightful textures, you are going to adore this Peppermint Pinwheel Cookies Recipe. These charming cookies combine the refreshing burst of peppermint with the classic sweetness of buttery sugar cookie dough, accented by vibrant red and green swirls that make every bite a holiday celebration. Perfect for gift-giving, parties, or simply treating yourself, these cookies are as fun to make as they are to savor. Get ready to impress your friends and family with a recipe that’s bursting with flavor and personality!
Ingredients You’ll Need
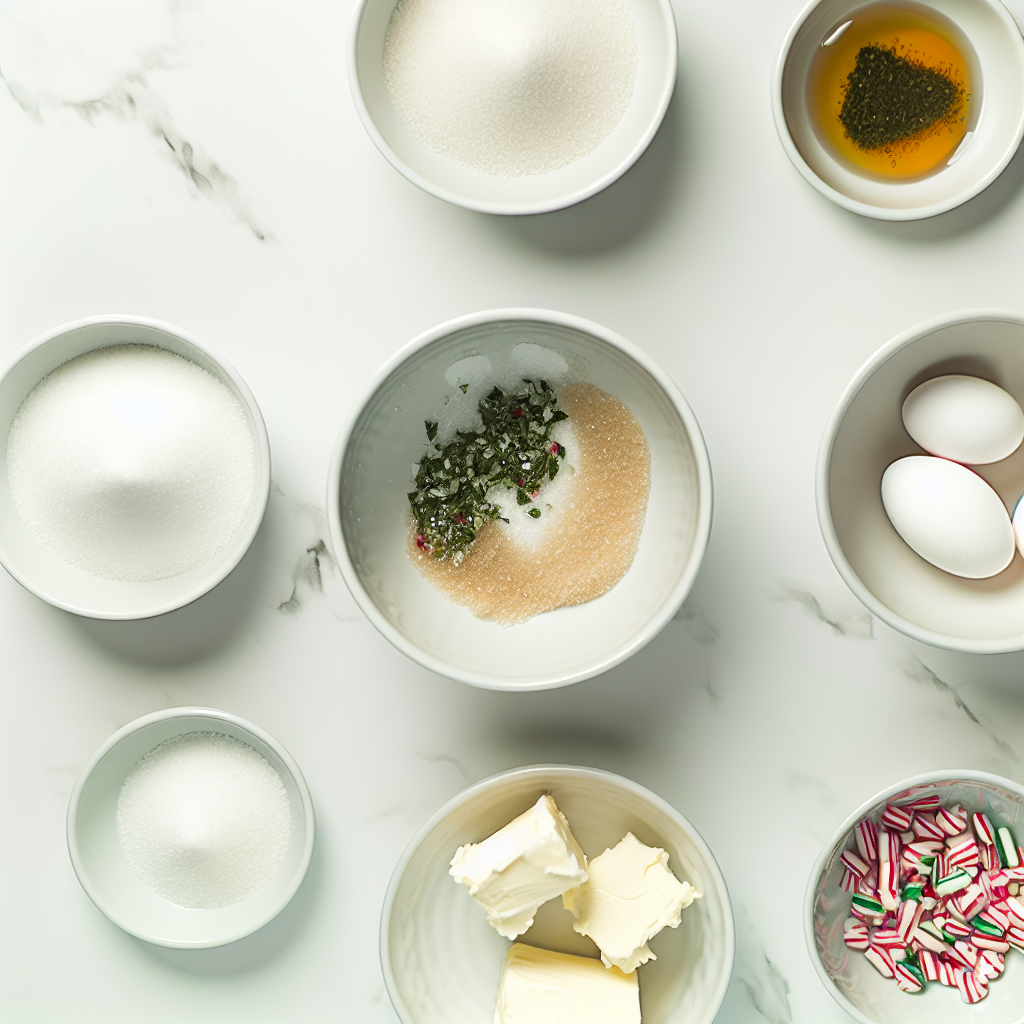
Gathering simple, high-quality ingredients is key to nailing the perfect Peppermint Pinwheel Cookies Recipe. Each component plays a special role, from the creamy butter that ensures moistness to the peppermint extract that delivers that signature cool kick. Here’s what you’ll need:
- Unsalted butter, 1 cup (227 grams): Softened for easy mixing and rich flavor that serves as the cookie base.
- Confectioners’ sugar, 3/4 cup (90 grams): Adds smooth sweetness and helps create a tender texture.
- White sugar, 3/4 cup (150 grams): Provides a balanced sweetness and a slight crunch.
- Vanilla extract, 1 ½ teaspoons: Enhances the overall flavor with warm, familiar notes.
- Peppermint extract, 1 teaspoon: The star flavor that infuses this recipe with festive freshness.
- Eggs, 2 large: Bind the dough together and add moisture for softness.
- All-purpose flour, 4 cups (480 grams): Gives the cookies structure and chew.
- Baking powder, 3/4 teaspoon: Helps the cookies rise slightly, ensuring a light texture.
- Salt, 1/4 teaspoon: Balances the sweetness and enhances flavor complexity.
- Nonpareil sprinkles, 1/2 cup (red, white, and green): For that festive crunch and colorful finishing touch.
How to Make Peppermint Pinwheel Cookies Recipe
Step 1: Combine the Dry Ingredients
Start by whisking the flour, baking powder, and salt together in a large bowl. This ensures your baking powder and salt are evenly distributed for consistent rising and flavor throughout the dough.
Step 2: Cream the Butter and Sugars
In a separate large bowl, beat the softened butter with the confectioners’ sugar and white sugar on medium speed until the mixture is light, fluffy, and creamy, about 3 minutes. This step infuses air into the dough, which helps create those delicate textures we love in a sugar cookie.
Step 3: Add Flavor and Eggs
Next, add the vanilla extract, peppermint extract, and eggs to the butter and sugar mixture. Beat everything together until smooth and fully combined, ensuring the peppermint flavor is evenly mixed throughout the dough for a refreshing taste in every cookie.
Step 4: Mix in Dry Ingredients
Gradually add your dry flour mixture to the wet ingredients. Beat until a soft dough forms that’s pliable but not sticky. This step is critical because overmixing can make the cookies tough, so stop as soon as everything comes together perfectly.
Step 5: Divide Dough and Refrigerate
Divide your dough into three equal portions. Wrap one portion in plastic wrap as your plain white dough and refrigerate it. This chilling allows the dough to firm up, making it easier to handle.
Step 6: Color the Dough
Add green food coloring to one portion and red food coloring to the other. Mix thoroughly using a hand mixer or your hands with gloves—this is the easiest method to achieve vibrant, consistent hues. Wrap each colored dough separately and chill for at least one hour to firm up and prevent colors from mixing prematurely.
Step 7: Roll Out the Dough
Once chilled, roll each dough portion out onto lightly floured parchment paper into approximately 9×12-inch rectangles. Rolling each dough to the same size allows you to stack the layers evenly for perfect pinwheels.
Step 8: Layer and Trim
Stack the layers with green on the bottom, plain white in the middle, and red on top. Trim the edges with a sharp knife to even out the rectangle shape. This step is key for neat, uniform pinwheels once sliced.
Step 9: Roll into a Log
Carefully roll the stacked dough starting from the long side, making a tight log. This rolling creates those signature swirls of color you’ll see in each cookie slice.
Step 10: Coat with Sprinkles
Pour your festive nonpareil sprinkles into a shallow rimmed dish. Roll your dough log over the sprinkles gently but thoroughly until the entire surface is coated. This adds a playful crunch and boosts the holiday spirit with colorful accents.
Step 11: Chill the Log
Wrap the sprinkle-coated log tightly in plastic wrap and refrigerate for at least 4 hours. This chilling step is essential to firm up the log for clean slicing and to meld the flavors together.
Step 12: Preheat and Prepare Baking Sheets
Before baking, preheat your oven to 350°F (175°C). Line two baking sheets with parchment paper to prevent sticking and allow for easy cleanup.
Step 13: Slice the Cookies
Remove the chilled dough log from the fridge and slice it into ¼-inch thick rounds using a sharp knife. The thin slices ensure delicate cookies that bake evenly.
Step 14: Bake and Cool
Place the cookie slices onto the prepared baking sheets and bake them for 9 to 11 minutes, until they are set but still soft. Allow them to cool briefly on the baking sheets before transferring to a wire rack to cool completely, preserving their tender texture.
How to Serve Peppermint Pinwheel Cookies Recipe
Garnishes
These Peppermint Pinwheel Cookies are stunning on their own, but for a bit of extra flair, consider dusting them lightly with a sprinkle of confectioners’ sugar or adding a few extra crushed peppermint candies on the side. This enhances both their appearance and peppermint kick.
Side Dishes
Pair these cookies beautifully with a hot cup of cocoa, peppermint tea, or even a rich eggnog to complement their minty freshness. For a brunch or holiday spread, they also work as a sweet contrast alongside savory cheese and charcuterie boards.
Creative Ways to Present
You can get creative by stacking the cookies in a festive glass jar tied with a ribbon as a gorgeous edible gift. Alternatively, arrange them on a decorative platter in overlapping circles, letting the red and green swirls shine and instantly brighten any dessert table.
Make Ahead and Storage
Storing Leftovers
Keep extra cookies fresh by storing them in an airtight container at room temperature. They stay soft and flavorful for up to a week, making them perfect to bake ahead for holiday gatherings.
Freezing
You can freeze the dough log both before and after rolling it in sprinkles. Wrap tightly in plastic wrap and freeze for up to 2 months. When ready to bake, thaw overnight in the refrigerator and slice as directed. This makes planning ahead for the Peppermint Pinwheel Cookies Recipe super convenient.
Reheating
If you want to enjoy freshly baked warmth after storage, pop a few cookies in the microwave for about 10-15 seconds or in an oven preheated to 300°F (150°C) for 3-5 minutes. This revives their soft texture and melts the sugars just enough to feel freshly baked.
FAQs
Can I use regular peppermint flavor instead of peppermint extract?
For best results, it’s best to use peppermint extract because it is more concentrated and pure, giving that true minty flavor. Peppermint flavorings can sometimes be artificial and might affect the taste and texture of your cookies.
Is it necessary to chill the dough multiple times?
Yes, chilling the dough not only makes it easier to handle and roll but also helps the cookies maintain their shape during baking, creating those perfect pinwheel spirals and a tender crumb.
Can I substitute the nonpareil sprinkles with something else?
Absolutely! You can use sugar crystals, colored sanding sugar, or even finely crushed candy canes to coat the dough log. Just choose something that complements the peppermint flavor and adds texture.
How do I prevent the colors from blending when rolling the dough?
Make sure each dough portion is well chilled before rolling and stacking. Work on a cool surface and try not to overhandle the dough to keep the colors vibrant and distinct in the swirl.
Can I make this recipe gluten-free?
You can try substituting the all-purpose flour with a gluten-free flour blend, but results may vary. Be sure to choose a blend formulated for baking, and consider adding a binding agent if needed to maintain dough consistency.
Final Thoughts
I truly hope you give this Peppermint Pinwheel Cookies Recipe a try because it’s one of those festive treats that bring both joy in baking and delight in eating. From the beautiful swirls to the refreshing peppermint flavor, these cookies will quickly become a beloved staple at your holiday celebrations and beyond. Happy baking, and enjoy every sweet, minty bite!
Print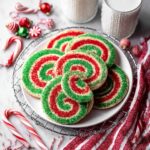
Peppermint Pinwheel Cookies Recipe
- Prep Time: 1 hour 20 minutes
- Cook Time: 11 minutes
- Total Time: 5 hours 35 minutes
- Yield: 20 servings
- Category: Dessert
- Method: Baking
- Cuisine: American
- Diet: Vegetarian
Description
Peppermint Pinwheel Cookies are festive, colorful, and perfect for holiday celebrations. These soft, buttery cookies feature vibrant red, green, and white layers infused with refreshing peppermint extract and decorated with nonpareil sprinkles for a cheerful look. Rolled into a log and sliced into delicate pinwheels, they are as delightful to look at as they are to eat.
Ingredients
Dough Ingredients
- 1 cup (227 grams) unsalted butter, softened
- 3/4 cup (90 grams) confectioners’ sugar
- 3/4 cup (150 grams) white sugar
- 1 1/2 teaspoons vanilla extract
- 1 teaspoon peppermint extract
- 2 eggs
- 4 cups (480 grams) all purpose flour
- 3/4 teaspoon baking powder
- 1/4 teaspoon salt
Decoration
- 1/2 cup nonpareil sprinkles, red, white, and green
- Green food coloring
- Red food coloring
Instructions
- Mix dry ingredients: In a large mixing bowl, whisk together the flour, baking powder, and salt until well combined and set aside.
- Cream butter and sugars: In another large bowl, beat the softened butter with the confectioners’ sugar and white sugar on medium speed until light and fluffy, about 3 minutes.
- Add flavorings and eggs: Add vanilla extract, peppermint extract, and eggs to the creamed butter mixture. Beat again until fully combined and the mixture is smooth.
- Combine dry and wet mixtures: Slowly add the flour mixture into the wet ingredients while beating. Continue until a soft but not sticky dough forms.
- Divide and chill dough portions: Divide the dough into three equal portions. Wrap one portion with cling wrap as the plain white dough and refrigerate.
- Color remaining doughs: Add green food coloring to one portion and knead until evenly colored, then add red food coloring to the remaining portion and knead. Wrap each colored dough with cling wrap and refrigerate for at least 1 hour.
- Roll out dough rectangles: Remove chilled doughs and roll each on lightly floured parchment into a 9×12-inch rectangle.
- Stack dough layers: Stack them carefully with green on the bottom, then plain white, and red on top. Trim edges to create an even rectangle.
- Roll into log: Starting from the long side, roll the stacked dough tightly into a log shape.
- Apply sprinkles coating: Pour sprinkles into a baking sheet, then roll the dough log over them, pressing gently to cover the surface evenly.
- Refrigerate log: Wrap the sprinkle-coated dough log tightly in plastic wrap and refrigerate for at least 4 hours to firm up.
- Preheat oven and prepare trays: Preheat oven to 350°F (175°C) and line two baking sheets with parchment paper.
- Slice cookies: Remove the chilled log from the refrigerator and cut into 1/4-inch thick slices using a sharp knife.
- Bake cookies: Place slices evenly spaced on the baking sheets and bake for 9-11 minutes until set but still soft.
- Cool cookies: Let cookies cool briefly on the baking sheets, then transfer to wire racks to cool completely.
Notes
- Make sure dough is well chilled before rolling to prevent colors from blending.
- Use a very sharp knife to get clean slices and prevent squashing the dough log.
- Sprinkle coating can be adjusted or omitted as preferred.
- Cookies maintain freshness best in an airtight container for up to one week or frozen for longer storage.
- Allow cookies to cool fully to achieve the best texture.

