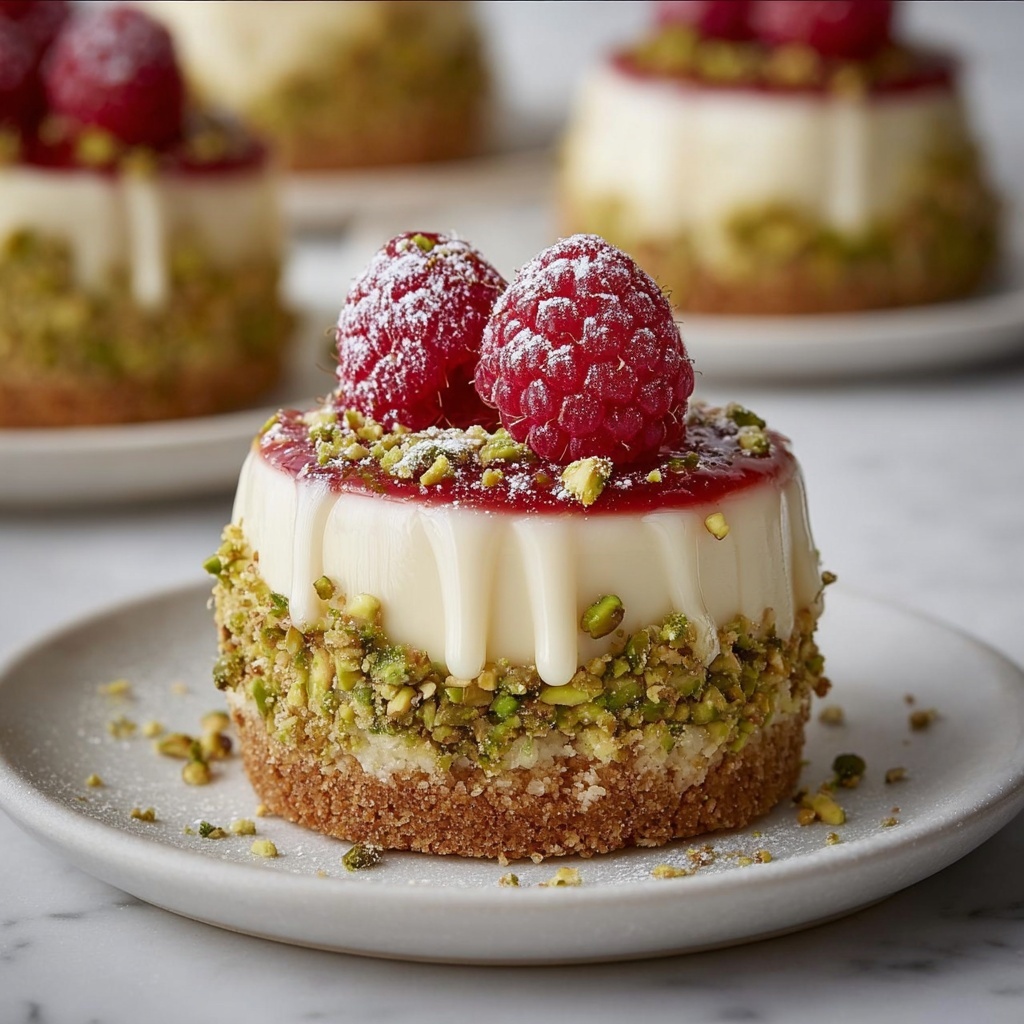
If you’re craving a dessert that’s both elegant and bursting with vibrant flavors, the Luscious Pistachio Raspberry Cheesecake Domes Recipe is absolutely perfect. These individual cheesecakes captivate with a nutty pistachio crust, a luxuriously creamy pistachio-infused filling, and a tart raspberry center that sings with every bite. The delicate white chocolate drizzle and fresh garnishes add an irresistible finishing touch, making this dish not only a feast for the palate but also a visual delight. Creating these domes might take a little patience, but the stunning result is worth every minute.
Ingredients You’ll Need
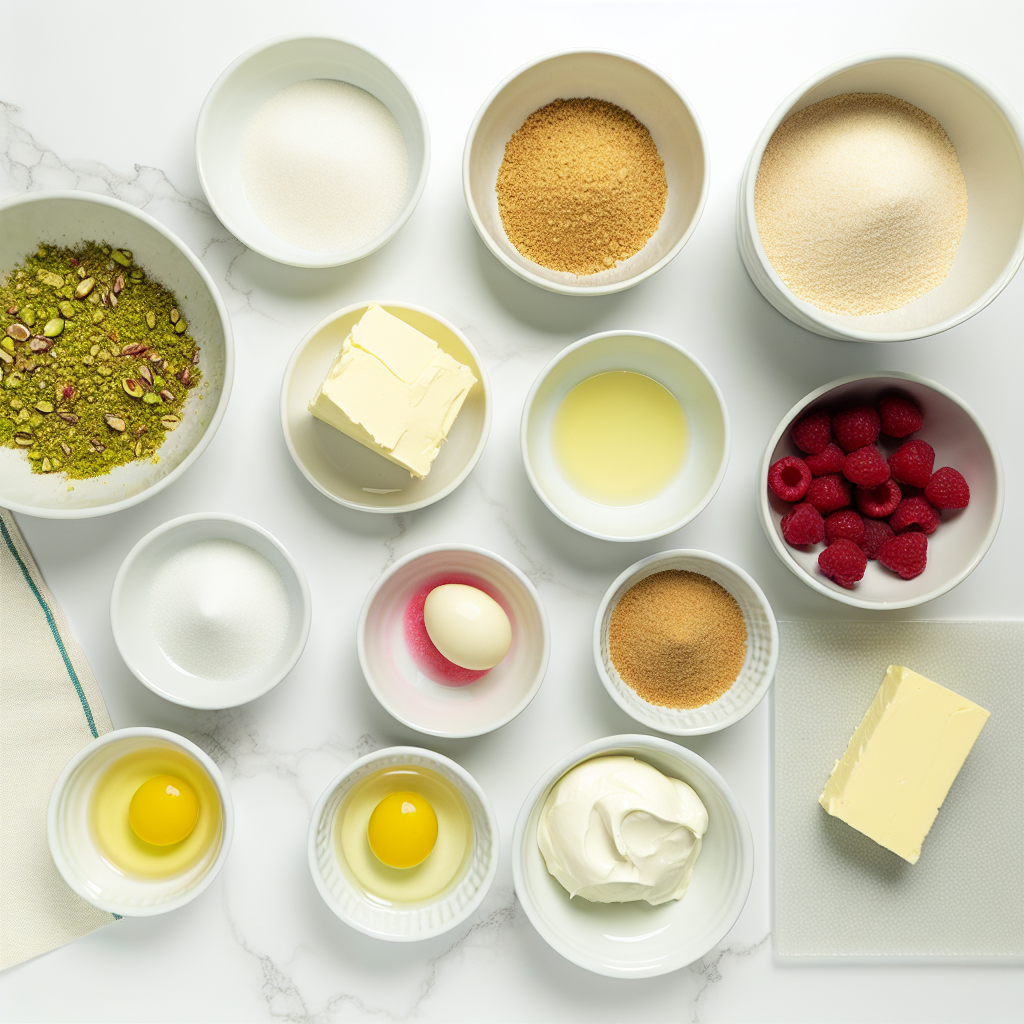
Gathering your ingredients is a breeze, yet each one plays a crucial role in building the luscious layers and textures of this dessert. From the rich pistachios that bring earthy crunch to the cream cheese that makes it smooth and dreamy, every element is essential for bringing the puzzle together!
- 1 cup pistachios, ground: Provides a nutty base crunch and distinct green hue for the crust.
- 1/2 cup graham crumbs: Adds subtle sweetness and structure to the crust.
- 3 tbsp butter: Binds the crust ingredients and gives a rich mouthfeel.
- 8 oz cream cheese: The creamy foundation of the cheesecake filling with velvety texture.
- 1/3 cup sugar: Balances the tang of cream cheese and sour cream with sweetness.
- 1 egg: Helps set the filling and adds richness.
- 1 tsp vanilla extract: Enhances flavor complexity and rounds out sweetness.
- 1/4 cup sour cream: Introduces a gentle tang and buttery softness to the filling.
- 2 tbsp pistachio paste: Intensifies pistachio flavor deep within the cheesecake.
- 1 cup raspberries: The vibrant star of the raspberry center with natural tartness.
- 2 tbsp sugar: Sweetens the raspberry sauce to perfection.
- 1 tsp lemon juice: Lifts and brightens the raspberry mixture.
- 1/4 cup white chocolate: For a silky drizzle that adds decadent sweetness on top.
- Additional pistachios for garnish: Adds texture and visual appeal.
- Fresh raspberries for garnish: A pop of color and fresh fruity bite.
How to Make Luscious Pistachio Raspberry Cheesecake Domes Recipe
Step 1: Prepare the Crust
Start by combining your ground pistachios, graham crumbs, and melted butter in a bowl until the mixture resembles damp sand. Press this blend firmly into the base of your molds or ramekins to form the crust. Placing them in the refrigerator to chill helps the crust set properly, ensuring a sturdy base for your cheesecake domes that won’t crumble when unmolded.
Step 2: Make the Raspberry Center
Next, take fresh raspberries, sugar, and lemon juice and simmer them gently over medium heat. This softens the fruit and melds the flavors while thickening the mixture slightly. For a smooth center, strain this sauce through a fine sieve to remove seeds—cool completely before assembly. This step guarantees a silky, vibrant surprise nestled inside each dome.
Step 3: Prepare the Cheesecake Filling
Beat the cream cheese until impeccably smooth and creamy, eliminating any lumps that could affect texture. Gradually add sugar, then an egg, vanilla extract, sour cream, and finally pistachio paste, blending thoroughly at each stage. The pistachio paste gives the filling a rich nutty depth that makes every bite intriguing and delicious.
Step 4: Assemble the Domes
With your chilled crusts ready, spoon a generous layer of the cheesecake filling over each base, creating a smooth surface. Then, add a dollop of the cooled raspberry mixture right in the center—this hidden burst of flavor will be the delightful heart of your dome. Cover the raspberry with more cheesecake filling and smooth the tops so that the raspberry remains a secret until cut into.
Step 5: Bake the Domes
Preheat your oven to 300°F (150°C) and place the cheesecake domes inside. Bake them gently for 18 to 20 minutes until the edges are set but the centers still have a slight wobble—this ensures creamy, not dry, filling. Removing the domes from the oven and allowing them to cool gradually to room temperature preserves their silky texture.
Step 6: Chill
To achieve the perfect firmness and meld flavors, refrigerate the cheesecake domes for at least 4 hours, ideally overnight. The cooling time lets the filling fully set and the crust remain crisp, setting the stage for a truly luscious dessert experience.
Step 7: Decorate and Serve
When ready to serve, carefully unmold the domes onto your plates. Melt the white chocolate and drizzle it elegantly over each dome for a glossy, decadent finish. Scatter extra pistachios and fresh raspberries on top for the perfect balance of crunchy texture and fresh brightness that makes this dish unforgettable.
How to Serve Luscious Pistachio Raspberry Cheesecake Domes Recipe
Garnishes
Brighten your domes with crushed pistachios for an extra crunch and a burst of green that complements the filling. Fresh raspberries bring a refreshing tartness that contrasts beautifully with the sweet cheesecake. A gentle drizzle of white chocolate not only enhances the appearance but lends a creamy sweetness that ties it all together.
Side Dishes
These cheesecake domes pair wonderfully with a light, fruity drink such as a sparkling rosé or a raspberry lemonade to echo the flavors inside. Serving alongside a small bowl of fresh berries or a scoop of tart lemon sorbet can also amplify the dessert experience without overpowering the delicate pistachio essence.
Creative Ways to Present
For a wow factor at your next gathering, serve the domes on elegant glass dessert plates or atop a single large leaf for a rustic aesthetic. You can also dust them with a bit of powdered sugar or edible gold dust to add a festive sparkle. Presenting them alongside edible flowers elevates the dish to a true centerpiece worthy of admiration.
Make Ahead and Storage
Storing Leftovers
Keep any leftover domes tightly covered in the refrigerator to maintain their freshness and texture. A good airtight container will protect them from absorbing other fridge odors and prevent the crust from becoming soggy, allowing you to enjoy the same luscious flavors for up to 3 days.
Freezing
These cheesecake domes freeze beautifully when wrapped well in plastic wrap and placed in an airtight container. Freeze for up to 1 month, then thaw overnight in the refrigerator before serving. Note that freezing may slightly soften the crunchy crust, but the flavor remains outstanding.
Reheating
Cheesecake domes are best enjoyed chilled, so reheating isn’t recommended. However, if you prefer them slightly less cold, leaving them at room temperature for 15 to 20 minutes before serving can soften the filling just enough to enhance creaminess without melting the crust.
FAQs
Can I substitute the pistachio paste with something else?
If you don’t have pistachio paste on hand, you can use finely ground pistachios blended with a bit of honey or neutral oil to approximate the richness. However, the pure pistachio paste delivers the most authentic flavor and creaminess that defines this recipe.
What if I don’t have molds for shaping the domes?
Not a problem! You can use silicone muffin cups or small ramekins to create individual portions. Just make sure to grease them lightly or use parchment paper to help with easy unmolding later on.
Can the raspberry center be replaced with another fruit?
Absolutely! Blueberries, blackberries, or even a strawberry jam would work well as a substitute. Just cook and strain the fruit in the same way to maintain that smooth, vibrant center effect.
Is this dessert gluten-free?
The graham crumbs in the crust traditionally contain gluten, but you can replace them with gluten-free graham crackers or almond flour to accommodate a gluten-free diet without sacrificing taste.
How long does the baking time affect the texture?
Baking between 18 to 20 minutes is key: less time results in a softer, creamier center; more time will produce a firmer texture. Keeping a slight jiggle in the middle ensures a luscious, melt-in-your-mouth experience that complements the pistachio and raspberry flavors perfectly.
Final Thoughts
The Luscious Pistachio Raspberry Cheesecake Domes Recipe is one of those desserts that feels special, yet is surprisingly approachable for a home baker. Each forkful is a delightful journey from crunchy nutty crust to tender, tangy raspberry core wrapped in creamy pistachio richness. Whether you’re serving it for a holiday celebration or a weekend treat, it’s bound to impress and become a fast favorite. Give this recipe a try and treat yourself and your loved ones to something truly luscious and wonderfully memorable.
Print
Luscious Pistachio Raspberry Cheesecake Domes Recipe
- Prep Time: 30 minutes
- Cook Time: 20 minutes
- Total Time: 4 hours 50 minutes
- Yield: 6 servings
- Category: Dessert
- Method: Baking
- Cuisine: American
Description
These Luscious Pistachio Raspberry Cheesecake Domes are a delightful dessert featuring a crunchy pistachio and graham cracker crust, creamy pistachio-infused cheesecake filling, and a sweet-tart raspberry center. Baked gently for the perfect texture and chilled until firm, they are elegantly finished with white chocolate drizzle, fresh raspberries, and chopped pistachios. This recipe serves 6 and is ideal for special occasions or a luxurious treat.
Ingredients
Crust
- 1 cup pistachios, ground
- 1/2 cup graham crumbs
- 3 tbsp butter, melted
Cheesecake Filling
- 8 oz cream cheese, softened
- 1/3 cup sugar
- 1 egg
- 1 tsp vanilla extract
- 1/4 cup sour cream
- 2 tbsp pistachio paste
Raspberry Center
- 1 cup raspberries
- 2 tbsp sugar
- 1 tsp lemon juice
Decoration
- 1/4 cup white chocolate, melted
- Additional pistachios for garnish
- Fresh raspberries for garnish
Instructions
- Prepare the crust: In a bowl, combine the ground pistachios, graham crumbs, and melted butter. Mix until well combined. Press this mixture firmly into molds, ensuring an even base layer. Place the molds in the refrigerator to chill and set while you prepare the filling.
- Make the raspberry center: In a small saucepan over medium heat, cook the raspberries with sugar and lemon juice until the mixture thickens slightly, about 5-7 minutes. Remove from heat and strain through a fine sieve to remove seeds. Set aside and cool completely.
- Prepare the cheesecake filling: Beat the cream cheese in a mixing bowl until smooth and creamy. Gradually add sugar and continue beating. Add the egg, vanilla extract, sour cream, and pistachio paste, mixing until the filling is uniform and silky.
- Assemble the domes: Spoon a layer of cheesecake filling over the chilled crusts in the molds. Add a spoonful of the cooled raspberry mixture in the center of each dome. Carefully cover the raspberry center with more cheesecake filling and smooth the tops evenly.
- Bake the domes: Preheat the oven to 300°F (150°C). Place the molds on a baking sheet and bake for 18 to 20 minutes until the edges are set and the centers remain slightly jiggly. Remove from oven and let cool gradually to room temperature.
- Chill: Refrigerate the cheesecake domes for at least 4 hours or until fully set and firm to the touch.
- Decorate and serve: Carefully unmold the cheesecake domes. Drizzle melted white chocolate over each dome. Garnish with additional chopped pistachios and fresh raspberries. Serve chilled and enjoy.
Notes
- Ensure cream cheese is softened to room temperature for a smooth filling.
- Be gentle when unmolding the domes to maintain their shape.
- You can substitute pistachio paste with finely ground pistachios if unavailable.
- Chilling the crust before adding the filling helps maintain its structure.
- Use fresh raspberries for the best flavor and texture in the center and garnish.


