
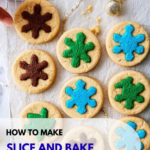
If you love tradition with a twist, I have just the recipe for you—the Slice and Bake Christmas Cookies Recipe is a festive crowd-pleaser that combines ease, creativity, and that nostalgic homemade charm we all cherish during the holidays. Imagine vibrant, colorful cookie stacks encased in buttery dough, sliced into perfect rounds of joy that fill your kitchen with the scent of vanilla and sweetness. This recipe is fun to make with family or friends and transforms simple ingredients into stunning cookies that everyone will adore. Let’s dive into the delightful process of crafting these memorable treats that taste as magical as they look!
Ingredients You’ll Need
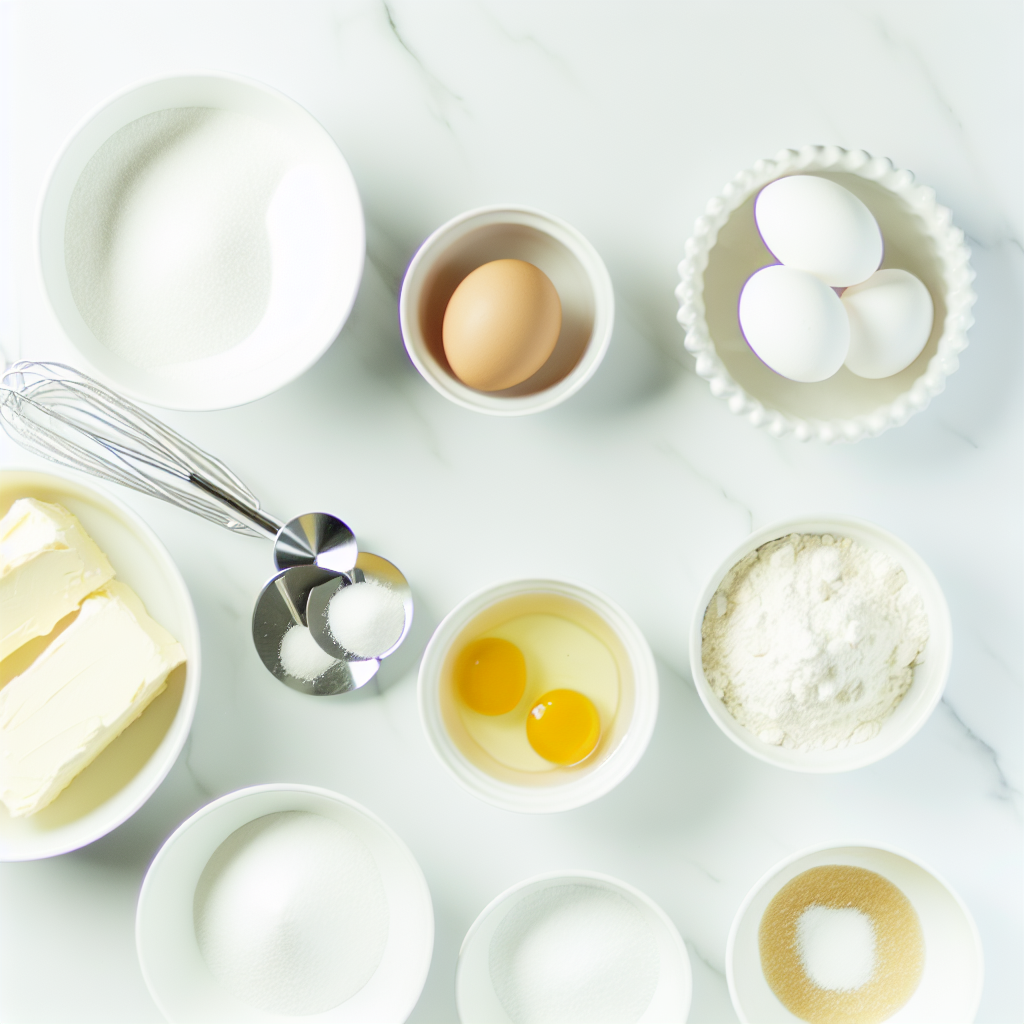
Every great cookie starts with the right ingredients, and this recipe keeps it straightforward yet essential—each element plays a key role in the perfect balance of flavor, texture, and beautiful color for these Christmas cookies.
- 1 cup (227 grams) unsalted butter, softened: The foundation for richness and tender crumb in your cookies.
- 3/4 cup (90 grams) confectioners’ sugar: Helps create a delicate sweetness and smooth texture.
- ¾ cup (150 grams) white sugar: Adds structure and a lightly crisp edge to your cookies.
- 1 ½ teaspoons vanilla: Deepens the flavor with warm, comforting notes.
- 2 eggs: Bind everything together and add moisture for a soft bite.
- 4 cups (480 grams) all purpose flour: The bulk of your dough, providing that perfect cookie body.
- 3/4 teaspoon baking powder: Gives just enough lift to keep cookies from being too dense.
- 1/4 teaspoon salt: Balances sweetness and enhances all the flavors.
- Gel food coloring: Bring in the festive flair with vibrant pops of red, green, blue, or gold.
How to Make Slice and Bake Christmas Cookies Recipe
Step 1: Prepare Your Dry Ingredients
Start by whisking together the flour, baking powder, and salt in a large bowl until evenly combined. This ensures that your cookies will have consistent texture and rise without any pockets of baking powder.
Step 2: Cream the Butter and Sugars
In another bowl, beat the softened butter with the confectioners’ sugar and white sugar using a hand mixer until light and fluffy—about 3 minutes. This process aerates the mixture and gives your cookies a tender, melt-in-your-mouth quality.
Step 3: Add Vanilla and Eggs
Beat in the vanilla extract and eggs until the mixture is smooth and fully incorporated. These add both moisture and flavor, enriching the dough beautifully.
Step 4: Combine Wet and Dry
Add your dry ingredients into the wet mixture gradually and beat until a soft dough forms. The dough should feel soft but not sticky—perfect for shaping and coloring.
Step 5: Divide and Chill the Dough
Wrap two-thirds of the plain dough and refrigerate it. The remaining third will be divided further and colored. This separation helps you create those gorgeous festive layers while keeping the base dough tender.
Step 6: Color Your Dough
Divide your remaining dough into portions and add gel food coloring of your choice. Mixing by hand with gloves or using a mixer works fine. Wrap each colored portion tightly and chill them for at least an hour to set the colors and firm up the dough.
Step 7: Cut Shapes and Stack
Roll out each colored dough to about ½ inch thick. Use mini cookie cutters to cut out small shapes and then stack identical shapes into neat, firm towers. Freeze these stacks for at least 4 hours to make them easier to handle in the next step.
Step 8: Soften the Plain Dough
Take the plain dough out of the fridge after about 3 hours and allow it to soften at room temperature for about an hour. This pliability is key to encasing your shape stacks smoothly.
Step 9: Form the Cookie Logs
Remove the frozen stacks from the freezer. Press the softened plain dough firmly around each stack to create a log, making sure the colorful shapes run straight through the center. For intricate shapes like snowflakes, pad small bits of plain dough into crevices before wrapping fully.
Step 10: Smooth and Freeze the Logs
Roll the logs gently between your hands until they are smooth, round, and even in thickness. Wrap each log tightly in plastic wrap and freeze for at least 4 hours, or overnight, to make slicing easier later.
Step 11: Bake Your Cookies
Preheat your oven to 350°F and line baking sheets with parchment paper. Remove the logs from the freezer and let them soften for about 20 minutes before slicing.
Step 12: Slice and Bake
Using a sharp knife, cut ¼-inch-thick slices from each frozen log. Place them on your baking sheets and bake for 9 to 10 minutes until they are set and lightly golden around the edges. That’s when you know your Slice and Bake Christmas Cookies Recipe has truly come to life!
How to Serve Slice and Bake Christmas Cookies Recipe
Garnishes
While these cookies are stunning on their own, a gentle dusting of powdered sugar or a drizzle of white chocolate adds a lovely finishing touch that heightens the festive spirit and makes each bite a holiday celebration.
Side Dishes
These cookies shine paired with a steaming cup of hot cocoa or a spiced holiday latte. Their buttery texture and vibrant colors complement the warm richness of your favorite holiday drinks perfectly.
Creative Ways to Present
Display your cookies stacked on a festive platter or arrange them in a decorative tin tied with ribbon for gift giving. You can also layer different colored logs before cutting slices to create multicolored pinwheel effects that wow guests visually and tastefully.
Make Ahead and Storage
Storing Leftovers
Keep your cookies fresh by storing them in an airtight container at room temperature for up to a week. This way, their buttery flavor stays intact, and the texture remains delightfully soft yet crisp at the edges.
Freezing
You can freeze the cookie logs before slicing for up to three months, making this recipe a fantastic option to prepare well ahead of holiday festivities. Just thaw slightly before slicing and baking as directed.
Reheating
To enjoy your cookies fresh from the oven again, pop them in a preheated oven at 300°F for 3 to 4 minutes. This quick reheat revives their soft texture and warm flavor without drying them out.
FAQs
Can I use food coloring other than gel?
Gel food coloring is best for this recipe as it provides vivid colors without altering the dough’s consistency. Liquid colorings might make your dough too soft or sticky, so stick with gel for vibrant, easy-to-handle dough.
What if I don’t have mini cookie cutters?
No worries at all! You can shape your cookies using small knife cuts or freehand shapes like stars and hearts to keep the festive fun alive. Just keep the thickness consistent for even baking.
Can I make these cookies gluten-free?
Absolutely! Swap the all-purpose flour for a gluten-free blend designed for baking. Be sure to check that it contains xanthan gum or add it separately to help hold the dough together.
Why do I need to freeze the dough stacks and logs?
Freezing firms up the dough layers so that when you slice them into cookies, the shapes remain sharp and clean. It also helps the logs hold together during baking without spreading too much.
How long do the cookies keep their freshness?
Stored properly at room temperature in an airtight container, these cookies stay fresh for about a week. For longer keeping, freezing the baked cookies works well, too.
Final Thoughts
This Slice and Bake Christmas Cookies Recipe truly brings holiday baking to a new level of fun and flavor. Whether you’re decorating your kitchen with little hands or surprising loved ones with a homemade gift, these cookies are a joyous way to celebrate the season. Give them a try—you’ll find that the process is just as delightful as the delicious results!
Print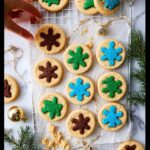
Slice and Bake Christmas Cookies Recipe
- Prep Time: 1 hour 20 minutes (including chilling and shaping)
- Cook Time: 10 minutes
- Total Time: 9 hours 35 minutes (includes chilling and freezing time)
- Yield: 20 servings
- Category: Baking
- Method: Baking
- Cuisine: American
- Diet: Kosher
Description
These festive Slice and Bake Christmas Cookies are a delightful treat perfect for the holiday season. Featuring a buttery, tender dough combined with vibrant gel food coloring, these cookies are easy to prepare in advance and can be sliced directly from frozen for perfectly shaped, colorful treats. The recipe offers a fun way to create multicolored stacked designs that bake up light and lightly golden, making them a joy for both kids and adults to enjoy and decorate.
Ingredients
Dry Ingredients
- 4 cups (480 grams) all purpose flour
- 3/4 teaspoon baking powder
- 1/4 teaspoon salt
Wet Ingredients
- 1 cup (227 grams) unsalted butter, softened
- 3/4 cup (90 grams) confectioners’ sugar
- 3/4 cup (150 grams) white sugar
- 1 1/2 teaspoons vanilla extract
- 2 eggs
Additional Ingredients
- Gel food coloring (various colors as desired)
Instructions
- Combine Dry Ingredients: In a large mixing bowl, whisk together the flour, baking powder, and salt until well combined. Set this mixture aside for later use.
- Cream Butter and Sugars: In a separate large bowl, use a hand mixer to beat the softened butter, confectioners’ sugar, and white sugar until the mixture becomes light and fluffy, about 3 minutes, ensuring a smooth texture.
- Add Vanilla and Eggs: Incorporate the vanilla extract and eggs into the butter mixture, then beat again until the ingredients are fully combined and the batter is smooth.
- Form Dough: Gradually add the dry flour mixture to the wet ingredients, using the mixer to combine until a soft dough forms. The dough should be soft but not sticky to the touch.
- Divide and Chill Dough: Wrap and refrigerate two-thirds of the plain dough. Divide the remaining one-third of dough into portions equal to the number of colors you’d like to use (the example uses green, brown, and blue, separated into three portions).
- Add Gel Food Coloring: Add gel food coloring to each portion of dough and mix thoroughly, either with a hand mixer or kneading by hand with gloves. Wrap each colored dough portion tightly in plastic wrap and refrigerate for at least 1 hour to chill.
- Shape Colored Dough: Remove the colored dough from the fridge and roll each portion to about 1/2 inch thickness. Use mini cookie cutters to cut out small shapes, then stack identical shapes into tall, firm stacks. Repeat this for all colored dough portions and freeze the stacks for a minimum of 4 hours to harden.
- Prepare Plain Dough: After about 3 hours in the fridge, remove the plain dough and let it sit at room temperature until softened, approximately 1 hour.
- Form Logs: Take the frozen colored shape stacks from the freezer. Press the softened plain dough around each colored stack forming a log, making sure the stack runs through the center of the log. For shapes with intricate details and corners, gently press small bits of plain dough into crevices before fully wrapping.
- Roll and Freeze Logs: Roll the logs gently between your hands until they are smooth, round, and evenly shaped. Wrap each log tightly in plastic wrap and freeze for at least 4 hours or overnight to firm up.
- Preheat Oven and Prepare Baking Sheets: Preheat your oven to 350°F (175°C) and line two baking sheets with parchment paper to prevent sticking and ensure even baking.
- Slice Cookies: Remove frozen logs from the freezer and let them sit for about 20 minutes so they soften slightly but remain firm. Use a sharp knife to slice the logs into 1/4-inch thick cookies.
- Bake Cookies: Place the cookie slices onto the prepared baking sheets and bake for 9-10 minutes until they are set and just lightly golden at the edges. Remove from oven and allow to cool before serving.
Notes
- Use gel food coloring to avoid making the dough too wet, which can happen with liquid colors.
- When stacking shapes for the colored dough, press gently but firmly to ensure the shapes stick together when wrapped in plain dough.
- Chilling and freezing dough and shapes is essential for maintaining cookie shape while baking.
- Allow frozen logs to soften slightly before slicing to prevent cracking.
- These cookies can be stored frozen for several weeks; slice and bake as needed.
- Feel free to experiment with different shapes and colors to match your holiday theme.
